We research, evaluate and select travel destinations based on a number of factors, including our writers’ experience, user reviews and more. We may earn a commission when you book or purchase through our links. See our editorial policy to learn more.
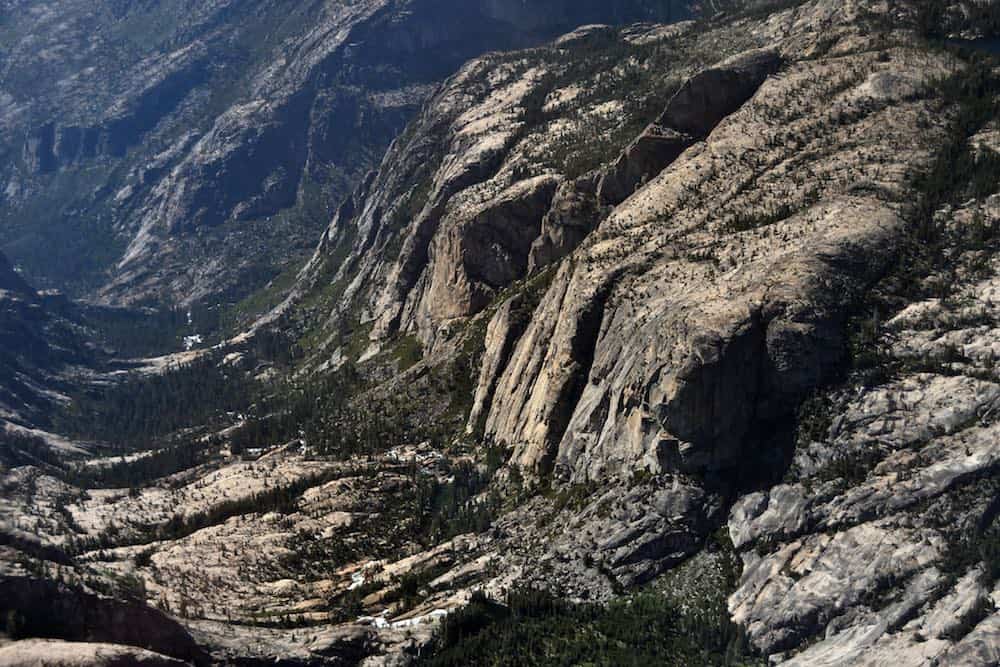
With over 700,000 acres of panoramic wilderness and 800 miles of developed trails, Yosemite is perhaps the most iconic national park in the entire country — and for good reason.
I couldn’t help but gasp the moment I pulled my car around the bend to catch my first glimpse of the famed Tunnel View. My friend in the passenger seat started singing the Jurassic Park theme song, and I felt instantly transported to a bygone era.
Giant domes of glacially carved granite rose up from the earth like the shells of massive petrified tortoises. Waterfalls cascaded down thousands of feet from the cliffs above, and a dense green forest carpeted the valley below as far as my eyes could see.
Everything felt impossibly huge. It was, quite literally, breathtaking.
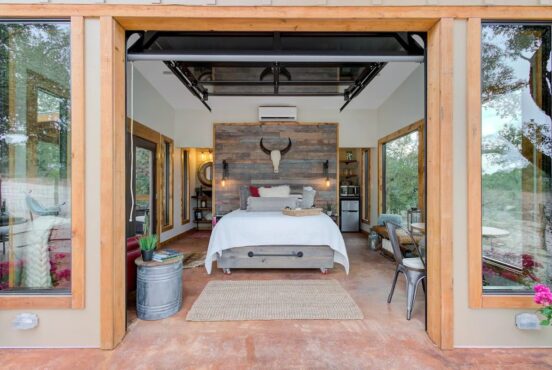
Related Read: 7 Best Airbnbs & Vacation Rentals Near Yosemite National Park
Backpacking In Yosemite
If you’ve got more than 24 hours to visit this majestic landscape in person, planning a multi-day backpacking trip is a fantastic way to get up close and personal with some of the top attractions at Yosemite National Park. It’s also the best way to escape the crowds, as most visitors don’t make it into the backcountry.
There’s something for everyone at Yosemite, from the valley-addicted photographer to the high-altitude hermit seeking solitude. Here’s a list of the best overnight backpacking trips to get you started.
Related read: 9 Super Scenic Hikes in Yosemite National Park, California
1. Glacier Point Loop
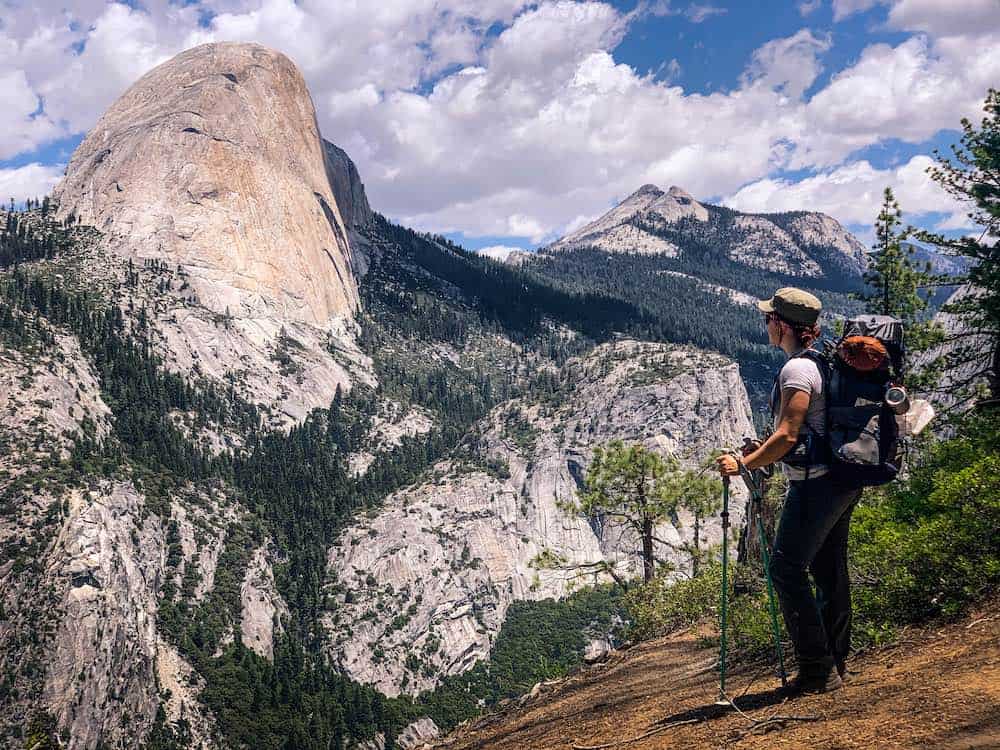
Why you should go: A two-day trek that delivers a highlight reel of the best natural attractions at Yosemite National Park.
- Distance: 18.25 miles
- Elevation Gain: 5,214 feet (total)
- Difficulty: Challenging
If you’re an avid hiker looking to cram as much as possible into a two-day trip, this is the loop for you.
Grab a permit from Glacier Point or Happy Isles to Little Yosemite Valley, lace up your shoes, and get ready to rack up some vertical gain. The Glacier Point Loop starts at the historic Glacier Point Trailhead, with sweeping panoramic views of the Yosemite Valley surrounding you for nearly the entirety of the hike.
“Beautiful trail, completely worth the journey,” says visitor Briana Cruz on AllTrails.
If you hike clockwise (recommended), you’ll descend the many switchbacks of the Four Mile Trail, meander through the most populated area of the valley, hop onto the John Muir Trail at Happy Isles, climb up to a roaring Nevada Falls, and camp at Little Yosemite Valley. It’s a brisk 11 miles with 2,628 feet of gain.
After a grueling day one, the second day offers a more leisurely seven-mile jaunt with 2,586 feet of gain past Half Dome, around Liberty Cap, and back over Nevada Falls before hikers are spit out onto the aptly named Panorama Trail. Get your cameras ready, folks, because the most iconic views of Half Dome are all over this trail.
After catching a side-peek of the powerful rush of Illilouette Falls, it’s time to chug water and climb the remaining few sunny switchbacks towards the car. Buy yourself an ice cream bar at the Glacier Point store and soak in the view — you’ve earned it.
Related Read: 9 Adventurous Things to Do in Yosemite National Park, California
2. Ten Lakes Loop
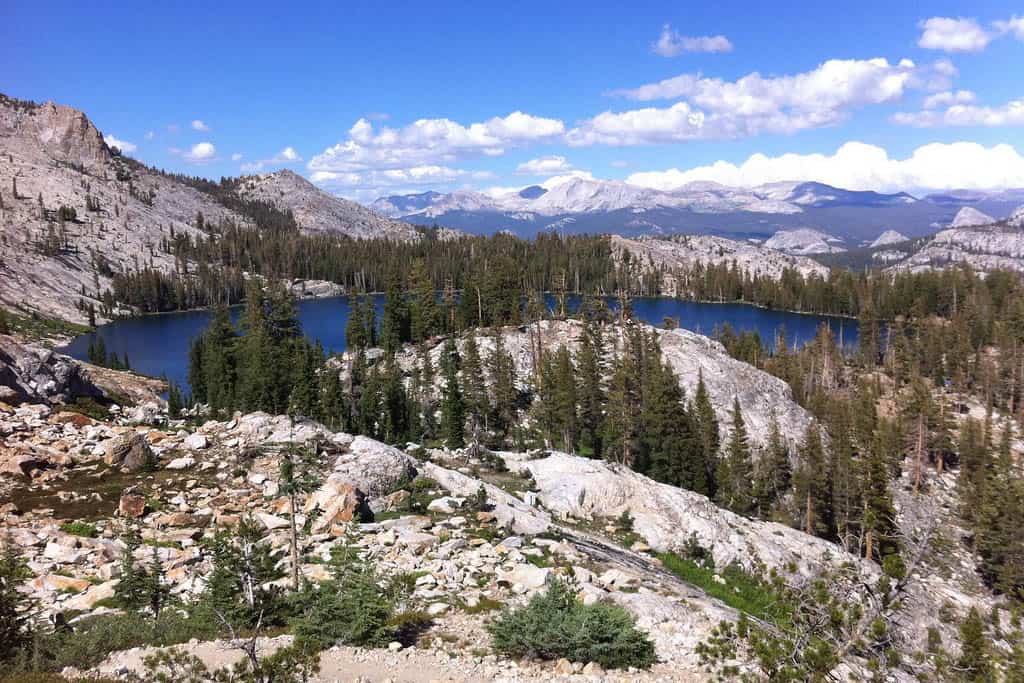
Why you should go: This 2-3 day high-altitude romp is heaven for alpine lake lovers.
- Distance: 20 miles
- Elevation Gain: 4,922 feet (total)
- Difficulty: Moderate (three days), Challenging (two days)
The trail up to Ten Lakes is always a fan-favorite for beginner backpackers and crusty old veterans alike.
Beginning near Porcupine Flat on Tioga Road, the trailhead climbs through dense, fragrant pine forest for two miles before passing through the lush, green corn lilies of Half Moon Meadow. The path quickly turns alpine as it ascends to a high pass at 9,671 feet above sea level, giving lucky hikers a stunning view of the Ten Lakes Valley below. There’s no shortage of great campsites here, and venturing a bit off-trail to a more secluded lake is a real treat.
From here, hikers can turn back the way they came for an easy day two, or they can tackle the absolutely gorgeous and crowd-free final 13.5 miles to make a loop.
The trail passes by a phenomenal view of the Grand Canyon of the Tuolumne before it climbs up and over a high pass near Tuolumne Peak. If your legs are killing you at mile 11, solitude and excellent camping can be found at Polly Dome Lakes. But, if you’re up for it, the remaining 3 miles to Tioga Road are a cinch if you’re dying to get back to the car.
When you’re done, stick your thumb into the air and catch a ride back to the trailhead — hitchhiking is legal in most national parks!
Pro tip: If you’ve got extra time on your hands, a side trek up to May Lake is well worth the effort.
Related Read: 8 Epic Backpacking Trips in Sequoia National Park & Kings Canyon
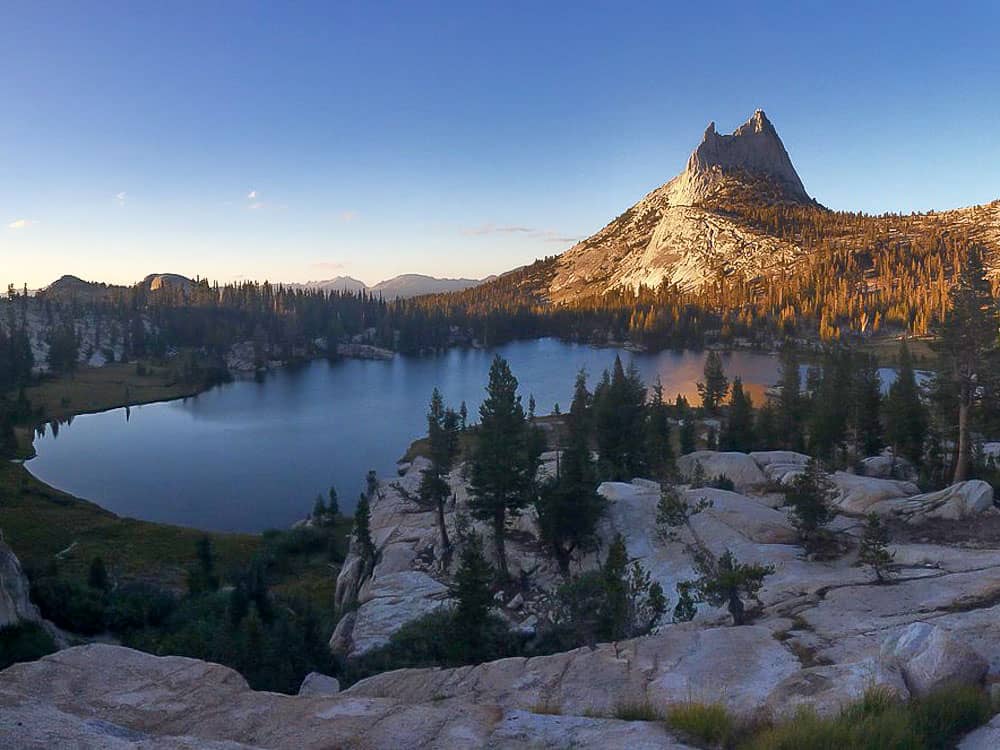
3. Cathedral and Sunrise Lakes Loop

Why you should go: Catch a glimpse of Cathedral Peak’s craggy summit and camp at a pristine, alpine lake on this two-day weekend trek.
- Distance: 19.5 miles (without Clouds Rest)
- Elevation Gain: 3,675 feet (total)
- Difficulty: Moderate
Hop onto the John Muir Trail heading southbound from Tuolumne Meadows and wave at sweaty, happy thruhikers as they pass you by on your climb towards Cathedral Lakes.
The views of Tuolumne’s many famous domes are fantastic the higher you ascend. Cathedral Peak’s rocky summit spire makes for an excellent beacon as hikers huff and puff their way towards it, gaining 1,000 feet in just 2.5 miles.
After edging around Columbia Finger, hikers will descend to a grassy, picturesque meadow before climbing up through Sunrise High Sierra Camp. You can choose to camp here, but for a little extra solitude, continue for a little over a mile to Sunrise Lake 3.
Great news — campfires are allowed below 9,600 feet in Yosemite National Park, so walk around and grab a gorgeous spot with a lakeside view and an existing fire ring.
From here, adventurous hikers can tack on Clouds Rest before heading down to Tioga Road and taking the shuttle, hitchhiking, or walking along the adjacent trail back to your car stashed at Tuolumne Meadows.
Related Read: 11 Epic Winter Camping Spots in California
4. High Sierra Camps Loop
Why you should go: A stunning six-day loop through Yosemite’s high country with meal and tent cabin options for the sophisticated hiker.
- Distance: 49 miles
- Elevation Gain: 6,100 feet (cumulative)
- Difficulty: Moderate
The Yosemite High Sierra Camps were developed between 1916 and the early 1960s, providing visitors with a luxurious backcountry experience that’s rich with history. The High Sierra Camps Loop is an excellent thru-hike option for visitors who have some cash to spend and don’t want to lug a heavy pack around the high country.
Most visitors opt to book “glamping” tent cabins and meals at each camp so that they hike in a 49-mile loop, going from Tuolumne Meadows Lodge to Glen Aulin, to May Lake, to Sunrise Camp, to Merced Lake, to Vogelsang, and finally back to Tuolumne Meadows.
The days on trail range from 6.8 – 9.5 miles, climbing up and over 10,000-foot mountain passes, through prehistorically green alpine meadows, and past the deep blue sapphire of many, many alpine lakes. This six-day trek is a bucket-list item not to be missed.
Related Read: An Epic Guide to California’s 14ers: Hiking & Climbing the High Peaks
5. Hetch Hetchy Loop
Why you should go: Solitude. In the words of John Muir, “Hetch Hetchy is a grand landscape garden, one of nature’s rarest and most precious mountain temples.”
- Distance: 29 miles
- Elevation Gain: 7,759 feet (cumulative)
- Difficulty: Moderate (four days), Challenging (three days)
Before Hetch Hetchy was dammed in 1923, it was a favorite Yosemite landmark for naturalist John Muir. He even went so far as to call it as beautiful as the more famous Yosemite Valley to the south.
Since then, the O’Shaughnessy Dam has turned the fabled area into a major water source for San Francisco, but that doesn’t mean that the area isn’t worth a visit. In fact, it’s the best place in the entire park to get away from the throngs of tourists populating the crowded valley.
This loop can be done in 3-4 days, depending on how burly you’re feeling. It starts at the O’Shaughnessy Dam and circles Hetch Hetchy in a clockwise direction. Since the first day out features a staggering 3,527 feet of elevation gain, we recommend starting early to beat the heat and camping at Laurel Lake.
From there, continue on to Lake Vernon (great camping for night two), circumnavigate the ever-looming Mount Gibson, and zigzag down the switchbacks towards Rancheria Falls before returning back along the reservoir towards the dam.
This trek is a haven for backpackers and waterfall-lovers looking for something less crowded and off the beaten path in Yosemite National Park.
Related Read: 7 Gorgeous Spots to See Fall Colors in California
6. Pohono Trail To Glacier Point
Why you should go: Nab exquisite views of Yosemite Valley and escape the crowds on this overnight adventure.
- Distance: 14 miles
- Elevation Gain: 5,622 feet (total)
- Difficulty: Challenging
Park in the lot to the right of the infamous Tunnel View, lace up your boots, and get ready to climb. The Pohono Trail wastes no time before throwing hikers right into the belly of a set of dappled, forest switchbacks. In no time, you’ll likely have the place all to yourself, escaping the mayhem of photographers down below, all vying for that perfect shot.
The panoramic views of the valley and Bridalveil Falls are the real star of this trail, so be on the lookout for turnoffs towards Old Inspiration Point, Stanford Point, Crocker Point, and Dewey Point as you hike. About 7.5 miles in, you’ll cross an adorable bridge over Bridalveil Creek, and we recommend pitching your tent here.
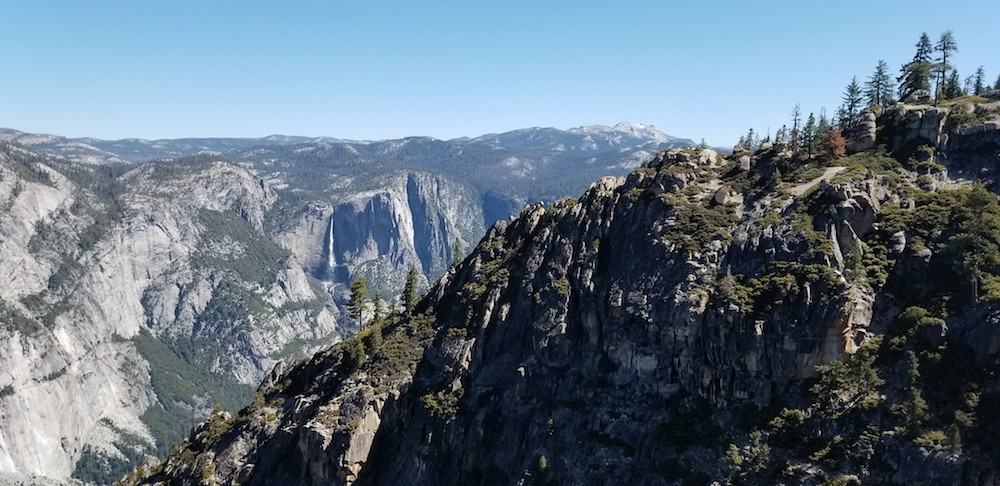
Day two is a collage of epic views of Taft Point, Yosemite Falls and, you guessed it, Half Dome. Finish your quest at Glacier Point and consider buying yourself a popsicle and enjoying the splendid view before heading back.
Logistics on this hike can be tricky, so ask the rangers about current water conditions and camping restrictions. Since the trail ends on the opposite end of the valley as it begins, you’ll have a “choose your own adventure” moment at the end of the journey. Shuttle two cars, utilize the bus from Yosemite Lodge, or hitch a ride back down to Tunnel View!
Related Read: 14 Wow-Worthy Hikes at Mount Shasta, California
7. Young Lakes Loop
Why you should go: This high altitude trek traverses alpine lakes, wildflowers, and campsites under the bohemoth summits of Ragged Peak and Mt. Conness.
- Distance: 16 miles
- Elevation Gain: 3,136 feet (total)
- Difficulty: Moderate
The hike up to Young Lakes is perhaps the best glimpse of untouched, alpine landscapes that Yosemite has to offer.
Head north on the trail towards Dog Lake, opting for a side jaunt up to the amazing views on the mini-summit of Lembert Dome. When you’ve had enough of the killer views of Tuolumne, mosey down the granite slabs to Dog Lake and cool off in the crisp, fresh snow melt.
From here, the trail winds through a meadow strewn with yellow monkeyflower, crimson paintbrush, and airy purple lupine. You’ll continue up and over a ridge extending from Ragged Peak before crossing a grove of whitebark pine trees. Nab a campsite at the first lake or continue on to lakes two and three if you’re seeking solitude.
When you begin your return to civilization, be sure to stay right at the junction to create a loop. Amble downhill through boulder-laden alpine meadows, hop onto the Pacific Crest Trail for a short while, and pass by the quaintly gurgling Soda Springs before returning to your vehicle.
Related Read: 10 Best Glamping Spots Near Joshua Tree National Park, California
8. Cathedral Lakes
Why you should go: A short out-and-back hike up to a pair of stunning glacial lakes, nestled under the towering shadow of Cathedral Peak.
- Distance: 9 miles
- Elevation Gain: 1,738 feet (total)
- Difficulty: Easy (but high altitude)
If you’re new to backpacking but want to soak up all the majesty of the Yosemite high country, Cathedral Lakes is the trail for you. It’s one of the shortest treks you can obtain a backcountry permit for, and the views along the way are second to none.
Take the Cathedral Lakes Trailhead and hike south. The looming dome of Cathedral Peak’s north side will come into view early on in the hike as you ascend up, up, up, through a thick, verdant forest.
Before you know it, you’ll be thrust into a lush, alpine meadow. Keep an eye out for the sign marking the junction towards lower Cathedral Lake. If you’re jonesing to camp with a fire, you’ll want to turn off here and select a site with a pre-existing fire ring. Or, simply tack on this extra mile hike to catch a glimpse of both lakes while you’re out.
If you’d like a little more solitude and an even more epic look at Cathedral Peak, continue south on the JMT until the small, aquamarine tarn of Upper Cathderal Lake comes into view. Scramble up a few boulders and gaze out across the electric sky for the best sunset view in the joint.
When you’re ready to head home, simply turn around and hike back the way you came.
Related Read: 18 Stunningly Secluded Cabin Rentals in California
9. Big Oak Flat Road To Yosemite Falls

Why you should go: Escape the crowds, camp on top of El Capitan, and get a bird’s-eye view of Yosemite Valley on this two-day mini thru-hike.
- Distance: 18 miles
- Elevation Gain: 6,247 feet (total)
- Difficulty: Challenging
Loved the movie Free Solo? This hike circumnavigates the star of the film. No, not Alex Honnold – El Capitan.
The trek starts off at the Old Big Oak Flat Road Trailhead and immediately starts climbing through a verdant pine forest. Soon, the shouts and selfie sticks of Yosemite Valley will all fade away, and you’ll be left with solitude and quiet as your boots crunch along the steady uphill of the trail.
Be mindful of your water level as you hike – creeks here can dry up in late summer months!
Camp at Ribbon Meadow, adjacent to the summit of El Capitan itself and make a point to wake up extra early to watch the magical glow of sunrise stretch its way slowly across the valley as you drink your morning coffee.
Tack on an optional summit of the breathtaking Eagle Peak before a long descent on the Falls Trail. Grab a ride or take the shuttle back to the base of El Cap to get your car when you’re done.
Related Read: The Most Scenic Los Angeles to Yosemite Road Trip Itinerary
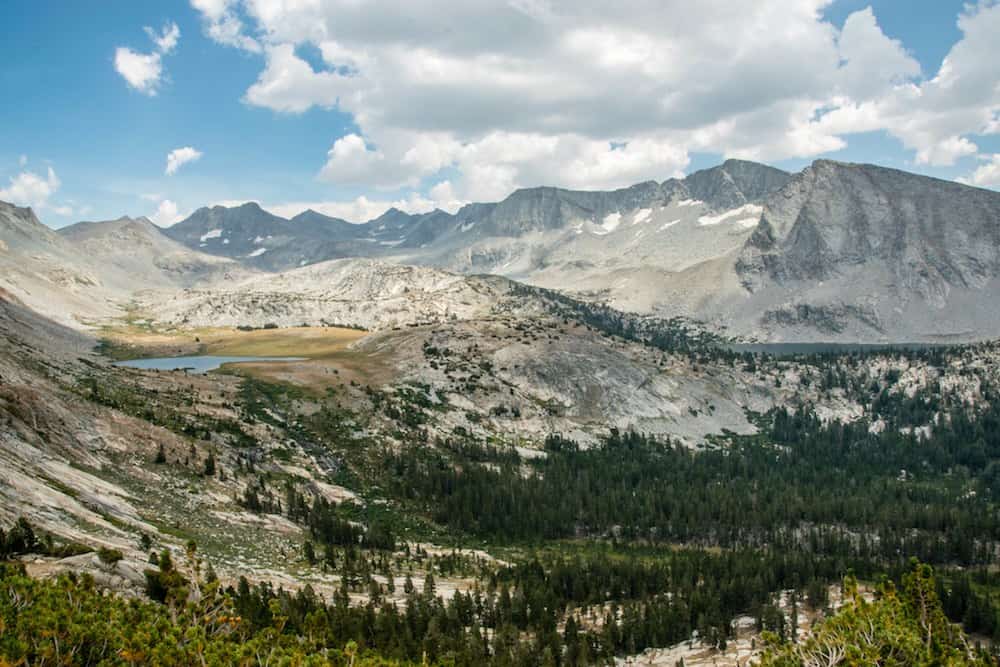
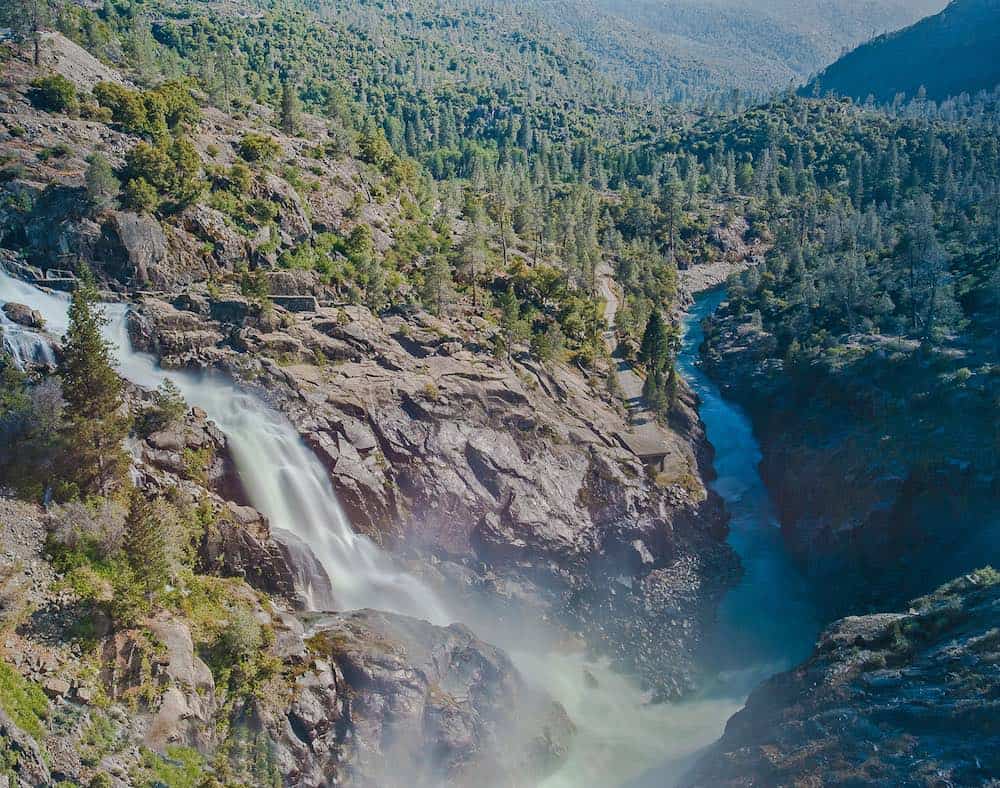
10. Grand Canyon Of The Tuolumne Loop
Why you should go: Cascading waterfalls, alpine lakes, towers of granite, and the roaring Tuolumne River offer the best of Yosemite’s high country on this longer 4-6 day loop.
- Distance: 47 – 55 miles (starting at White Wolf or Tuolumne)
- Elevation Gain: 9,631 feet (cumulative)
- Difficulty: Moderate
“Holy Granite!” You’ll be pinching yourself for the majority of this trail to make sure you aren’t dreaming. This multi-day loop can be hiked from either White Wolf or Tuolumne Meadows, so pick your poison and reserve a permit early.
If you begin the journey at Tuolumne Meadows, you’ll hike a moderately graded dirt path for five miles to Glen Aulin. There’s a High Sierra Camp here if you prefer to camp near a pit toilet, but we recommend you continue on a few miles and grab a more secluded tent site near the river. Check fire restrictions before you head out — they may be in place late season for lower elevations.
Hang a left and head towards Pate Valley, following the swift, blue line of the Tuolumne River for the next 16 miles. You’ll stroll past massive granite rock faces and cross under several imposing waterfalls like California, LeConte, and Waterwheel. Eat lunch in the shade near one of the many swimming holes and take a dip in the frigid water to cool off.
Most hikers will hit a gnarly, 3,500-foot ascent on day three (if hiking out of Tuolumne), which can easily be broken up by planning to camp near Morrison Creek. If you’re lucky, you might even nab a spot with an epic view of Hetch Hetchy!
From here, you could end the trek early at White Wolf or loop through a shady, wooded area and begin the ascent towards Ten Lakes. It’s a bit of a bear, but the 12-mile hike from Morrison Creek to the first of the lakes is well worth it, and you’ll catch a stellar sunset from this incredible alpine basin.
For the final leg, the trail meanders through wildflower-strewn meadows, up and around Tuolumne Peak, and across a lovely forested area before returning to Glen Aulin. If you’re looking to cut the mileage, Polly Dome Lakes has several choice campsites and is only a half-mile off the route.
Return back the way you came, heading down the storied Pacific Crest Trail towards Tuolumne.
Related Read: 14 Epic Campgrounds Near Los Angeles, California
A Word On Wilderness Permits
Because of its beauty and recent Instagram fame, Yosemite’s wilderness permits can be tricky to score. The best way to ensure you nab your top trail pick is to plan your trip a few months in advance, so there’s ample time to get the right permit.
Permits are available via an online lottery system 168 days in advance of the hiking start date. They’re are required year-round, though reservations are only needed from April to November.
Planning a last-minute excursion to John Muir’s favorite valley? 40 percent of all trailhead permits are available on a first-come, first-served basis no earlier than 11am the day before your hike begins.
Weekdays are best for snagging a coveted permit for a popular trailhead, making this an excellent option if you’re feeling lucky and have some extra time.
Related Read: 11 Stunning Glamping Spots Near Yosemite National Park, California
Don’t Forget Your Bear Canister
Critters are practically everywhere you turn in Yosemite. That’s great for photos, but unfortunately, many of the animals are accustomed to the presence of humans.
In an effort to keep wildlife wild, bear canisters are required (and available for rent) for all overnight travel within Yosemite National Park. You’ll need to store all excess food, trash, and smellables inside the canister before you go to bed, and hide it at least 100 feet from camp.
More Backpacking Resources
Get epic travel ideas delivered to your inbox with Weekend Wanderer, our newsletter inspiring more than 10,000 readers every week.