We research, evaluate and select travel destinations based on a number of factors, including our writers’ experience and expertise, user reviews and more. We may earn a commission when you book or purchase through our links. See our editorial policy to learn more.
Curb your cravings for tall trees and get really, really high on these majestic overnight treks into the heart of the Great Western Divide.
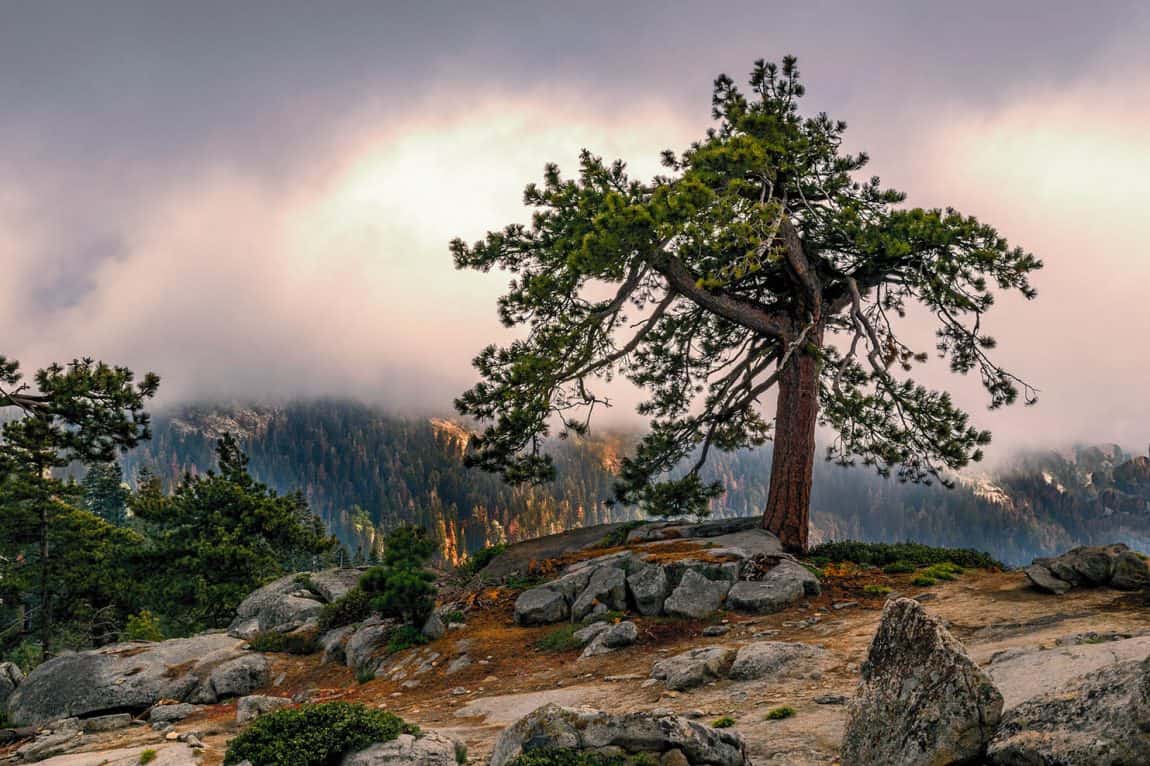
I know, I know — it’s sacrilegious to say it, but I think I like Sequoia National Park even more than Yosemite. It’s the park where I took my first backpacking trip, summited my first mountain, and saw my first black bear. It’s got bigger peaks, taller trees, and far fewer crowds.
Plus, the permitting system is much better suited for last-minute weekend warriors looking to leap into the high alpine.
This park is full of hidden sequoia groves, crisp lakes fed with snowmelt, and over 1,000 miles of hiking trails. What’s not to love?
Bring your wanton search for adventure and get ready to hit the trail.
Related Read: 6 Phenomenal Backpacking Trails in Joshua Tree National Park
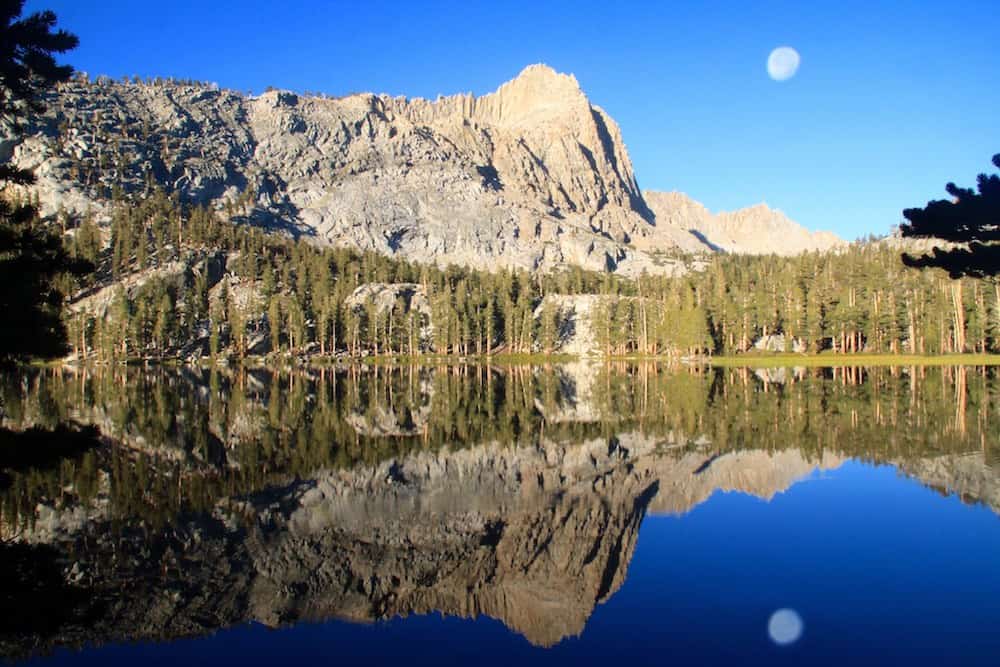
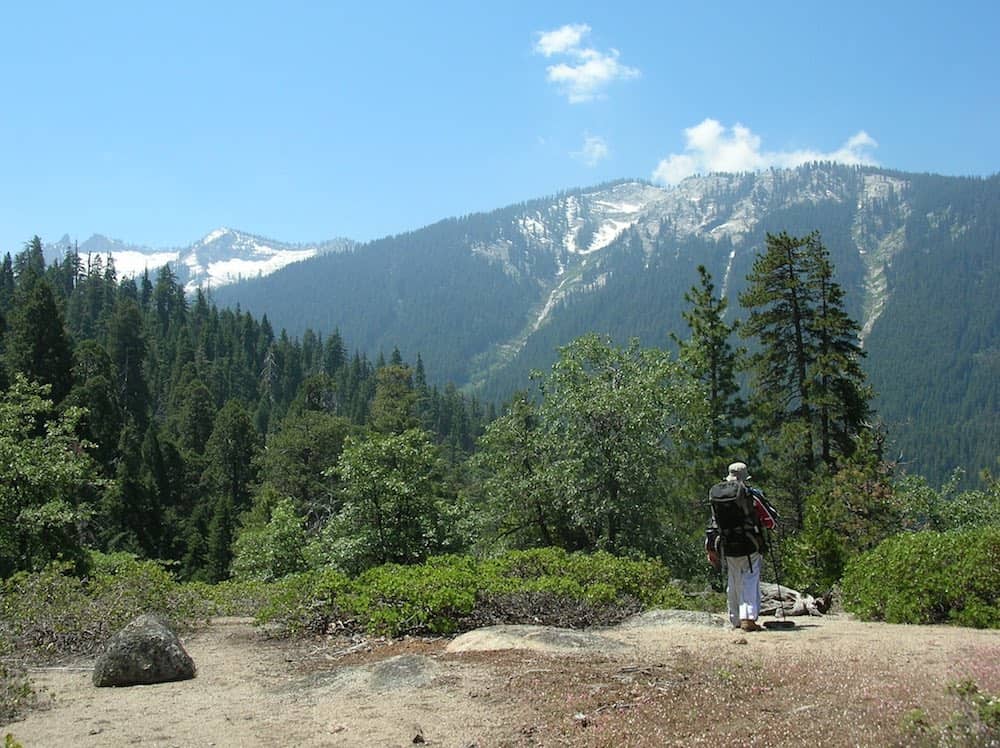
1. Lakes Trail to Pear Lake
Why you should go: This popular overnight trek is perfect for newer backpackers, packed with epic views, and even has a backcountry toilet and bear boxes.
- Distance: 12.4 miles
- Elevation Gain: 3,663 feet (total)
- Difficulty: Moderate
If you’re a diehard weekend warrior looking for the perfect two-day trek with Sequoia National Park’s best views, then the Lakes Trail might be your soulmate.
This high altitude overnight (or dayhike, if you’re feeling ambitious!) starts from the Wolverton Parking Lot and is so popular that it’s the only backcountry permit in Sequoia that is first-come, first-served only. Wake up early, head to the ranger station, and get ready for some seriously stellar vistas.
The hike begins by meandering uphill through old growth pine forest. At around mile 1.75 on the Lakes Trail, you’ll come to a junction. We highly recommend veering towards The Watchtower, though it adds 0.4 miles to the trip. Pretty soon, you’ll find yourself on the spine of the Watchtower itself, an epic viewpoint by anyone’s standards and a great spot for a snack break.
If you’re already feeling wrecked from the altitude gain, you’ll want to grab a site near Emerald Lake, situated in a stunning alpine basin below Alta Peak. However, if you don’t mind roughing it and trekking a bit further to seek more solitude, the extra mile to Pear Lake is SO worth it. Your efforts will be rewarded with incredible sunset views of the jagged ridge leading to Alta Peak.
When you’re ready to come home, simply turn around and follow the trail back to your car.
Related Read: 20 Incredible Hikes in Southern California
2. High Sierra Trail
Why you should go: Cross the Sierra Nevada and finish triumphantly on top of Mt. Whitney on this gorgeous, 73 mile thru-hike.
- Distance: 73 miles
- Elevation Gain: 15,475 feet (cumulative)
- Difficulty: Moderate (eight days), Challenging (six days)
The High Sierra Trail is nothing short of amazing. It’s like a mini John Muir Trail without the hassle of resupplying, and most hikers take 6-8 days to complete it. It’s easily one of the best trails the Sierra has to offer, an alpine romp over high mountain passes, through verdant meadows, past a remote hot spring, and up to the summit of Mt. Whitney, the highest point in the contiguous US.
The logistics of this hike can be difficult as it starts and finishes on opposite ends of a huge mountain range, so arranging rides with friends or shuttling cars will be crucial to your success.
Start in Sequoia National Park at the Crescent Meadow Trailhead, winding through a grove of towering sequoia trees before being spit out onto a narrow ledge with a killer view of the Great Western Divide. Camp at the stunning Bearpaw Meadow or magical Hamilton Lake on night one and be on the lookout for meteors — the ultra-dark night skies here are perfect for them!
If you plan your timing just right, you’ll hit the secluded Kern Hot Spring on day three or four, and believe us when we say it’s a welcome sight for tired thruhikers. Plan on lingering here to soak in the incredible views of Kern River Canyon.
Soon enough, the trail will join the JMT at Junction Meadow and climb through rocky, high-elevation terrain as you near Mt. Whitney.
Camp at Guitar Lake to acclimatize and look out for pesky marmots eager to snatch your supper! Start early to catch sunrise from the 14,505-foot summit of Mt. Whitney and look back on how far you’ve come before beginning the forever-descent down to Lone Pine.
Related Read: Everything You Need to Know About Backpacking with Kids
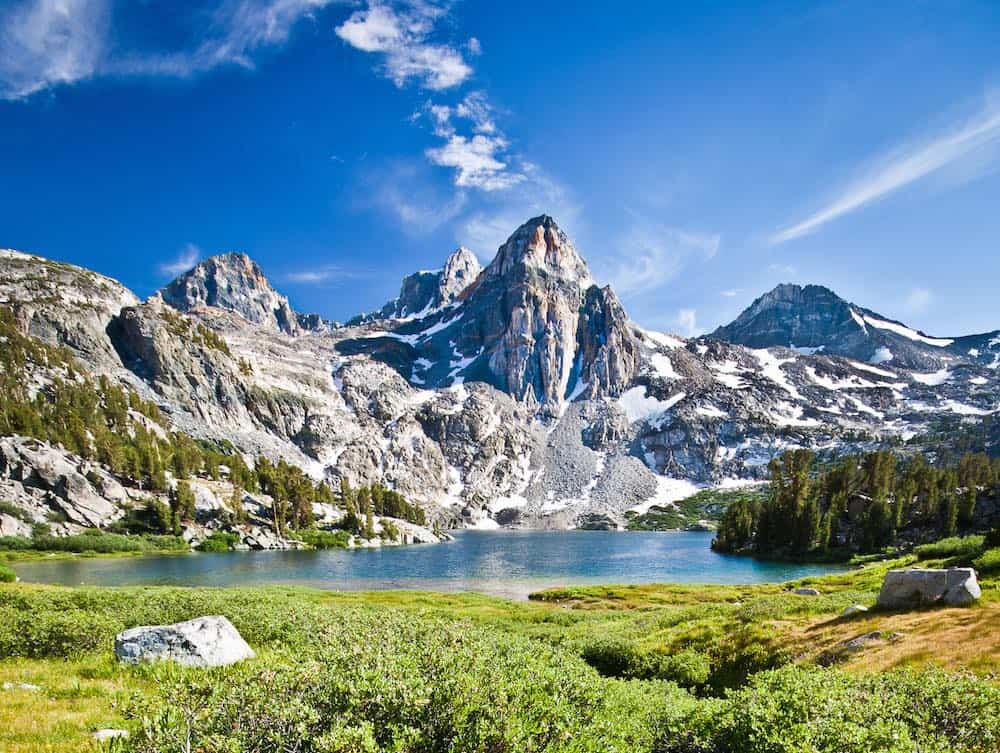
3. Rae Lakes Loop
Why you should go: Soak in some seriously amazing High Sierra views on this 4-5 day loop through a wonderland of alpine lakes.
- Distance: 37.5 miles
- Elevation Gain: 7,840 feet (total)
- Difficulty: Challenging
The Rae Lakes Loop is one of the hardest permits to nab in Sequoia & Kings National Parks. And why shouldn’t it be? Nearly every inch of this trail is teeming with incredible Sierra Nevada scenery. From gnarled foxtail pines to gigantic granite peaks and pristine alpine lakes full of fresh snow melt, this trail has it all.
Begin your journey at the Roads End Trailhead and hike clockwise or counterclockwise (depending on your permit). As you ascend towards the aptly named Upper Paradise Valley, make sure you turn around to marvel at the fantastic views you’ll get of The Sphinx, a 9,146-foot tall granite fishtail that dominates the landscape.
Day two will be the burliest of the trek if you’re looking to get all the way to Middle Rae Lake, but if you persist, there’s a bear box near the campsites that’ll help shave a few pounds off your fully-loaded pack. Opt for a rest day here or pack up and over 11,926-foot Glen Pass and get a taste of true alpine scenery – high above the tree line.
Wind your way through Junction Meadow and back to the car, where a cold beer awaits you at Cedar Grove Market.
Be aware: Due to high snow melt in 2017, the bridge at Upper Paradise Valley is washed out and will not be rebuilt before 2020. Use extreme caution if attempting to cross in early summer.
Related Read: An Epic Guide to California’s 14ers: Hiking & Climbing the High Peaks
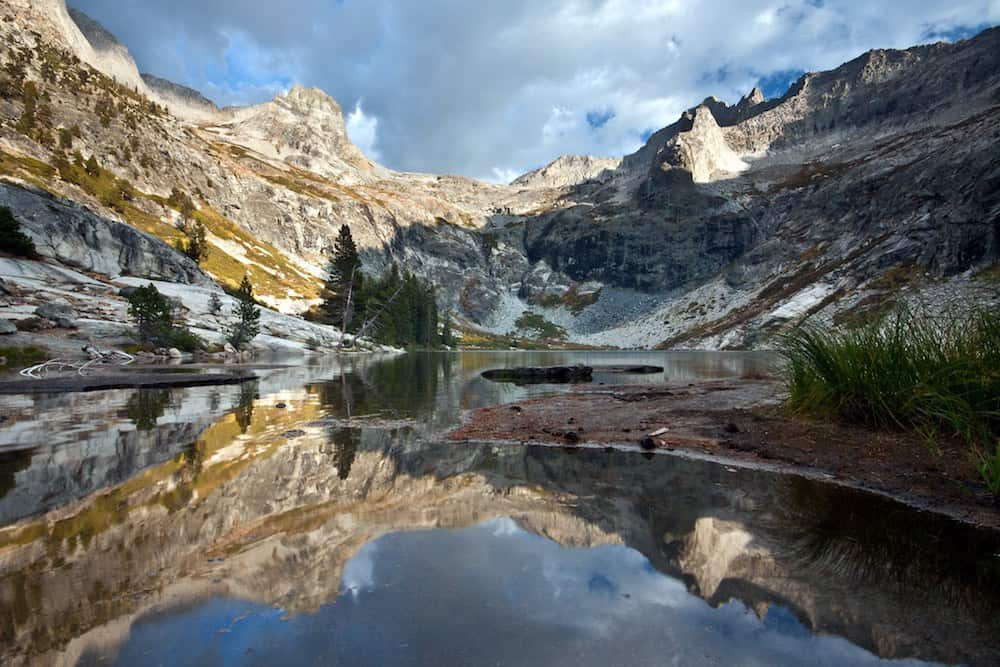
4. Little Five Lakes Loop
Why you should go: Take in the breathtaking scenery of the high alpine on this leg-busting trek out of Mineral King.
- Distance: 31 miles
- Elevation Gain: 9,549 feet (total)
- Difficulty: Challenging
The trek to Little Five Lakes is not for the faint of heart! Hikers who dare set foot on this trail will find themselves huffing and puffing their way up not one, but two nearly 12,000-foot mountain passes.
The reward for this arduous quest is great, though — the adventurous souls who tread here will find themselves right smack in the middle of the Great Western Divide.
Though you could hike this loop counterclockwise, we highly recommend starting at the Timber Gap Trailhead and climbing up over Black Rock Pass instead. Sawtooth Pass is an unmaintained sand and scree slog that’s likely to give even the most patient hiker a headache.
Once safely across Black Rock Pass (check with a ranger for snow conditions before you go), you’ll reach Little Five Lakes, a trio of perfectly blue alpine tarns nestled into a huge, rocky cirque.
About 2 miles past Little Five Lakes, you’ll pass a junction in the trail leading towards four more magnificent, pristine lakes — Big Five Lakes. Camp here or continue down the switchbacks towards the easternmost of the “Big Five.”
Get ready to walk in slow motion as you crest the rocky slope of Sawtooth Pass and consider camping along the banks of the beautiful Monarch Lake after the steep descent. Then, dodge the persistent, yellow-bellied marmots as you snake your way back down to your vehicle.
Related Read: 10 Killer Backpacking Trails in Yosemite National Park
5. Mineral King to Franklin Lakes
Why you should go: This short overnight trek climbs up to a stunning alpine cirque nestled deep in the High Sierra.
- Distance: 12 miles
- Elevation Gain: 3,515 feet (total)
- Difficulty: Moderate
Grab your permit from the Mineral King Ranger Station, lace up your hiking boots, and wrap your vehicle in a tarp diaper to protect it from marmots (they like to chew on car hoses in summer months). Then you’ll be ready to begin this jaw-droppingly epic 12-mile out and back to Franklin Lakes.
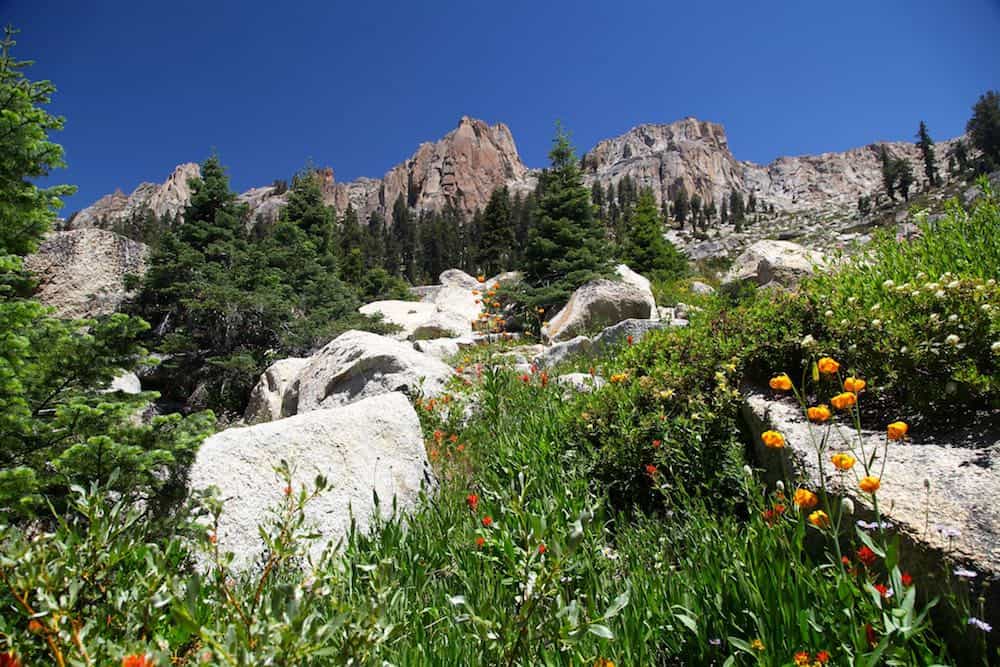
The trek begins by traversing the lush, green hillside above the East Fork of the Kaweah River. Keep your eyes peeled for wildflowers as you hike, especially if you’re heading out in July or August. Mountain lupine, Sierra shooting star, and crimson columbines can all be seen along this stretch of trail.
You’ll quickly cross a burbling waterfall cascading down from Crystal Creek, and then the climb begins in earnest. Since the trail is only six miles long, you’ll have ample time to take it slow and enjoy the towering, rust-colored peaks of the Mineral King Valley as you ascend.
Try to score a campsite on the eastern slabs just above Lower Franklin Lake if you want the best view (peakbaggers may set their sights on nearby Florence Peak). Then relax, cook dinner, and stargaze until you’ve had enough and are ready to turn back around.
Related Read: 9 Adventurous Things to Do in Yosemite National Park, California
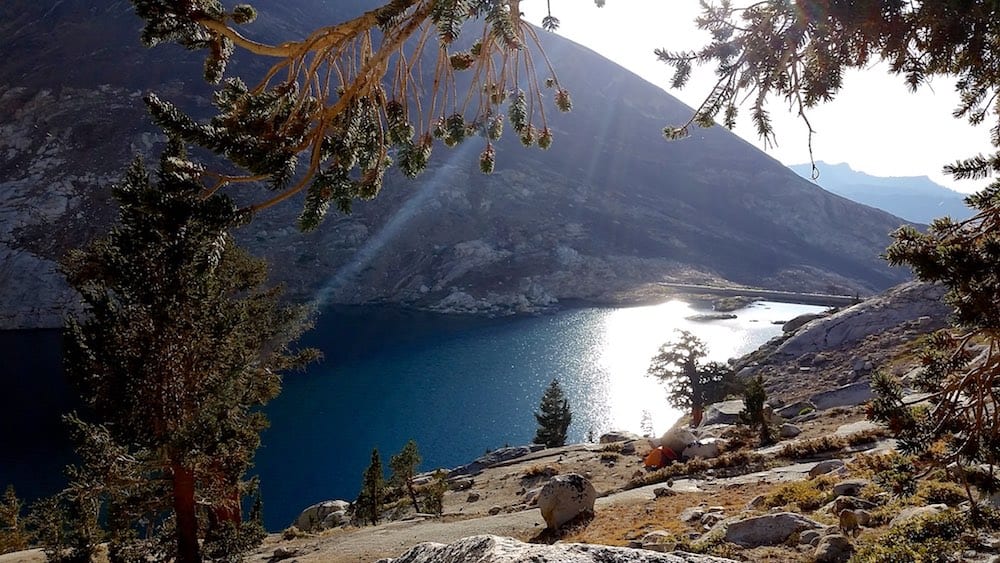
6. Hamilton Lake
Why you should go: Get up close and personal with friendly deer and an alpine big wall named Valhalla on this spellbinding 2-3 day hike into the heart of the Great Western Divide.
- Distance: 29 miles
- Elevation Gain: 6,952 feet (total)
- Difficulty: Challenging
Hamilton Lake is hands-down one of the top five most impressive lakes in the entire Sierra Nevada. It’s a giant sapphire gem surrounded on all sides by craggy granite cliffs reminiscent of Yosemite Valley, set at an altitude much higher and more remote. Getting there can be quite a slog, but trust us, it’s worth it.
Take the High Sierra Trail out of Crescent Meadow and follow its well-graded ups and downs for 11.1 miles to Bearpaw Meadow. Water is plentiful for the entirety of the trail, and there are bear boxes at both Bearpaw and Hamilton if you’re looking to cut a few pounds off of your pack weight.
You’ll see a large and perfectly situated High Sierra Camp as you round the bend and stumble upon your very first dead-on view of the Great Western Divide. Awe inspiring doesn’t even begin to describe it.
Buy a beer from the camp kitchen and relax if you’re planning on overnighting here, or continue across Lone Pine Creek and up a harrowing set of stone stairs to get to Upper Hamilton Lake. Once you arrive, throw down your pack and watch as the sunset waves its magic wand across the granite walls, turning them a bright shade of strawberry.
When you’ve had enough, simply turn around and hike the 14.5 miles back to your car.
Related Read: 14 Unforgettable Hikes in Northern California
7. Alta Peak to Alta Meadow
Why you should go: Summit an easy High Sierra peak and camp in a lush alpine meadow full of wildflowers and amazing views of the Great Western Divide.
- Distance: 16.5 miles
- Elevation Gain: 4,811 feet (total)
- Difficulty: Challenging (with peak), Moderate (meadow only)
Alta Peak was my first major summit and the mountain that got me hooked on the outdoors for good. Situated at 11,207-feet above sea level, the peak is low enough to be accessible for most hikers but high enough to pose a challenge. The views from the top of Pear Lake, Mt. Silliman, and the Great Western Divide are nothing short of spectacular.
Park at Wolverton and begin your journey on the Lakes Trail. Around 2 miles in, you’ll come to a signed junction and continue right towards Alta Peak. Stomp your way through a red fir and pine forest, catching occasional glimpses of the fabulous views to the south.
At the five-mile mark, you’ll hit the junction to head up to Alta Peak. Prudent hikers may want to ditch their packs or bear canisters here and only bring water and a snack to save weight — the hard part is yet to come.
Slowly make your way up the well-maintained switchbacks leading to the summit of Alta Peak and marvel at the gnarled, bright red foxtail pines that live at this altitude. A quick scramble will bring you to the top of the summit block, and you’ll finally feast your eyes on the marvelous view.
Hike back to the junction and continue east towards Alta Meadow if you’re ready to camp in a flurry of flowers (Mehrten Creek also has some great sites). Pack up and walk out the following morning after you’ve enjoyed the sunrise with a cup of joe!
Related Read: 5 Best Backpacking Trips & Trails in Big Sur, California
8. Middle Fork to Redwood Meadow
Why you should go: Don’t be fooled by the name! This 2-3 day lower elevation trek in Sequoia National Park lets you camp in a remote grove of giant sequoia trees.
- Distance: 25 miles
- Elevation Gain: 5,639 feet (total)
- Difficulty: Moderate
Snow got you down? This weekend backpacking trip is perfect for those early season months when the High Sierras are still socked in but you’re itching to get out and push some big miles. Due to scorching summer temperatures, the Middle Fork Trail is best hiked in spring or fall.
Brave the bumpy, 1.5-mile dirt road up from the main Sequoia highway and park in a small lot when you come to the end. Store excess car snacks in the bear box and strap on those boots!
One of the most unique things about this trail is the diversity of plant life you’ll encounter as you climb through Sequoia’s many biotic zones. You’ll begin in a thick grove of low manzanita trees and chaparral, crossing a few creeks and climbing through oak and pine trees as you ascend towards the sequoias of Redwood Meadow.
Mehrten Creek has some great shaded campsites if you’re looking to break up the mileage a bit.
Stay right at the fork towards Redwood Meadow and carefully cross the swift current of the river before a short climb will bring you face-to-face with a hidden grove of supernaturally large sequoia trees. This is one of the few places on earth where you can still legally camp beneath these giants, and you’ll feel transported back to John Muir’s heyday as the sun slowly sets.
If you have extra time, tack on a trip to neighboring Bearpaw Meadow for the best view in the entire park before descending the trail back to your vehicle.
Related Read: The 10 Best Hikes in Redwood National Park, California
Don’t Forget the Bear Canister
Bear resistant food containers are required for overnight travel on most popular trails and are highly recommended everywhere else within Sequoia & Kings Canyon National Parks. Bear canisters can be rented at most visitor centers when you pick up your permit ($5 for 3 nights and $2 each additional night).
Yes, these heavy cans can be cumbersome and feel like a nuisance, but they help ensure that bears stay wild and don’t rely on human food. Once a bear gets a taste of the calorie-dense snack foods we enjoy on a regular basis, they’re much more likely to become a “problem bear” and eventually need to be put down.
Another incredibly cool thing that Sequoia does is place bear lockers along popular trails in the wilderness. If you plan your mileage carefully and look at the bear locker map ahead of your trip, you might be able to shave a few pounds off your pack weight.
Related read: 7 Gorgeous Campgrounds Near Kings Canyon National Park
Reserve a Wilderness Permit
In Sequoia & Kings Canyon National Parks, a wilderness permit is required year-round for all backcountry travel. The quota season for popular trails changes from year to year depending on snowpack and weather, but is generally late May to late September.
Permits cost $10, plus $5 per person. Sequoia’s got a fancy, new online permitting application form that you can fill out, save, and email to the wilderness permit office, noting your 1st, 2nd, 3rd, and 4th choices for trails and dates. You can also call the ranger station and have them help suggest trails and solidify your reservation.
Don’t forget to pick up that permit when you arrive in the park! Your confirmation email does not count as a wilderness permit, so you’ll need to schlep on over to the ranger station nearest to your trailhead to grab the permit in person no later than 9am on your entry date.
Outside the May – September quota season, permits are self-issued at dropboxes located at each permit station. Be sure to fill one out! This helps the park know where you are and what color your tent is, should you go missing.
Once you’ve got that paper permit slip in hand, you’re ready to burn some rubber!
Related read: 11 Places that Get Snow in California to Fuel Your Winter Wanderlust
Explore California
Sign up for Weekend Wanderer to join 10,000+ readers getting epic travel ideas every week.