We research, evaluate and select travel destinations based on a number of factors, including our writers’ experience and expertise, user reviews and more. We may earn a commission when you book or purchase through our links. See our editorial policy to learn more.
Summiting a peak higher than 14,000 feet (a 14er, if you will), is a bucket list accomplishment for any savvy hiker.
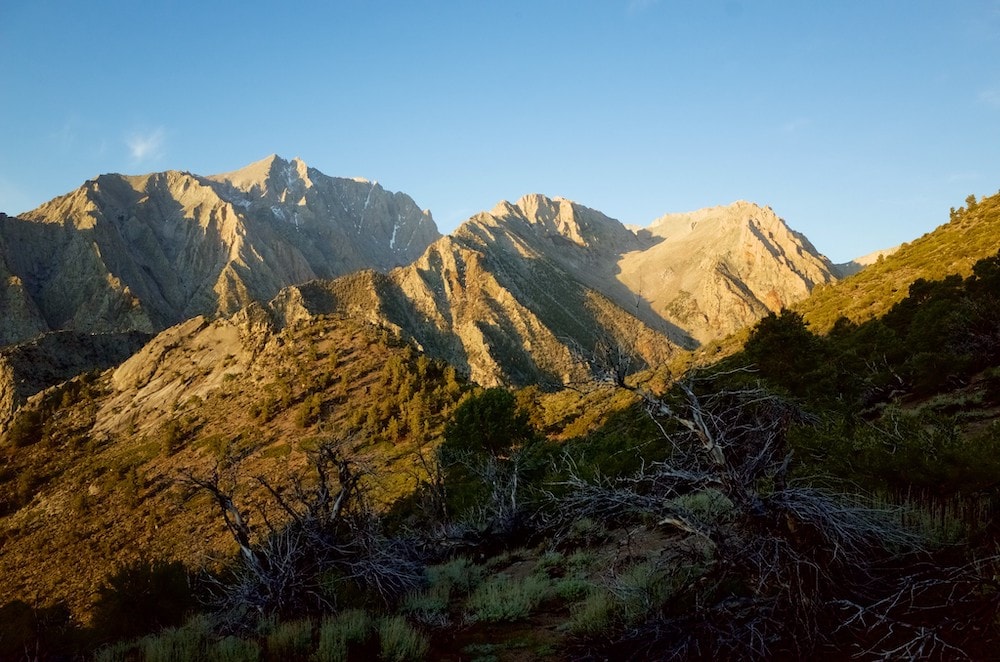
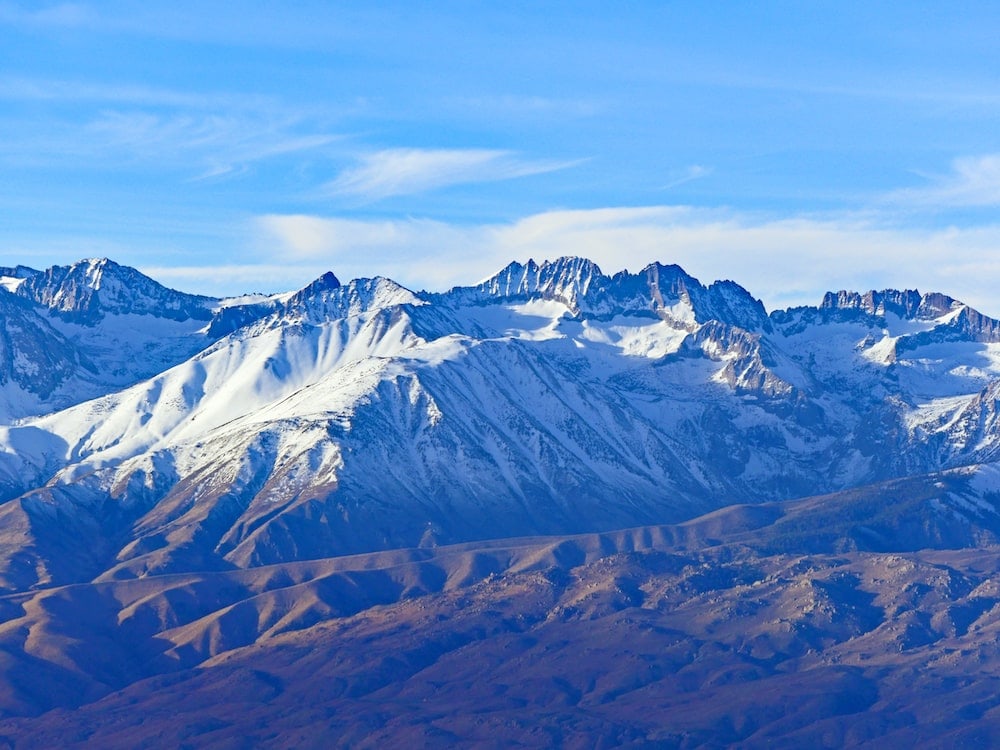
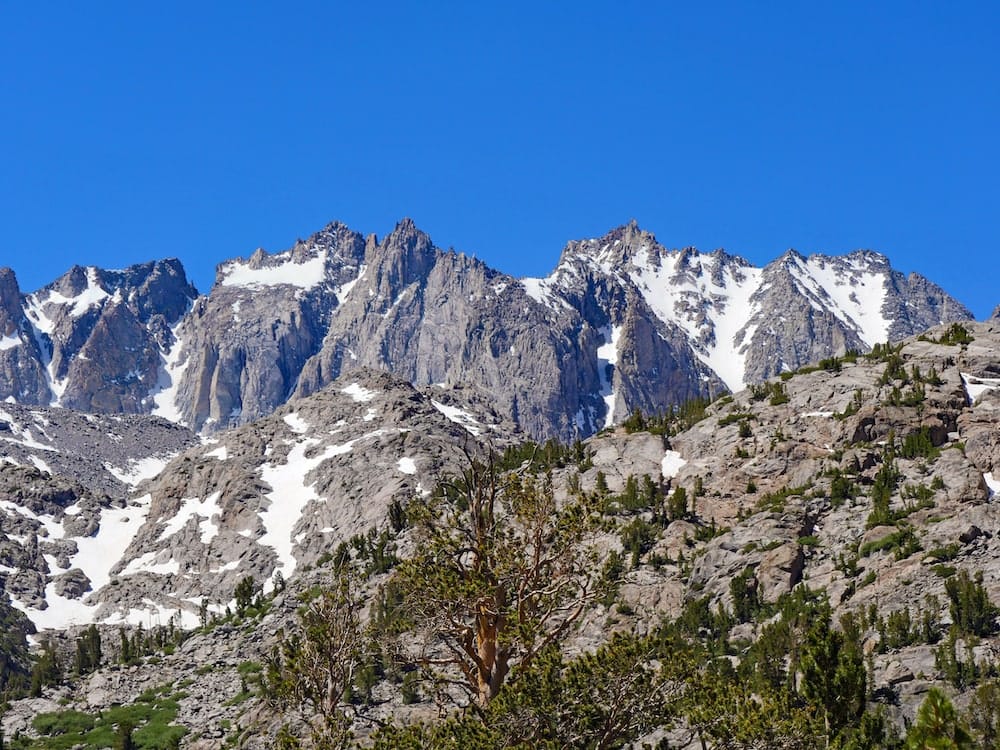
There are only 67 14ers in the lower 48 states, and even an “easy” 14er still requires a wealth of fitness, careful weather watching, and solid outdoor gear. Still, to traverse through barren moonscapes above the treeline and stand — usually breathless — on top of one of these summits is worth all the blood, sweat, and tears it’ll take to get there, which just makes the view from the top that much sweeter.
There are 15 mountains in California that reach higher than 14,000 feet above sea level, but only 12 of them are technically considered 14ers. Kind of weirdly, if a mountain isn’t at least 300 feet higher than the mountains around it, it doesn’t count as a 14er. The guide below goes through all of California’s 14ers anyway, ranked from the “lowest” elevation to the highest.
For many of these California 14ers, you’ll need a permit to climb and/or camp. You can usually reserve those at recreation.gov up to six months in advance. Some, like Mt. Whitney, are highly competitive, and require you to enter a permit lottery. The more flexible you are with your dates, the better.
As with any big adventure in the wilderness, climbing a 14er requires a ton of upfront planning and is not for the faint of heart. Make sure you’re well aware of everything from safety to LNT principles to how to read a trail. Read through the information below to get an idea of how to choose a trail and prepare for the challenge.
The Climbing Rating System
The YDS (Yosemite Decimal System) is a means of ranking the difficulty of a mountain climb, ranging from a flat walk in the woods to a full-on rock climbing session requiring ropes and technical gear. Each of the 14ers in California has a “class of easiest route” category, and that’s where these ratings come in. It’s basically the YDS rating for the easiest possible route to the top.
Class 1: Class 1 is the easiest designation, and it typically refers to hiking on an established trail or bike path. There will be no need to use your hands for balance, though the trail itself may be steep or go uphill for many miles. Most hikes in national parks are Class 1.
Class 2: Think of Class 2 as a moderate, off-trail ascent. There may be talus, loose scree, or boulder fields to traverse, but the climbing shouldn’t be much harder than ascending a steep staircase. You may need to use your hands briefly for balance, but you are primarily moving on foot, rather than climbing with hands and feet vertically.
Class 3: Class 3 routes require much more all-out scrambling — using your hands and feet together to balance, move upward, and safely cling to the edge of the mountainside as you make your way upwards. Because the hand and foot holds on these routes are typically larger and more obvious, technical rock climbing know-how is usually not required. Steep snow is also included in this category.
Class 4: On a Class 4 climb, mountaineers will be required to search for and use copious hand and foot holds on near-vertical rock to avoid falling off a steep face. Many people elect to rope-up on these pitches for safety and you’ll need some rock climbing know-how to avoid potentially fatal falls. The climbing is typically exposed, with potential to fall hundreds or thousands of feet off the mountain.
Class 5: Ropes, hardware, and technical rock climbing ability are needed to safely ascend a Class 5 mountain. The climbing is thin and exposed, with few obvious hand and foot holds. You’ll need to practice route finding to make a successful summit bid. If you’ve ever been to a rock climbing gym and seen routes marked with ratings like “5.7” or “5.11+,” those are sub-ratings within a Class 5 climb. (A 5.7 is easier than a 5.11+, by the way.)
Related Read: 9 Adventurous Things to Do in Yosemite National Park, California
Weather Considerations for California 14ers
At an elevation of more than 14,000 feet, late-season snow and ice can linger well into July. Heck, even ski resorts around Lake Tahoe (which are usually at around 8,000 feet above sea level) can sometimes have snow year-round. August, September, and early October are typically considered the “sweet spot” to climb California 14ers, as they present a window of generally good weather and probably a small enough amount of snow that you won’t need any snow-specific technical gear.
Many of the trailheads for these peaks are at or above 10,000 feet, so many roads to reach the parking areas may not open until early June. If you’re concerned about the snow conditions and climbing in the early season, check a snow or avalanche forecast to get up-do-date weather information, or call the ranger station nearest to your climb before heading out.
While not subject to as intense of weather as some 14ers in other states, California’s summits can and do create their own weather. Summer thunderstorms are a serious concern once you’re above the treeline (generally around 11,500-12,000 feet above sea level). Always check the weather the day you head out with a site likeMountain Forecast, and if you’re going to be out for multiple days, consider bringing along a portable GPS device with weather tracking, like the Garmin inReach Mini.
Temperature swings in the high alpine can be intense; it’s not uncommon for a sunny, 70-degree day to give way to a sub-freezing evening. Always pack multiple layers when attempting to climb a 14er and be prepared to spend the night outdoors, should emergency strike or a climb take longer than you intended. Your day hike may turn into an overnight if you run into problems.
Lastly, wildfires in the western US are a serious problem for anyway living west of the Mississippi, and hikers and backpackers even more so. Unfortunately, the fire season lines up nearly perfectly with the alpine climbing season, so checking smoke forecasts and fire maps before beginning a climb is necessary for your safety and success.
As with all things in the backcountry, it’s important to remember that the mountain will always be there tomorrow, but you might not be. So having a plan B in case of smoke or inclement weather is always recommended. There’s no shame in bailing on a summit attempt if something feels off, and anyone who tells you otherwise is an irresponsible hiker — and a bad hiking companion!
Related Read: 9 Best Hiking & Outdoors Apps for iPhone and Android
Guiding Companies
If you’re not sure where to begin or have climbed a few 14ers and are looking to level-up your skillset, consider going with an experienced guiding company to learn new skills while summiting your dream peak.
California is full of excellent, accredited guiding companies that lead groups up every 14er on this list. Popular options include:
- Sierra Mountain Guides
- Sierra Mountain Center
- Sierra Mountaineering International
- International Alpine Guides
- Shasta Mountain Guides
Related read: 11 Places that Get Snow in California to Fuel Your Winter Wanderlust
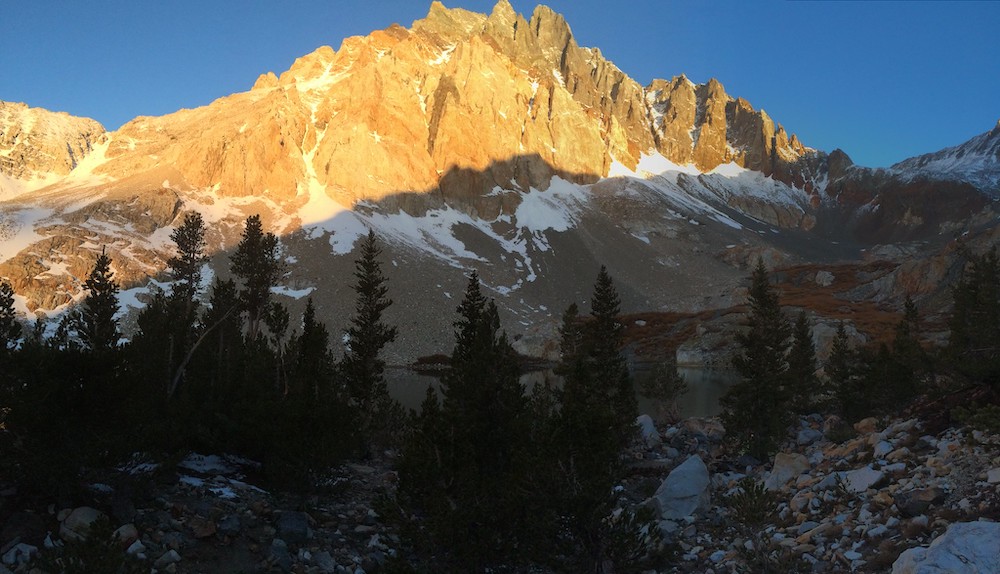
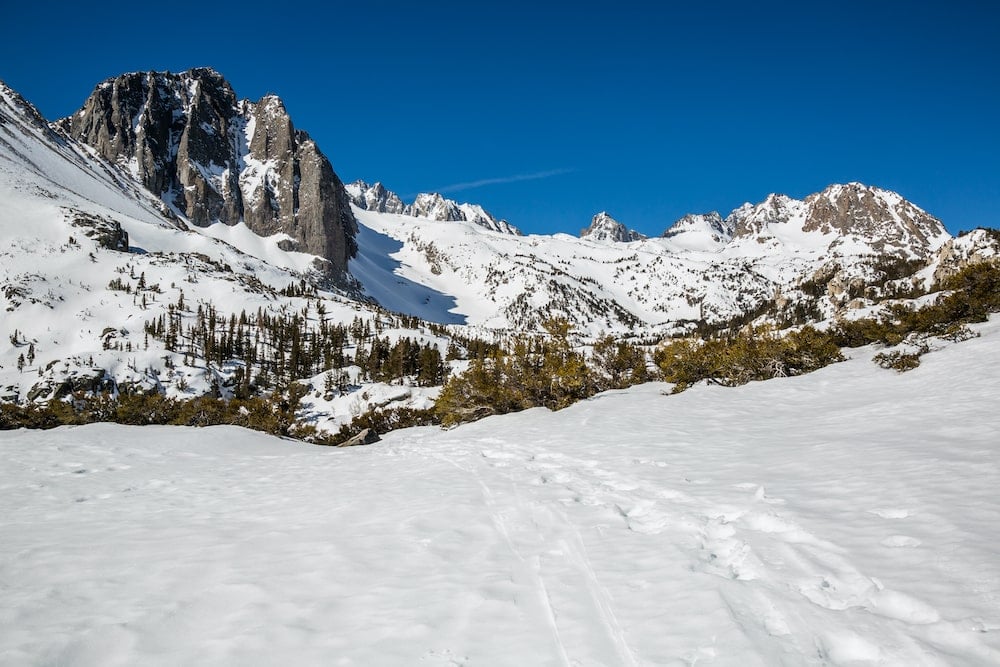
California 14ers: Trail Hikes
Generally considered the easiest of the three California 14ers, each of these peaks is accessible by a well-worn trail or, in the case of White Mountain, a rutted, 4WD road all the way to the summit. While weather and snow at these altitudes may still be a concern, no technical climbing knowledge is required.
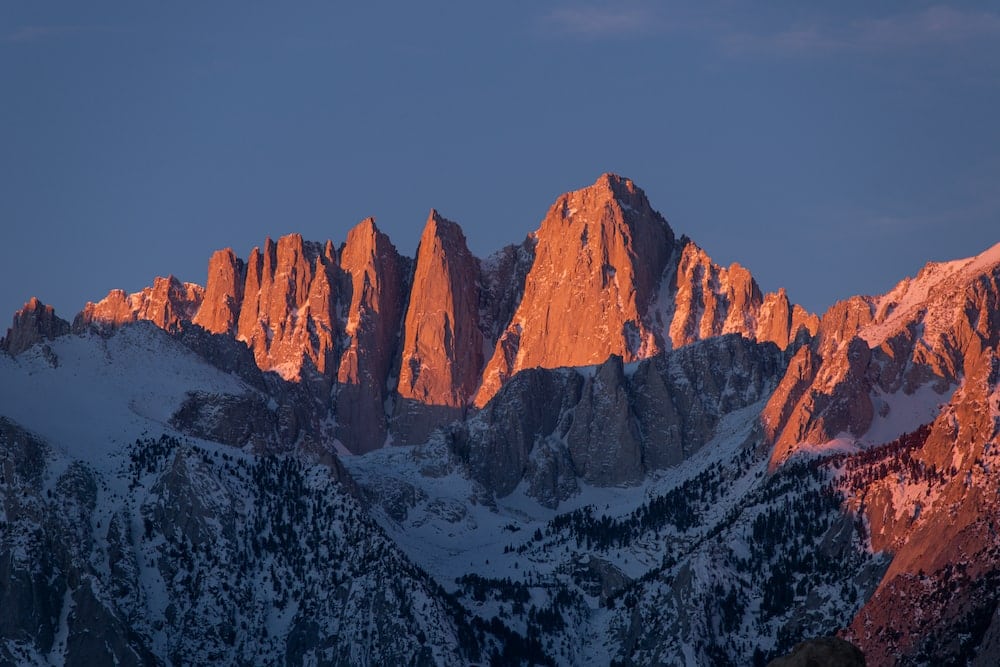
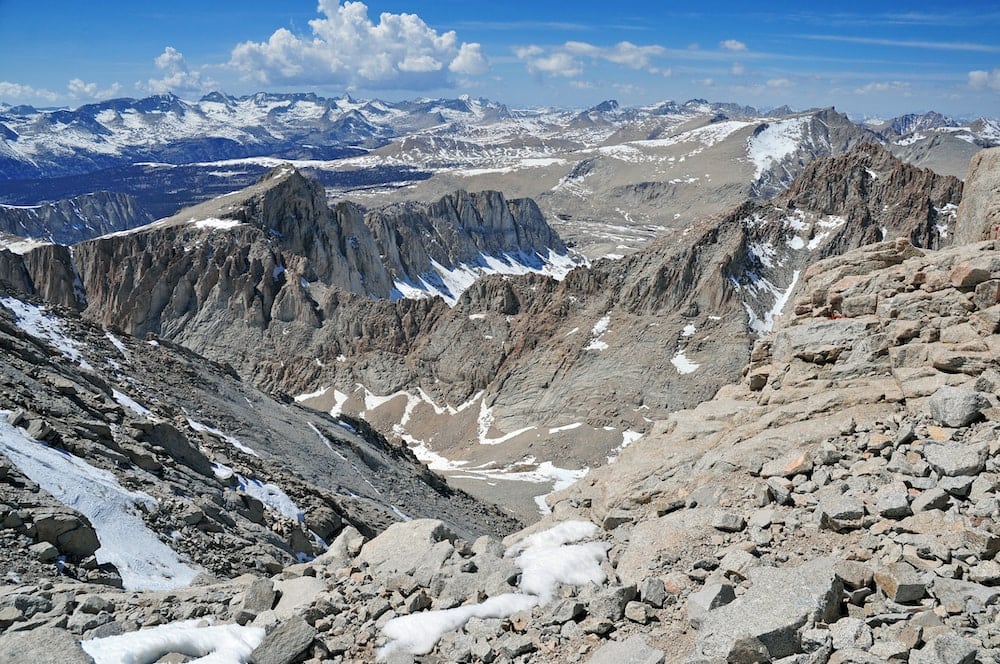
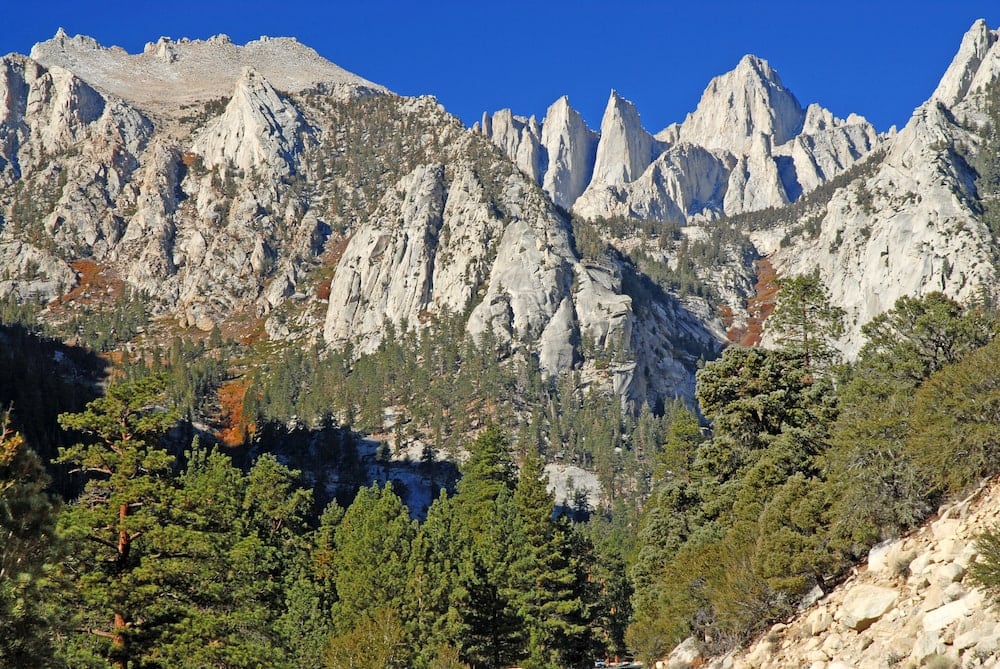
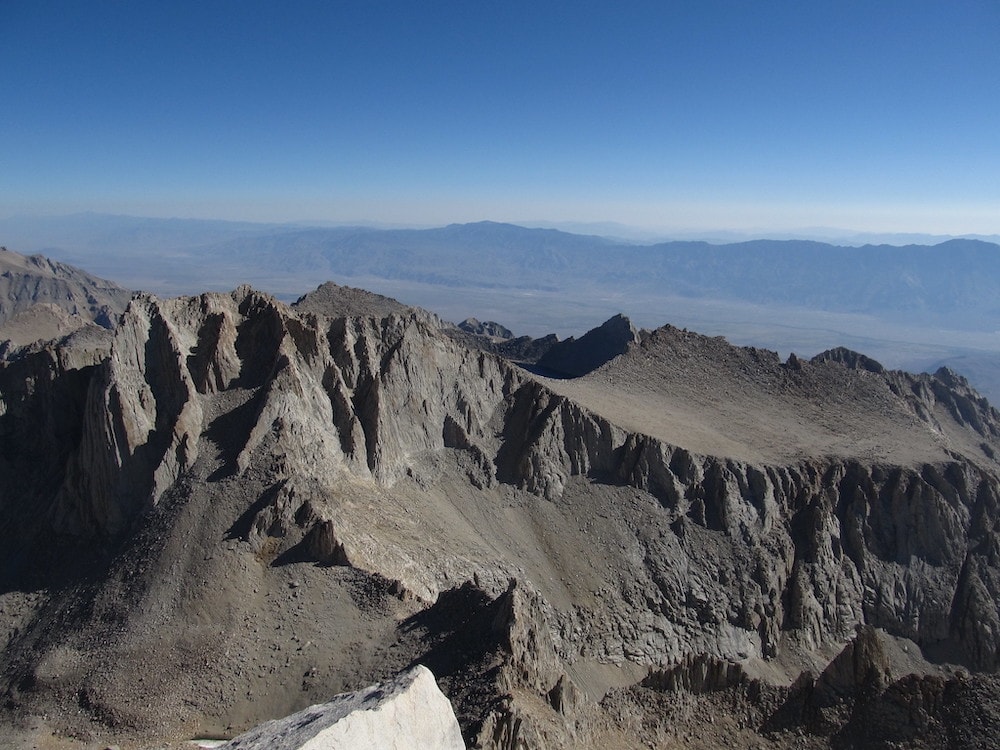
1. Mount Whitney
- Elevation: 14,505 feet
- Elevation gain: 6,600 feet
- Permit required: Yes, for day hiking and overnight camping
- Easiest route: Mount Whitney Trail
- Class of easiest route: Class 1
- Nearest town: Lone Pine
As the highest peak in the lower 48 and the most famous of the California 14ers, many people have heard of Mount Whitney. It’s a hike on many peoples’ bucket lists, and with a well-maintained trail stretching from Whitney Portal all the way to the summit, it’s the most accessible 14er of the bunch.
When hiking Mount Whitney, be sure to plan ahead. The lottery for permits opens on February 1st and you can enter until March 15. Hikers (and overnight backpackers) will be selected at random from the list of people who put their names into the metaphorical hat. It’s a competitive process and Whitney permits are usually in high demand.
If you’ve never climbed a 14er before, make your first attempt easier by doing it as backpacking trip, sleeping at Trail Camp (at an elevation of 12,000 feet) to properly acclimatize. August and September are the best months to hike it to avoid snow and ice on the trail.
The trail starts at Whitney Portal, from which point hikers will travel 3.5 miles to Lone Pine Lake, a stunning overlook of the Owens Valley below, and a great place for a snack break.
From there, it’s on to Trail Camp, where the trees thin out considerably until you’re fully above the treeline and in the rocky moonscape of the High Sierra. Refill on water at Trail Camp as there might not be any above unless the patchy, late season snow is still hanging around.
Lather up that sunscreen and slowly trod up the many, many well-graded switchbacks that connect Trail Camp and Trail Crest. This area has great views and a total of 99 switchbacks in the steep section well-known to the 14er hiking community. At Trail Crest, you’re at 13,600 feet above sea level.
From there, turn right and continue up the long, granite-filled trail, perhaps stopping to take a peek through several windows on the cliff edge that gaze straight out at Whitney Portal and Lone Pine far below it.
Once you reach the top, sign your name to the register and take a well-earned snack break in the shade of the emergency shelter. On that note, another friendly reminder: always check the weather you start and be aware of any potential fast-moving summer thunderstorms.
Once you’re ready, it’s back down the 99 switchbacks you go, losing 6,200 feet of elevation over the 11-mile hike down to Whitney Portal. If you’re lucky, you’ll be able to grab a cheesy slice at Pizza Factory back in town when you’re done trekking.
More information: Inyo National Forest
2. White Mountain
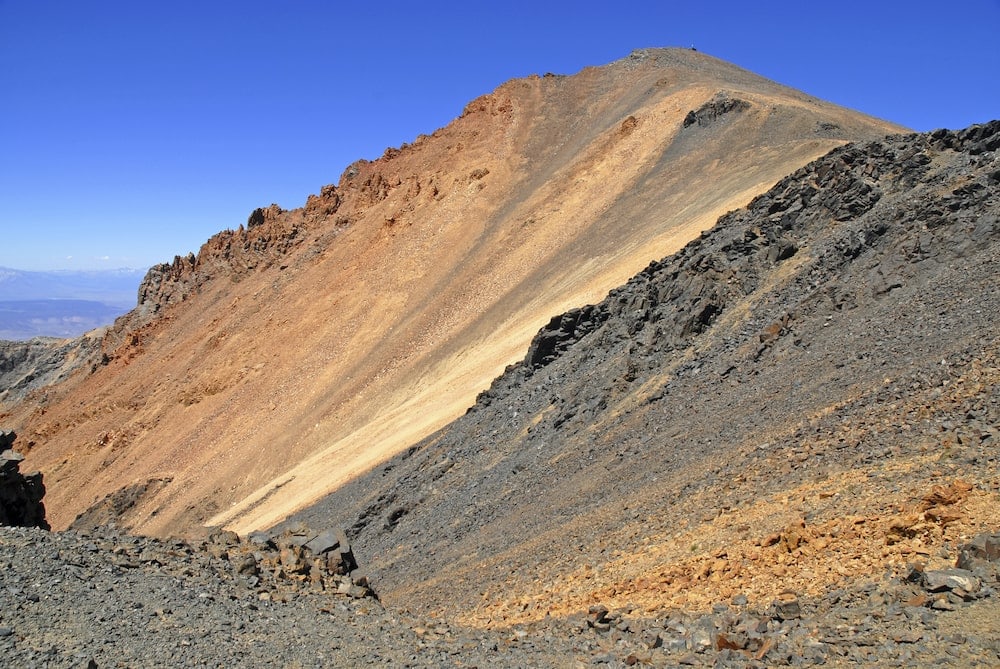
- Elevation: 14,252 feet
- Elevation gain: 3,400 feet
- Permit required: No
- Easiest route: South Face
- Class of easiest route: Class 1
- Nearest town: Bishop
Though many people believe this to be the easiest of the California 14ers, the rugged, 4WD-only road leading to the summit and remoteness of the climb itself add a bit of extra challenge you won’t encounter on Whitney.
The resources for rescue are sparser in the arid White Mountains, so bring a hiking partner and always tell a friend where you’ll be and when you’re planning to be back in cell-service range. For more remote peaks, a portable GPS and texting device like the Garmin In-Reach Mini can be a huge anxiety reliever.
As one of the only two 14ers in California outside John Muir’s beloved Sierra Nevada range, White Mountain is flanked by an ancient bristlecone pine forest. The forest is full of incredible and unique geological features and speckled with iron-rich rock that make much of the hike rust-colored and Mars-like.
From the parking area, it’s a 15-mile (round trip) slog up the back of the long-dormant volcano. The views of the Sierra, the White Mountains, and the Owens River Valley are tremendous, so try to embrace the experience, Take it easy in the higher altitudes, breathe deeply, and take lots of breaks on your way to the summit.
The trail gains approximately 3,400 feet of elevation from where trekkers begin the hike, and most fit hikers take 7-9 hours to finish the journey. If you’re not yet acclimatized, consider sleeping in or near your vehicle the night before at the trailhead (11,000 feet above sea level) to get used to the altitude before ambling up the peak the following morning.
More information: Inyo National Forest
3. Mount Langley
- Elevation: 14,032 feet
- Elevation gain: 4,670 feet
- Permit required: Yes, for overnight camping
- Easiest route: New Army Pass
- Class of easiest route: Class 1
- Nearest town: Lone Pine
Starting at the stunning, wooded Cottonwood Lakes Trailhead, the trail up to Mount Langley is an excellent 14er. Compared to Mount Whitney, it has fewer crowds and is easier to get a permit, making for an excellent, semi-last-minute weekend backpacking trip.
From the trailhead (at 10,000 feet above sea level), you’ll begin the hike through a high-alpine pine forest with several easy stream crossings. The trail then will gain some altitude as you near some mountain lakes. Most Mount Langley climbers elect to veer left at the junction and camp at Long Lake to continue the hike up New Army Pass in the morning.
Long Lake sits at 11,200 feet above sea level and is a great place to acclimatize while watching the sunset. Be sure to fill up on water before heading to the peak as it’s the last water source before the summit.
Next up is a series of switchbacks through a rocky field of gravel that eventually crests at the top of New Army Pass proper. From there, you’ll have a tremendous view of far-off Mount Langley and it’s tundra-like alpine plateau. Hundreds of yellow-bellied marmots call this area home, so guard your snacks, and keep on trekking. Remember proper Leave No Trace principles regarding animals (hint: don’t feed them).
The Army Corps of Engineers constructed dozens of massive rock cairns to mark the trail up to Mount Langley, so route-finding shouldn’t be an issue. Just take it easy and stroll through the boulder field until you hit the summit slabs. From there, you’ll get a commanding and well-earned view of Mount Corcoran, White Mountain, and, of course, Mount Whitney.
More information: Inyo National Forest
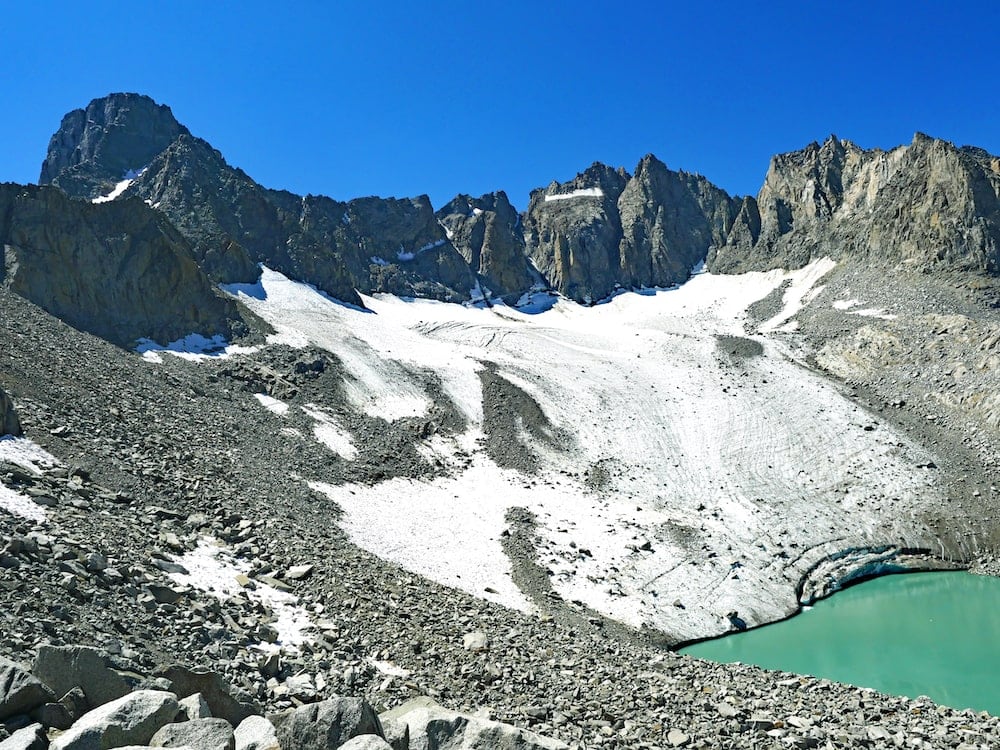
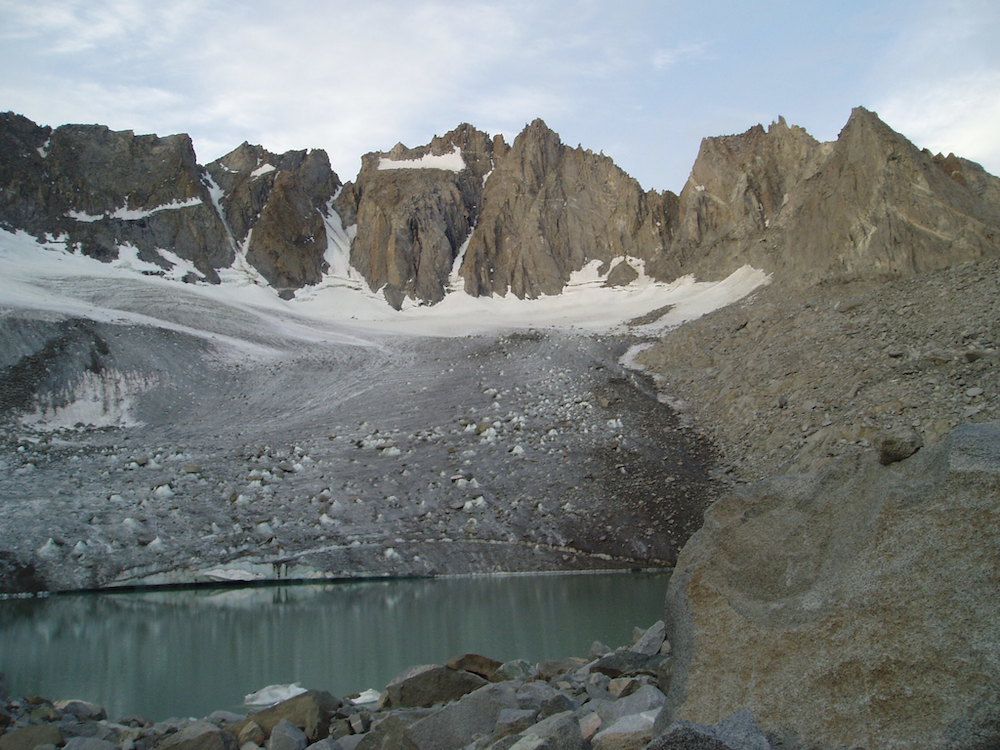
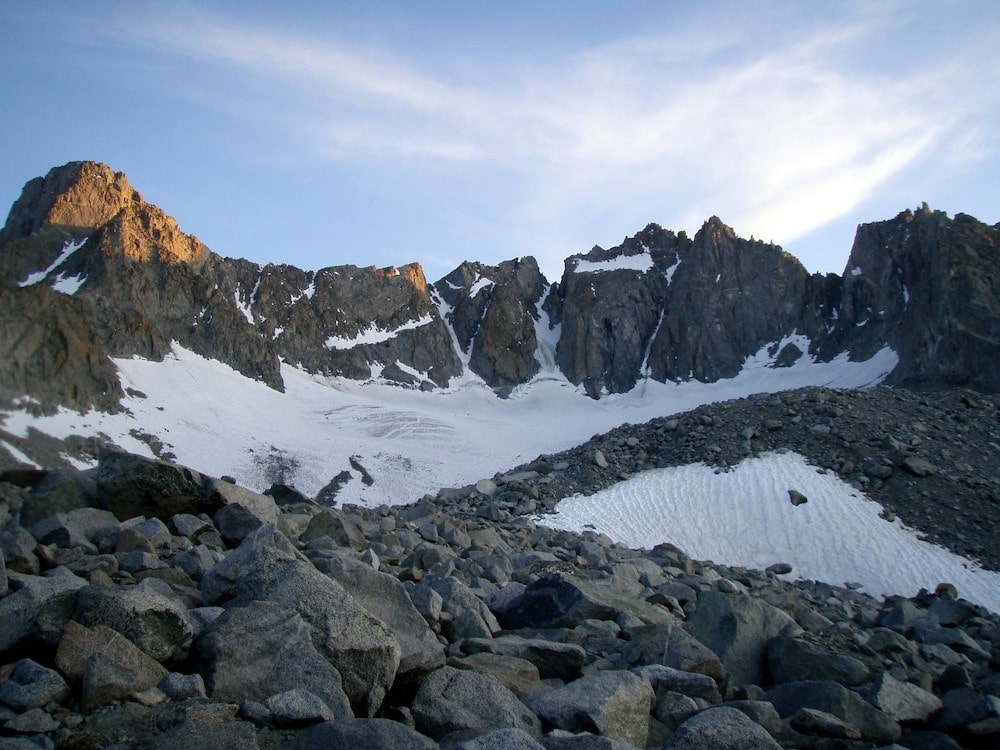
California 14ers: Scrambles
These 14ers require a lot more climbing skill, fitness, and route finding know-how to make a successful bid for the summit. You should have a solid grasp of Class 3 scrambling skills before attempting any of these peaks, bring a GPS locator along, and do a lot of research on the best route up and down for your team before leaving home.
When in doubt, there are several excellent guiding companies in the Sierra Nevada that will happily show you the literal ropes, should you want to start climbing harder at altitude.
4. Split Mountain
- Elevation: 14,064
- Elevation gain: 7,500 feet
- Permit required: Yes, for overnight camping
- Easiest route: North Slope from Red Lake
- Class of easiest route: Class 2
- Nearest town: Big Pine
Though the dirt road to get to the trailhead is rough, and the trail to Red Lake is often considered one of the worst-maintained in the whole of the Sierra, Split Mountain is an epic climb for anyone looking to test their route-finding skills on an established Class 2 route with no technical climbing required.
Download a GPX file before leaving home to make sure you can easily stay on route as you venture up the craggy, glaciated mountain. Start at the parking area for the Red Mountain Trailhead and get ready to climb more than 4,000 feet to set up camp at Red Lake.
From here, take in the stunning vistas of the jagged spires on Split’s east face. From this vantage point, it’s easy to make out the mountain’s two distinct summits — north and south. The North Summit is the highest and easiest of the two and is where you’ll be heading the next day after spending your first night acclimatizing at the lake.
From the lake the next day, veer right and head up to the low point between Split and Mount Tinemaha. From there, you’ll go left, and the wild scramble begins. Be sure to stay on the Class 2 route and not veer off into more technical terrain. Also, try to enjoy the panoramic views of the John Muir Wilderness — it’s beautiful up there!
The round-trip journey is 14 miles with a huge amount of elevation gain. It’s best completed as a 3-day backpacking trip.
More information: Inyo National Forest
5. Mount Sill
- Elevation: 14,159 feet
- Elevation gain: 3,400 feet
- Permit required: Yes, for overnight camping
- Easiest route: Southwest Slope
- Class of easiest route: Class 2+
- Nearest town: Big Pine
Mount Sill is a memorable speck on view of the Sierra ridgeline because of its prominent, thumb-shaped peak. All routes up this beast require crossing the Palisade Glacier, so brush up on your mountaineering skills over snow and ice before attempting the route (or consider taking a basic skills class from a company like REI or Sierra Mountain Center).
The easiest and most popular route up Mount Sill is the Southwest Slope, which is a steady scramble up mostly Class 2 granitic rock. It’s just under four miles each way and climbs 3,400 feet to the summit. It’s doable in a day for most people.
More information: Inyo National Forest
6. Mount Muir
- Elevation: 14,018 feet
- Elevation gain: 5,900 feet
- Permit required: Yes, for day hiking and overnight camping
- Easiest route: Mount Whitney Trail Side-Spur
- Class of easiest route: Class 3
- Nearest town: Lone Pine
Though the majority of the main route up to Mount Muir follows the classic, well-maintained Mount Whitney Trail mentioned above, the trip to Mount Muir involves a hard right turn and a gnarly scramble.
While this peak can be hard to make out from the west side of Mount Whitney, it is the high point along the ridge after the trail’s junction with the JMT. Make your way up the mostly Class 2 granite boulders until you reach the final push to Mount Muir’s summit, then carefully find your way along the easiest Class 3 moves until you’re on top. It’s signed.
If you’re looking for something spicier, there are also several technical rock climbs up the East Buttress of this peak, ranging from class 4 to 5.9.
More information: Inyo National Forest
7. Mount Tyndall
- Elevation: 14,025 feet
- Elevation gain: 8,950 feet
- Permit required: Yes, if camping overnight
- Easiest route: Northwest Ridge
- Class of easiest route: Class 2
- Nearest town: Independence
Mount Tyndall is an intense climb, but mostly because of the long, arduous traverse over Shepherd’s Pass to reach the base camp. It’s highly recommended that you do this trip as two or three nights, as the quickest route is still a 25-mile round-trip journey with 6,000 feet of elevation gain — just to get to Shepherd’s Pass (at 12,000 feet above sea level) which is where the climbing route begins in earnest.
The trek starts on the Shepherd’s Pass Trail, heading west toward the JMT. About half a mile after the pass, most hikers start to veer off the trail and carefully make their way up the ridgeline, moving slowly to avoid hitting technical terrain.
Some experienced climbers prefer the Class 3 North Rib Route to avoid the tricky Class 2 route-finding on the more popular route, but be prepared to use your hands a lot more if you step up the grade.
Because of its remote location, climbers generally choose to tag Mount Williamson and Mount Tyndall at the same time. They’ve physically very close and have a similar climbing grade.
More information: Inyo National Forest
8. Mount Williamson
- Elevation: 14,380 feet
- Elevation gain: 10,100
- Permit required?: Yes, if overnight camping
- Easiest route: West Face
- Class of easiest route: Class 3
- Nearest town: Independence
Though it requires solid route-finding skills, the West Face of Mount Williamson is not a very technical climb. It just requires a lot of patience and pre-planning to become familiar with the route (including downloading a reviewing a GPX file before you start).
Like Mount Tyndall, the hike to basecamp alone (near Shepherd’s Pass) is long and steep, so come prepared with plenty of food and water. The trek gains +/- 10,100 feet of elevation gain over the course of roughly 26 miles
The good news is that water is relatively abundant until you begin the final climb to the summit and there are ample places near Shepherd’s Pass and its nearby lakes to set up base camp on your way up this California 14er. When you’re ready to go for it, traverse the boulder-filled Williamson Bowl, locate the infamous black stain that marks the beginning of the climbing route, and carefully make your way up the Class 3 rock to the top.
More information: Inyo National Forest
9. Mount Shasta
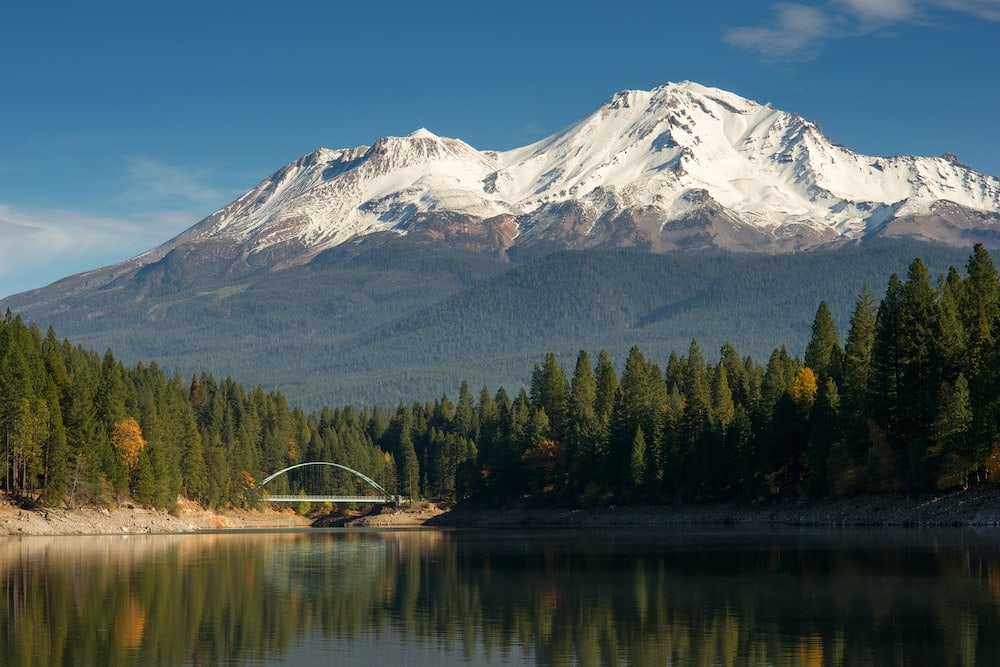
- Elevation: 14,179 feet
- Elevation gain: 7,130 feet
- Permit required: Yes, for day hiking and overnight camping
- Easiest route: Avalanche Gulch
- Class of easiest route: Class 2+
- Nearest town: Mount Shasta
Unlike the other climbs on this list, Mount Shasta is in very northern part of the state, near the border with Oregon. It’s in an oft-forgotten mountain range called the Cascades. It’s made up of a series of now-dormant volcanoes; Mount Rainier, Mount St. Helens, and Mount Baker are also members.
Both day hikes and overnight backpacking trips up Mount Shasta require a Summit Pass and Wilderness Permit, which you can get from nearby ranger stations. The route to the top is technically only Class 2, but because of the constant snow and ice surrounding the summit, the climb requires you to practice mountaineering skills over ice and snow. You’ll also need to know how to route-find in frozen terrain.
If you’re a beginner, no problem. Mount Shasta is one of the best 14ers in California to learn outdoor skills. The mountain is an excellent training ground for learning how to swing an ice axe or move with crampons strapped to your boots. Hiring a guide is almost always a good idea.
More information: Shasta-Trinity National Forest
10. Middle Palisade
- Elevation: 14,018 feet
- Elevation gain: 6,890 feet
- Permit required: Yes, if camping overnight
- Easiest route: Northeast Face
- Class of easiest route: Class 3
- Nearest town: Big Pine
The base camp for Middle Palisade (Finger Lake) is one of the prettiest in the entire Sierra Nevada. It’s a phenomenal place to acclimatize and soak up the high-alpine views before embarking on the arduous glacier climb and scramble to the summit the following morning.
Most climbers attempting this formidable peak start their journey on the South Fork of Big Pine Creek Trail, climbing over a small pass, down to Brainerd Lake, and then up a short scramble to get to base camp at Finger Lake. From there, cross to the west side of the creek, strap on your crampons, and get ready to glacier climb.
After the glacier, the route finding gets intense, so do some serious research on the route before leaving home. Downloading a GPX file is a non-negotiable. If you are at all unsure about climbing Middle Palisade, consider hiring an experienced guide to help you safely navigate the steep, loose landscape of the High Sierra.
More information: Inyo National Forest
11. Mount Russell
- Elevation: 14,094 feet
- Elevation gain: 5,800 feet
- Permit required: Yes, for day hiking and overnight camping
- Easiest route: East Ridge
- Class of easiest route: Class 3
- Nearest town: Lone Pine
Most of the East Ridge up Mount Russell is technically a Class 2 hike up steep granite slabs, but the route’s jaw-dropping levels of exposure make sit quite notorious in California climber circles.
Once you’ve made it up the 1,500 feet of loose scree to the Russell-Carillon Pass, you’ll turn left to hop onto the ridge itself. It’s a “sidewalk-in-the-sky”-style ascent with thousands of vertical feet spilling out on both sides as you traverse the knife’s edge to the summit.
The good news about this California 14er is that if you’re confident on Class 3 terrain and comfortable with exposure, the route itself is very straightforward. Really, it just ascends a steep ridge to the west of the pass. Climb carefully, enjoy the incredible views, and stop for a hard-won lunch break at the summit.
More information: Inyo National Forest
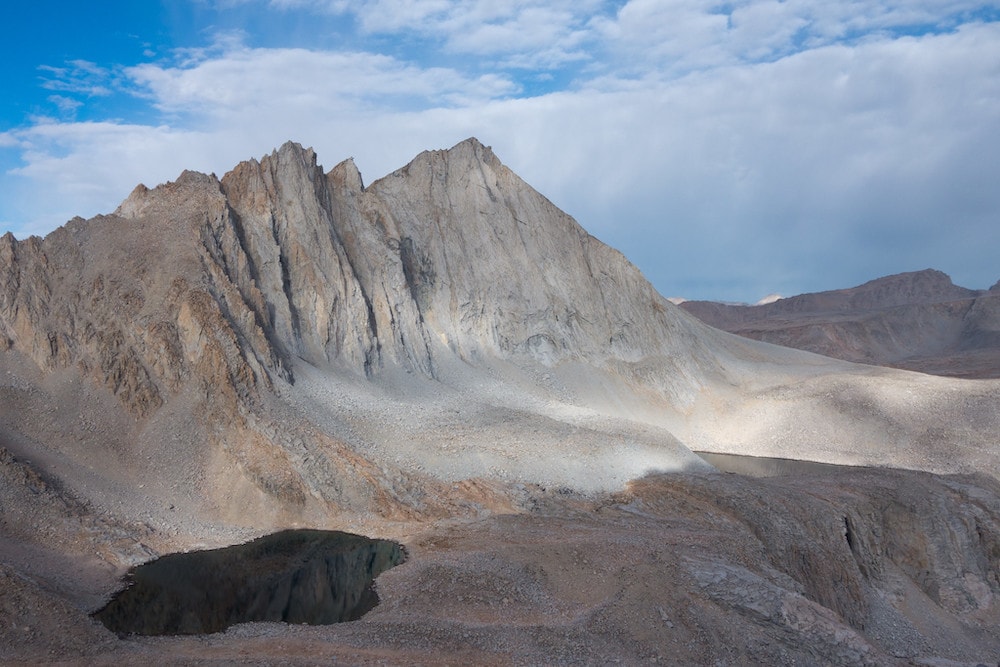
California 14ers: Harder Climbs
The California 14ers below are only recommended for incredibly experienced hikers who are comfortable climbing 14ers on exposed, steep terrain and who have solid route-finding skills. Many of the peaks listed below require roped climbing, gear placement, and extremely difficult down-climbing or rappelling.
If you’ve climbed a few easier 14ers and aren’t sure if you’re ready to take the plunge into harder fare, consider hiring a certified guiding company to help you rope-up and confidently gain new skills.
12. North Palisade
- Elevation: 14,249 feet
- Elevation gain: 5,500 feet
- Permit required: Yes, if camping overnight
- Easiest route: West Chute
- Class of easiest route: Class 4
- Nearest town: Bishop
The easiest route up North Palisade is still a heady, technical Class 4 climb with loads of tricky route-finding, and experienced alpine climbers often opt for the U-Notch Chimney Route instead.
You’ll experience excellent ice and snow climbing on the peak’s many steep couloirs. Have more time to spare? Combine this 14er with a longer, multi-day Palisade Traverse. This trek is not for the faint-of-heart, so do some serious research and continuing mountain education before scheduling your trip.
More information: As always, Inyo National Forest
13. Polemonium Peak
- Elevation: 14,081 feet
- Elevation gain: 5,000 (ish) feet
- Permit required: Yes, if camping overnight
- Easiest route: From the U-Notch
- Class of easiest route: Class 4
- Nearest town: Bishop
Another classic climb along the infamous Palisade Traverse, Polemonium Peak requires technical climbing ability, a high comfort with heights and exposure, and expert-level route finding skills.
To climb Polemonium, the route starts much the same way as the route up North Palisade, only it climbs a wide crack to the right of the U-Notch. You’ll probably want a rope as the Secor guidebook — which is sort of the definitive mountain guide for California peak-baggers — lists the section as a 5.2.
This unusually named peak gleaned its moniker from the rare flower “polemonium eximium” (otherwise known as sky pilot), which grows high in the alpine expanse of the Sierra Nevada.
More information: Yup, still Inyo National Forest
14. Starlight Peak
- Elevation: 14,081 feet
- Elevation gain: +/- 4,400 feet
- Permit required: Yes, if overnight camping
- Easiest route: Northwest Chute
- Class of easiest route: Class 5 (5.6)
- Nearest town: Bishop
It may not be as prominent as some of the other peaks on this list as it’s near North Palisade, but many Sierra alpine climbers have fallen in love with Starlight Peak’s technical, airy summit block. And the start of the approach is on the epic Bishop Pass Trail, which is full of breathtaking alpine lakes for a dip when you’re done climbing.
The summit spire is marked by a unique rock formation commonly referred to as the “milk bottle.” It’s a by-the-book technical rock climb rated 5.6. The rest of the Northwest Chute is rated as Class 4, but if you want to summit Starlight Peak, get ready to rope up and grit your teeth for the final 20 feet to the top.
More information: What do you know? It’s Inyo National Forest
15. Thunderbolt Peak
- Elevation: 14,009 feet
- Elevation gain: +/- 4,400 feet
- Permit required: Yes, if camping overnight
- Easiest route: Southwest Chute Number One
- Class of easiest route: Class 5 (5.9)
- Nearest town: Bishop
It may not be considered a “true” 14er as it only rises 223 feet above the nearby peaks, but this stunning summit is the most technical on the bunch, thus making it a bucket list ascent for many serious alpine climbers.
Part of the long and gorgeous Palisade Traverse, you can reach the top of Thunderbolt Peak in a variety of ways, but the easiest and most popular is the mostly class 3 Southwest Chute. No matter which way you slice it, the summit block will require at least a short rope and the ability to climb class 5.9 rock at altitude.
More information: Have you memorized this URL yet? Inyo National Forest
Find Your Next California Adventure
Sign up for the Weekend Wanderer to join 10,000+ readers getting epic travel ideas every week.
Seen in: California, Hikes