If you haven’t experienced Utah’s “Island in the Sky”, now’s the time to start planning a trip to see this remarkable landscape from behind the wheel on White Rim Road.
An overland adventure on the 100-mile White Rim Road in Canyonlands National Park is the kind of remote drive you’ll remember for a lifetime. Along the way, you’ll navigate under towering red rock formations and peer down steep canyon walls carved by the Colorado and Green rivers.
The best views of the spectacular and rugged desert landscape’s many layers are from the middle of the road, and the best way to get the full picture is to drive along the canyon rim. Since there aren’t any hotels, White Rim Road is an obvious spot for an epic overlanding trip.
Related Read: 14 Vanlife Hacks: How to Make Van Living Easier
Contents
- What is Overlanding?
- Know Before You Go
- What to Pack for White Rim Road
- Reservations and Regulations
- Seasons, Weather, and Road Conditions
- Directions and Logistics
- Suggested Itinerary
Take a Drive: What is Overlanding?
Perhaps you’ve heard of overlanding, but aren’t exactly sure what the term means? This vehicle-assisted form of outdoor recreation involves mild to extreme off-roading as part of your adventure to reach remote locations. Think of it like backpacking with your 4WD vehicle — you’ll need to be self-reliant and pack what you need for the trip to get both you and your vehicle there and back again.
Overlanding has become popular in recent years. Unlike off-roading or four-wheeling, which focus more on tackling off-road obstacles in your vehicle while driving, overlanding focuses on vehicle-assisted exploration (along with the destination, of course.) An overlanding route may involve a multi-day drive with overnight stops in remote locations. Sound up your alley? If so, White Rim Road in Canyonlands National Park is an ideal place to dip your toes into the overlanding waters.
If you don’t own a 4WD vehicle, you can rent a decked-to-the-nines, off-road-ready Jeep from one of the many rental shops in Moab. And though you can complete White Rim Road in one long day of driving, overlanding is less about conquering the loop as quickly as possible and more about spending some quality time on the road less traveled
Related read: 6 Stunning Backpacking Routes in Canyonlands National Park, Utah
White Rim Road: Know Before You Go
The National Park Service recommends a high-clearance 4WD vehicle for White Rim Road. For the most part, any four-wheel or all-wheel-drive truck or SUV with moderate ground clearance should do the trick. If you’re an intrepid low-clearance Subaru owner comfortable maneuvering your Outback or Crosstrek through the wilds, you should have no issues on White Rim Road.
Due to several rock outcroppings and tight switchbacks, make sure your lifted van or camper rig doesn’t exceed around 10 feet in height and has a short enough wheelbase to make the tight switchback turns. Trailers are allowed, but you’ll want an off-road capable model. And you should be confident in your towing abilities.
While you don’t need to have a ton of off-road driving experience to tackle White Rim Road, you will want to be comfortable taking your vehicle over rocky, rutted, sandy, and possibly muddy terrain. Make sure someone in your group isn’t afraid of heights, as the road can be narrow with steep drop-offs.
Two-way traffic is allowed on White Rim Road. In certain spots, if you encounter an oncoming vehicle, you may need to reverse to let the other vehicle pass. Uphill traffic has the right of way.
If you’re not sure if you’ll be comfortable tackling the more technical sections of the road, head to YouTube to watch some footage and get a feel for the type of terrain you’ll encounter on the drive. If you’re afraid of heights or get queasy on roads without guardrails, this drive probably isn’t your cup of tea.
ATVs, UTVs, and other off-road vehicles are not allowed on White Rim Road, so leave your decked-out dune buggy at home. Motorcycles, e-bikes, mountain bikers, and hikers and runners are allowed on the route. Keep an eye open and be courteous to other drivers. (You can drive in either direction.)
Related read: 10 Adventurous Campervan Rentals in Salt Lake City, Utah
What to Pack for White Rim Road Overlanding
In addition to your usual car camping gear and set-up (tent, sleeping gear, cooking supplies, you know the drill), you’ll need to pack plenty of food and water. This remote route has very little shade and no potable water. The NPS recommends packing at least one gallon/four liters of water per person per day, plus more if you’ll be active and breaking a sweat.
This goes for food, too. Pack a few backup meals just in case you end up out on the road longer than you planned for. The campsites are primitive with pit toilets and no trash cans, so be prepared to pack out all your garbage (bring some trash bags.) And throw an extra roll of toilet paper in the vehicle too as the more remote pit toilets aren’t always stocked up on the paper goods.
Along the road, you’ll also have access to various hiking trails, so pack your hiking or running gear if you want to explore the area on foot. Mountain bikes (e-bikes included) are allowed on White Rim Road, but not on any of the area trails. You might see a few intrepid souls out bike-packing the full loop.
And remember, White Rim Road is a high-altitude desert environment. This can mean big temperature swings between blazing hot days where you need loads of water and sunscreen to cold, clear nights where you’ll want all your layers, plus an added blanket.
You’ll also need some extra supplies for your car. If you’ve been off-roading before, you probably know what to pack. But if this is your first extended overlanding trip, you’ll want a few things for your vehicle. Make sure you have quality tires with good traction and a full-size spare tire (with air) along with the proper tools.
Additionally, the NPS recommends some kind of traction device, whether that is chains or another option like Maxtrax for any loose, slick, or steep sections where you might need some added traction. And play it on the safe side with some additional gas — five gallons on the roof should do the trick, depending on your vehicle’s fuel economy and tank size. Extra fluids for your car (coolant and oil) and a tow strap are probably good to have on hand, too. Other nice-to-have, just-in-case items to bring along include a high-lift jack, a small shovel, and an air compressor, in case you want to deflate your tires for some sections.
If you have a satellite communicator or a personal locator beacon like a Garmin InReach or SPOT, bring it, along with a first aid kit. Though you’ll be on an established road and should see plenty of other people on your drive, cell service is spotty, and you won’t regret having this device should you need it.
Also bring a hard-copy topographic map to complement any digital maps you download. Overall, the road is well-marked and easy to follow. You shouldn’t have to do any route-finding, but you’ll find it is always better to have a map and not need it than need one and not have it.
Related read: 15 Best Overlanding Vehicles for Off-Pavement Adventure
White Rim Road Reservations and Regulations
You’ll need a day-use or overnight permit to drive White Rim Road. You’ll also need to book reservations at the specific campsites where you plan to spend the night. Spring and fall are the busiest seasons with permits selling out well in advance, so plan accordingly.
There’s no walk-up camping and campsites must be booked in advance. Along White Rim Road, there are 10 campgrounds with a total of 20 individual campsites. Each campsite can accommodate about 15 people and up to three vehicles. All reservations are online at recreation.gov.
Pets, campfires, and generators are not allowed anywhere on the route.
Related read: 9 Best Hikes in Canyonlands National Park for Every Adventurer
Seasons, Weather, and Road Conditions
Conditions permitting, White Rim Road is open year-round. Be aware that in the spring, the western side of the loop may be impassable due to high water on the Green River. Road conditions can change quickly after any rain or snow, making the steep and narrow sections more challenging and dangerous.
Late spring or early fall tend to be the best time to plan a drive as you can hopefully avoid spring run-off, the worst of the summer heat, and the early winter snow. No matter when you go, always check the forecast and call ahead to the district visitor center for the most current road conditions.
White Rim Road Directions and Logistics
Depending on which direction you plan to drive the loop, the start is approximately 45 minutes west of Moab. From U.S. Highway 191 north of Moab, turn west onto Utah 313 (also known as Dead Horse Mesa Scenic Byway). Utah 313 is paved but as soon as you turn off onto either Mineral Road (counterclockwise) or Shafer Trail Road (clockwise) to start the loop, expect rough dirt roads for the rest of your drive.
White Rim Road is roughly 100 miles long and has an additional 13-mile section on Mineral Road to complete the loop. Though you can drive it in a single, long day (budget at least 10 hours and go when the days are long), if you want to really soak in all the scenery and explore the area, plan a two- or three-day trip. And remember that your driving speeds will be slow for much of the route. At best, the road is a washboard dirt road; at worst, you’re going to have to slow way down for some easy rock-crawling over bumpy terrain.
The Reward
No matter the time of year, you can expect expansive views of some of the most stunning red rock country Utah has to offer. You’ll also have the chance to spot desert wildlife like bighorn sheep. And if you’re lucky enough to snag one of those private backcountry campsites, you’ll revel in the solitude under beautifully clear starry night skies.
White Rim Road: Suggested Itinerary
The itinerary below covers a full week if you stay at every campground, but you certainly don’t need to move that slowly. Feel free to combine sections to make the trip shorter, especially since not every campground may be available when you want it. You can drive the whole road in three days and still leave time for hiking and stopping at lookouts (and lazy morning coffees.)
Miles 0-18: Shafer Trail to Airport Campground
To find White Rim Road, turn off Utah 313 toward the Island in the Sky visitor center. Shafer Trail (the start of the White Rim Road loop) will be on the left. You will turn off the road before reaching the Island in the Sky visitor center, which is good news if you don’t want to wait in the infamous park entry line. Bad news if you wanted to use a flush toilet or buy some Canyonland memorabilia before you head off into the wild blue yonder, though.
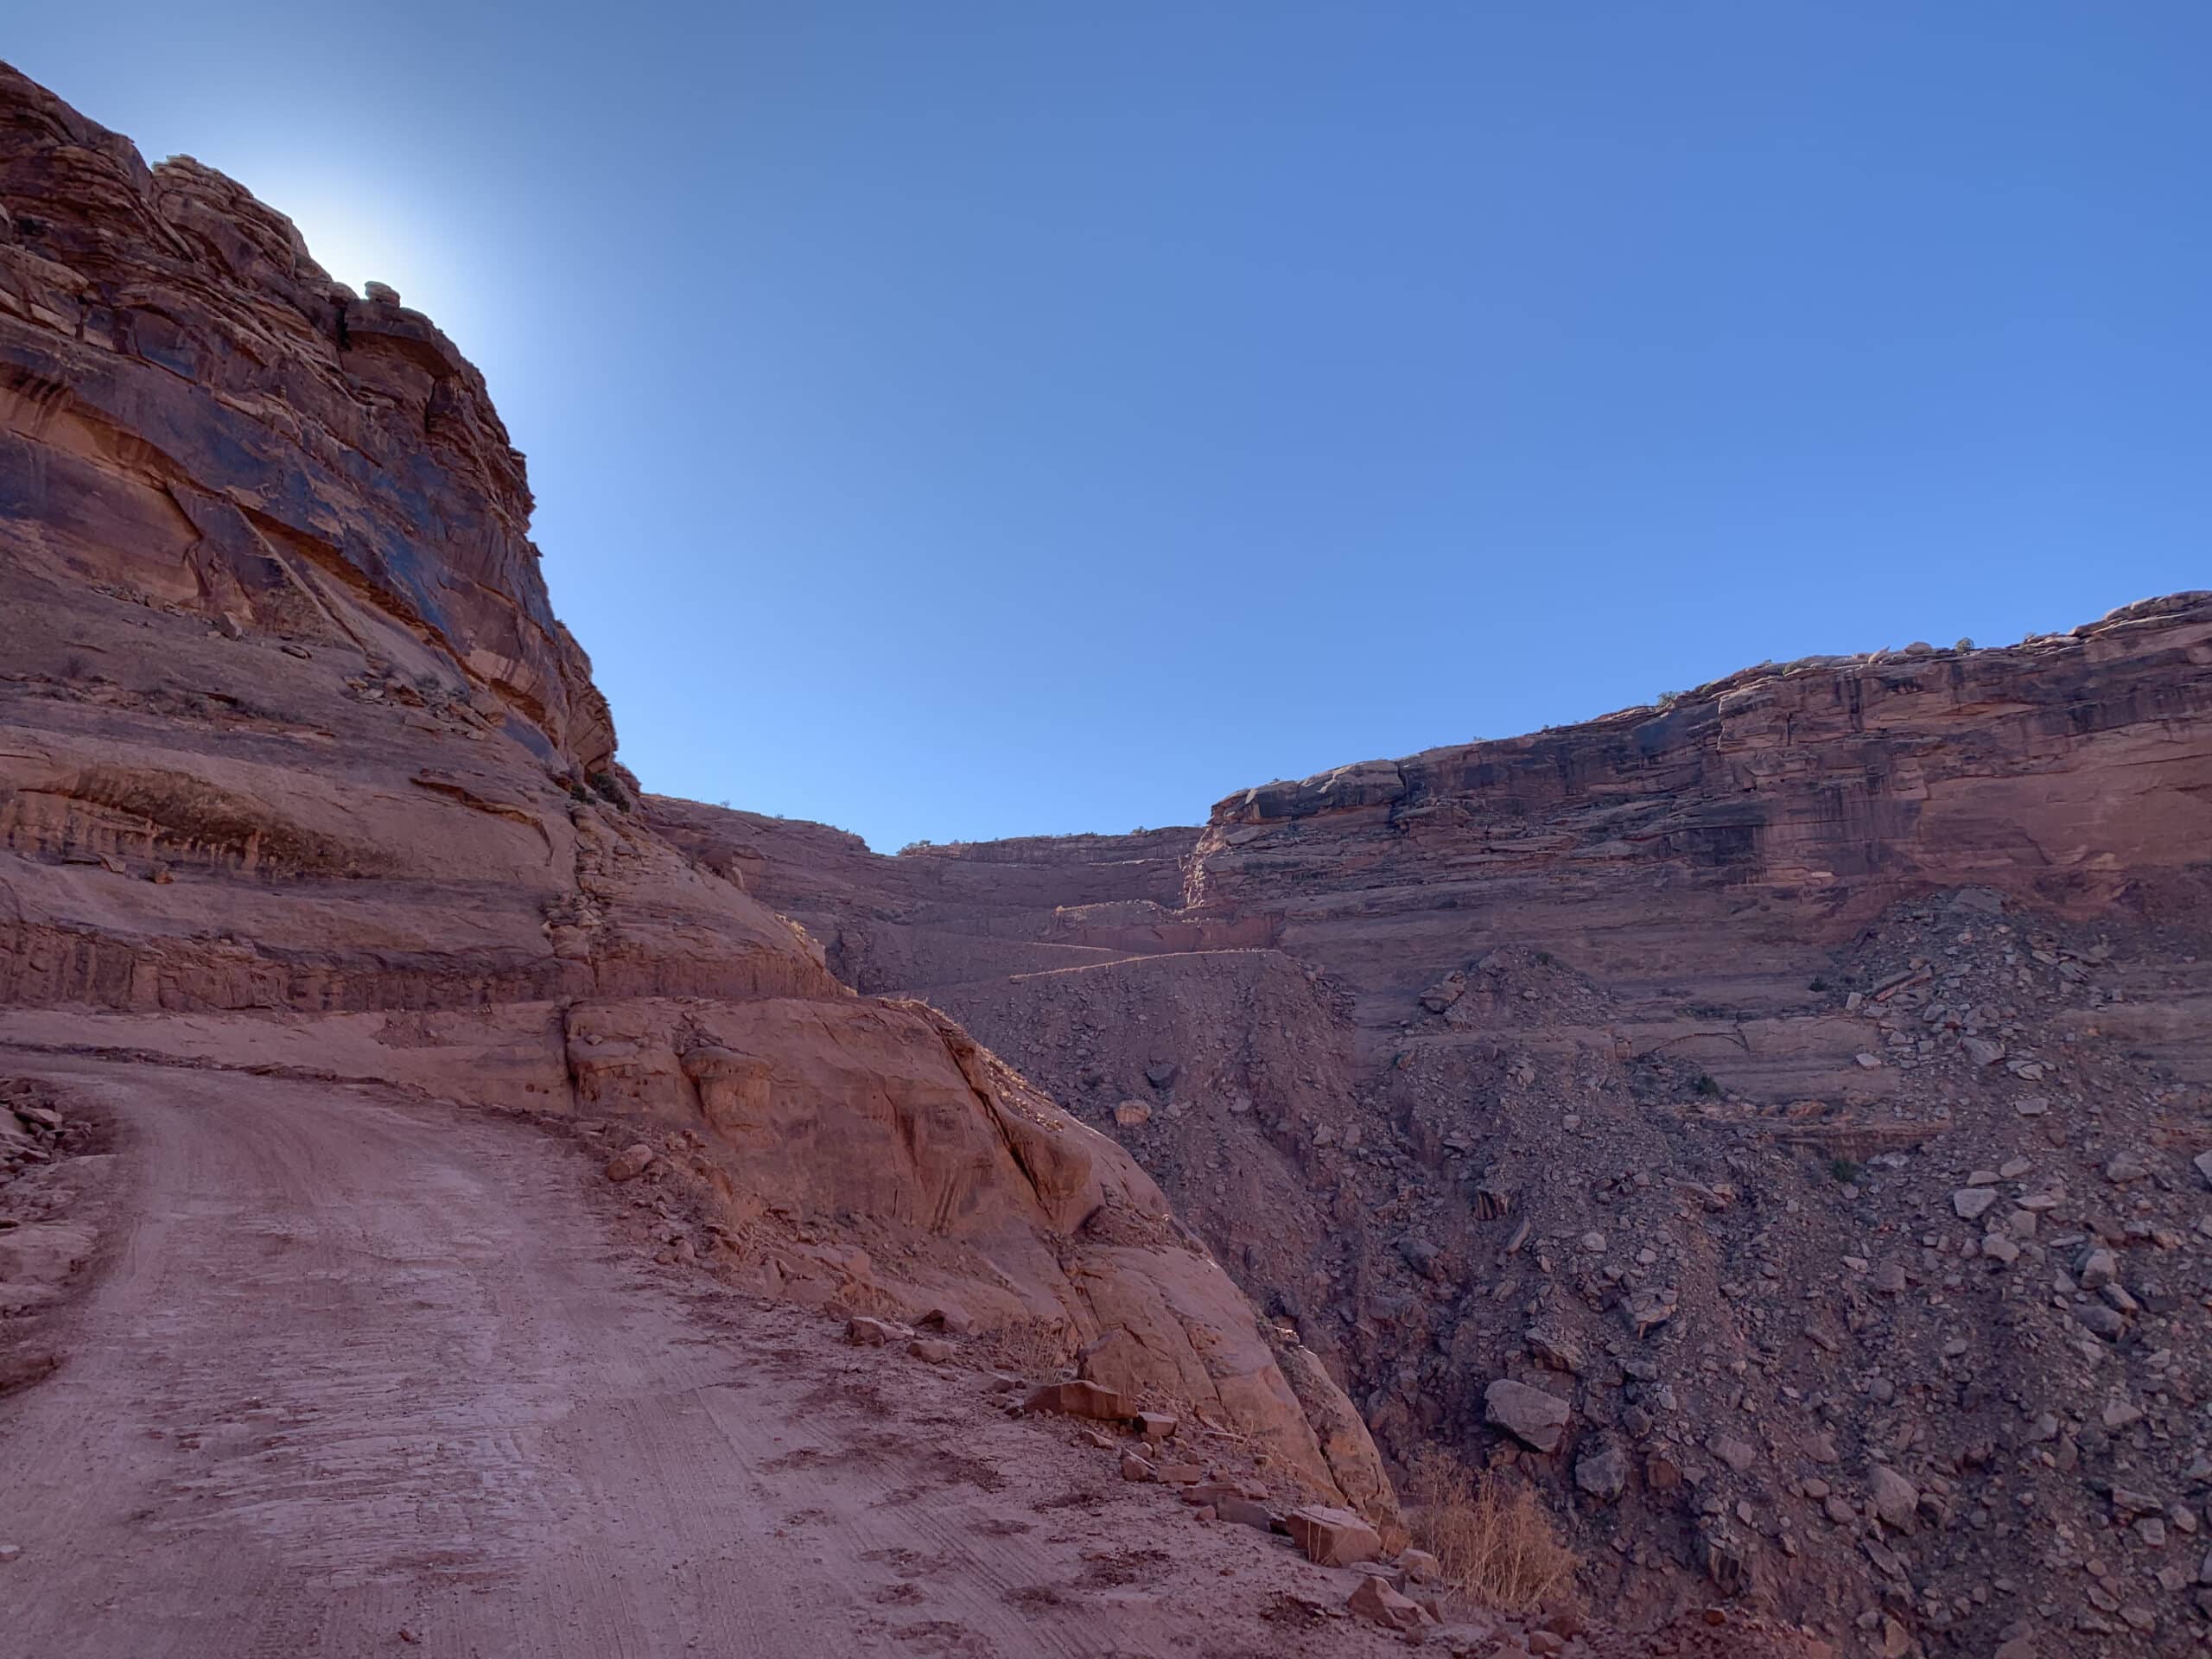
The road starts easily enough but quickly dives over the mesa rim. The switchbacks are tight but the road is wide and well-maintained, though steep in places. As with most tight spots on White Rim Road, be on the lookout for oncoming traffic. And don’t forget to look up (when it’s safe to do so.) On a clear day, you’ll enjoy views out over Moab to the La Sal Mountains in the distance.
The road levels out at the bottom of the switchbacks and you’ll reach a split where Potash Road branches off to the east. The single campsite at Shafer Campground is a short way up this road.
After the split, the road gets noticeably rougher. Get used to it as this is your new normal. For much of the eastern portion of the loop, the road is relatively flat but quite rutted, and you’ll find yourself navigating bumpy rock gardens anywhere that it approaches the rim.
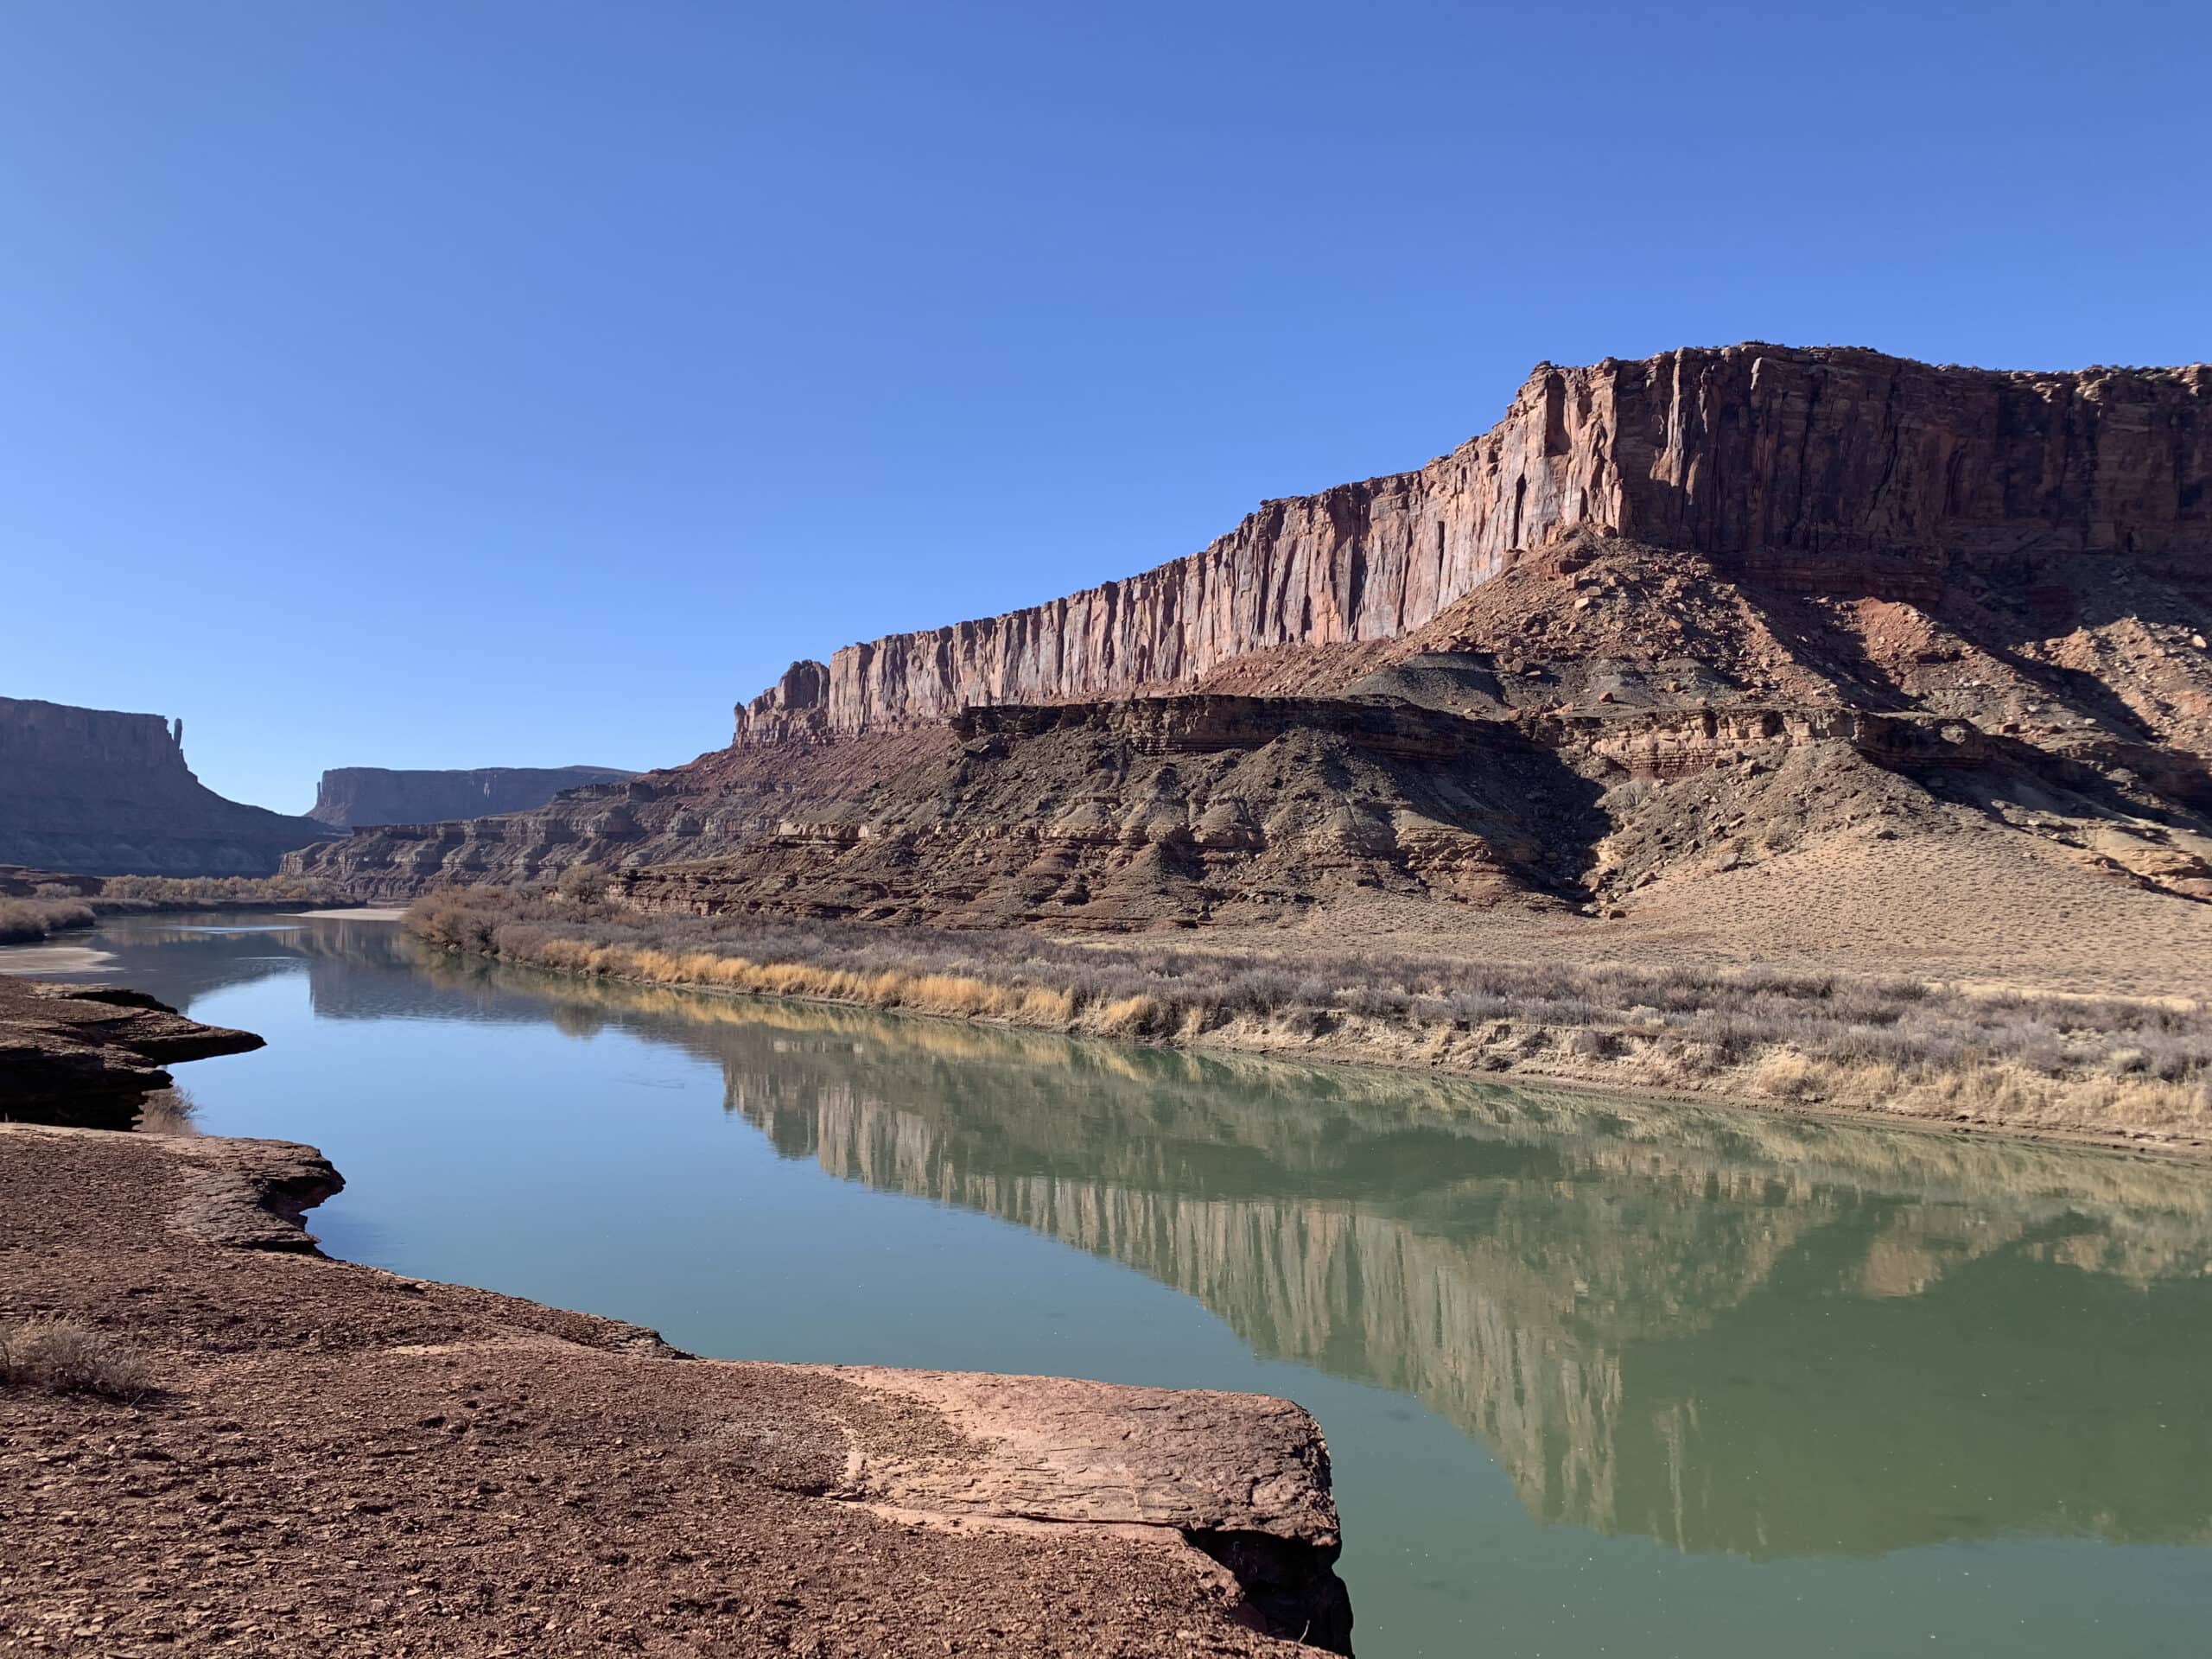
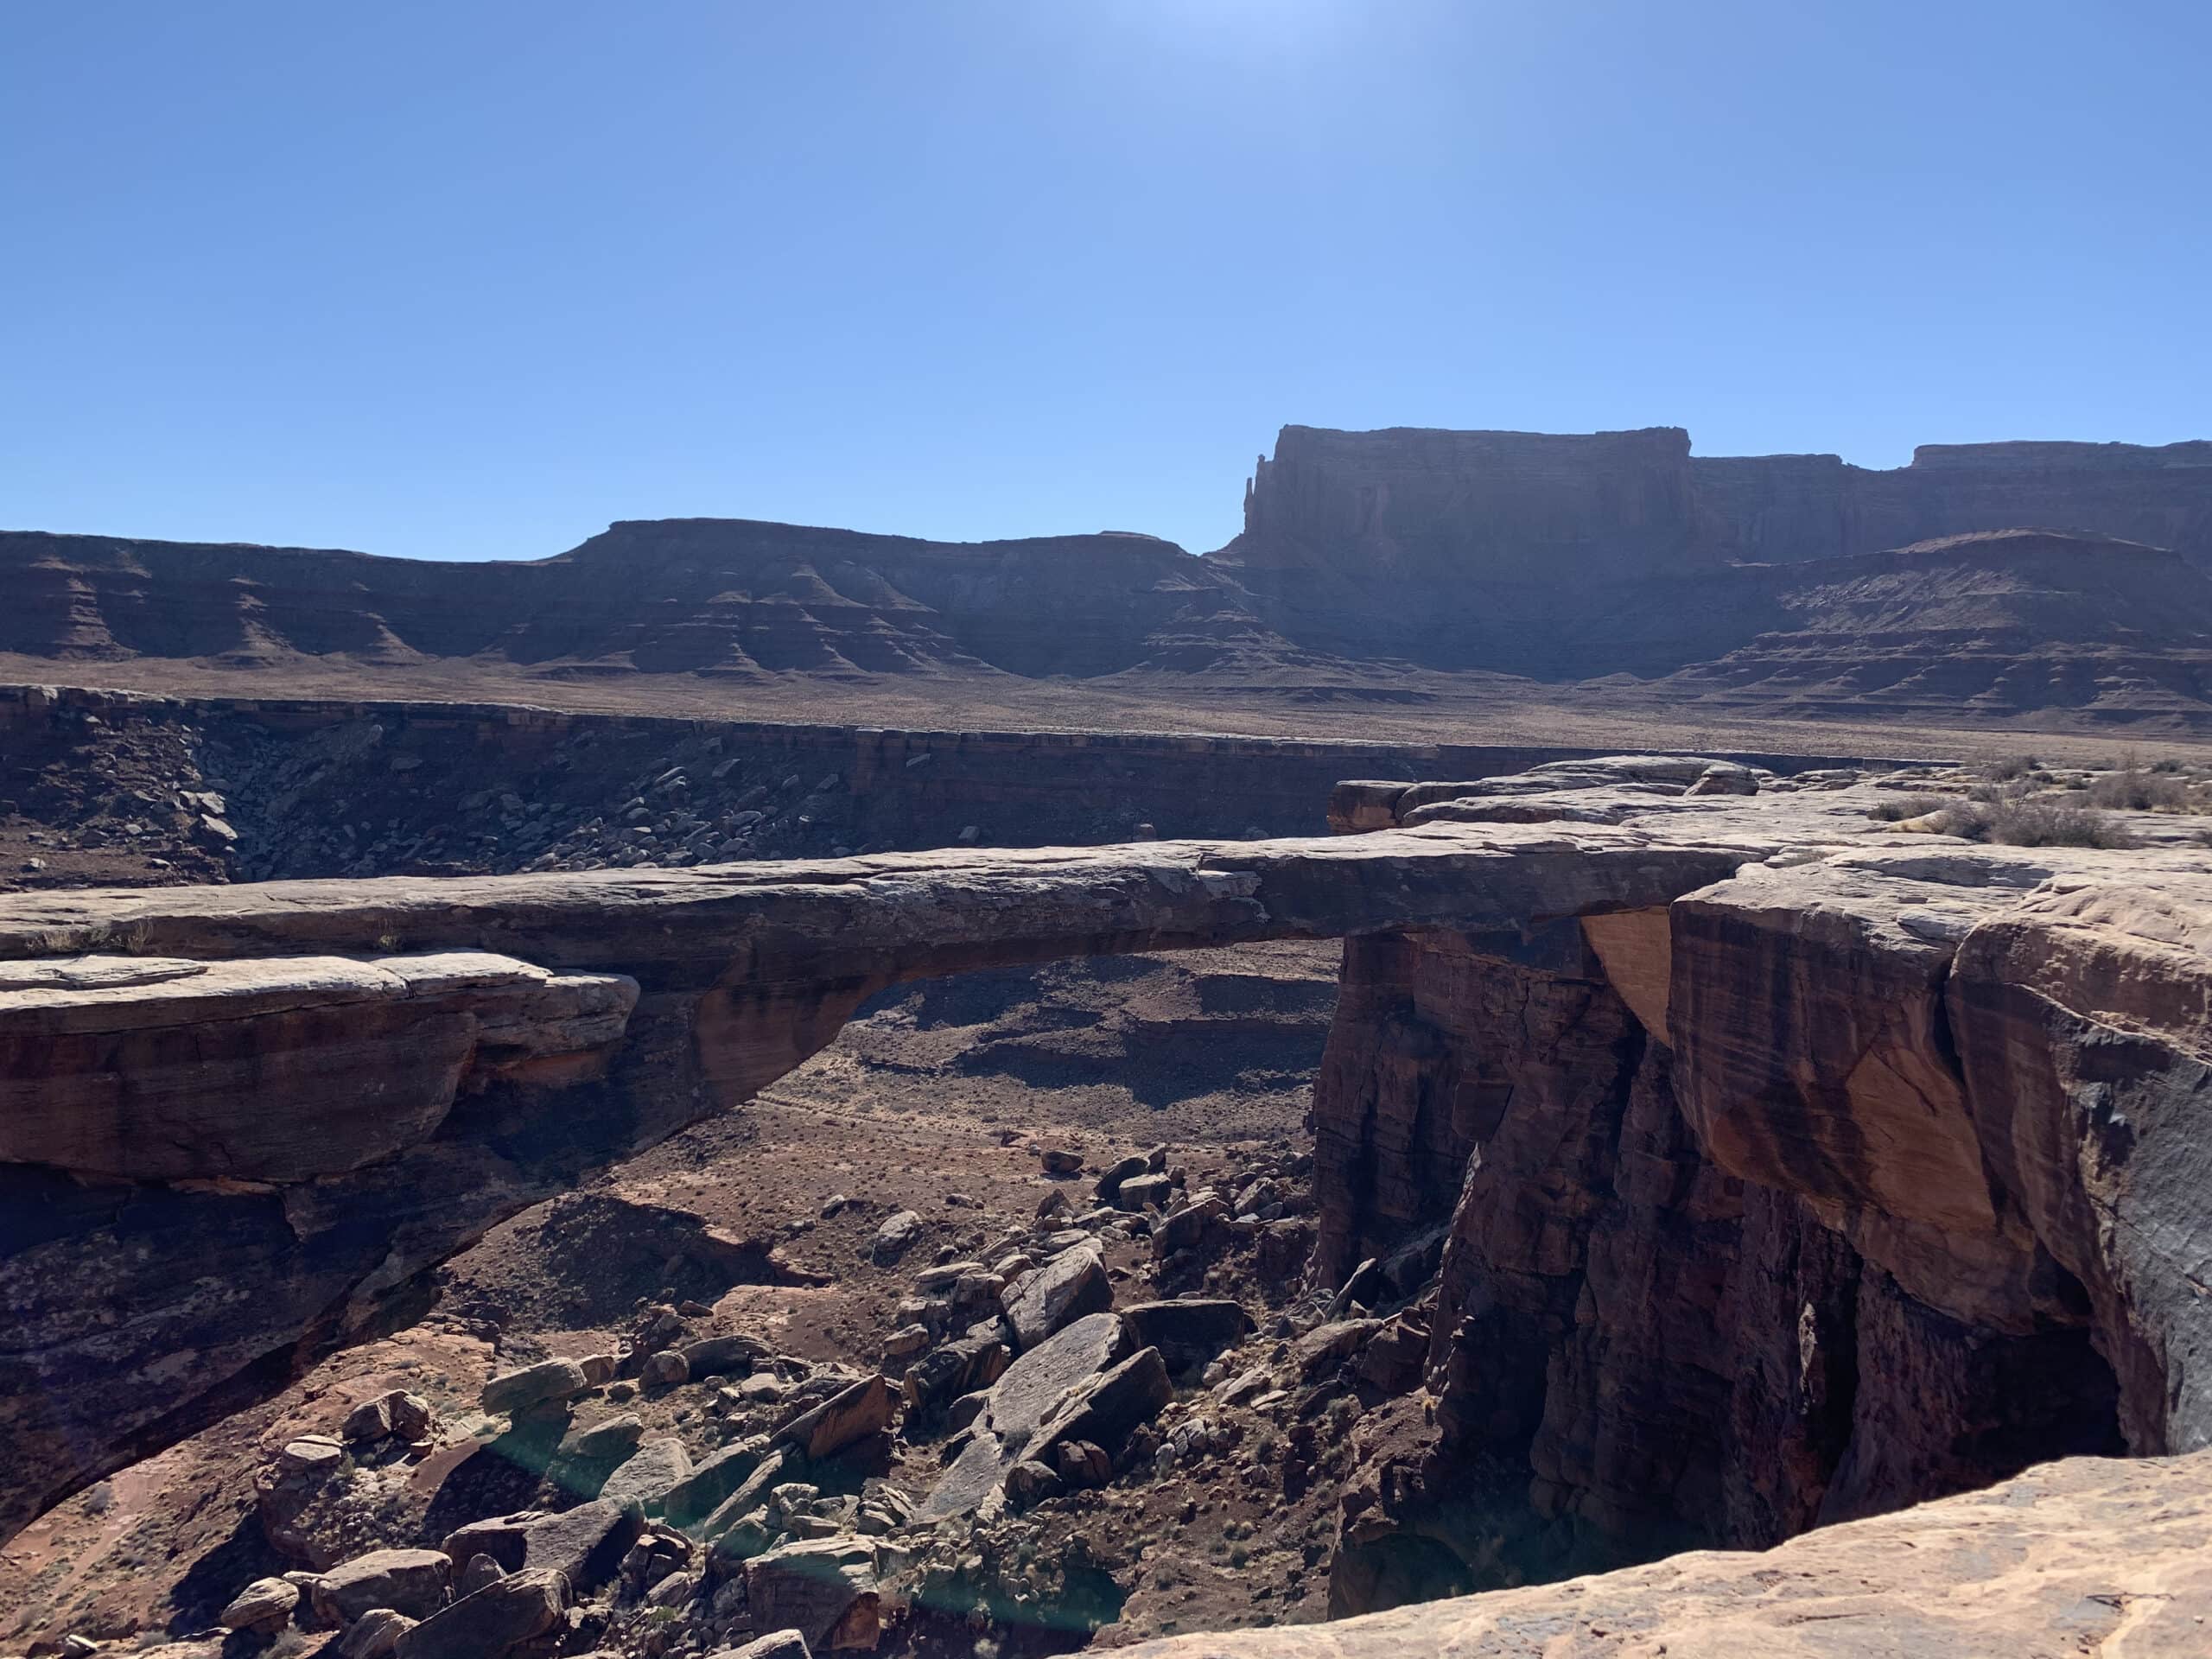
Shortly after the split with Potash Road, you can park and walk a short trail out to Gooseneck Overlook for a view of a sweeping, U-shaped bend in the Colorado River more than 900 feet below. Musselman Arch, a low-slung and bridge-like arch, is the next scenic highlight. You can park in another pull-out and walk out to the rim for a closer look at the arch.
As the road winds along atop the white, blocky rocks of the canyon rim (by now you should be able to guess where the road got its name), you’ll have stunning views out either window. To the driver’s side, the canyons drop away to sharply reveal the colorful bluffs and plateaus above the Colorado River. Out the passenger’s side window, the jutting rock formations of the Island in the Sky mesa create a stunning red-rock backdrop.
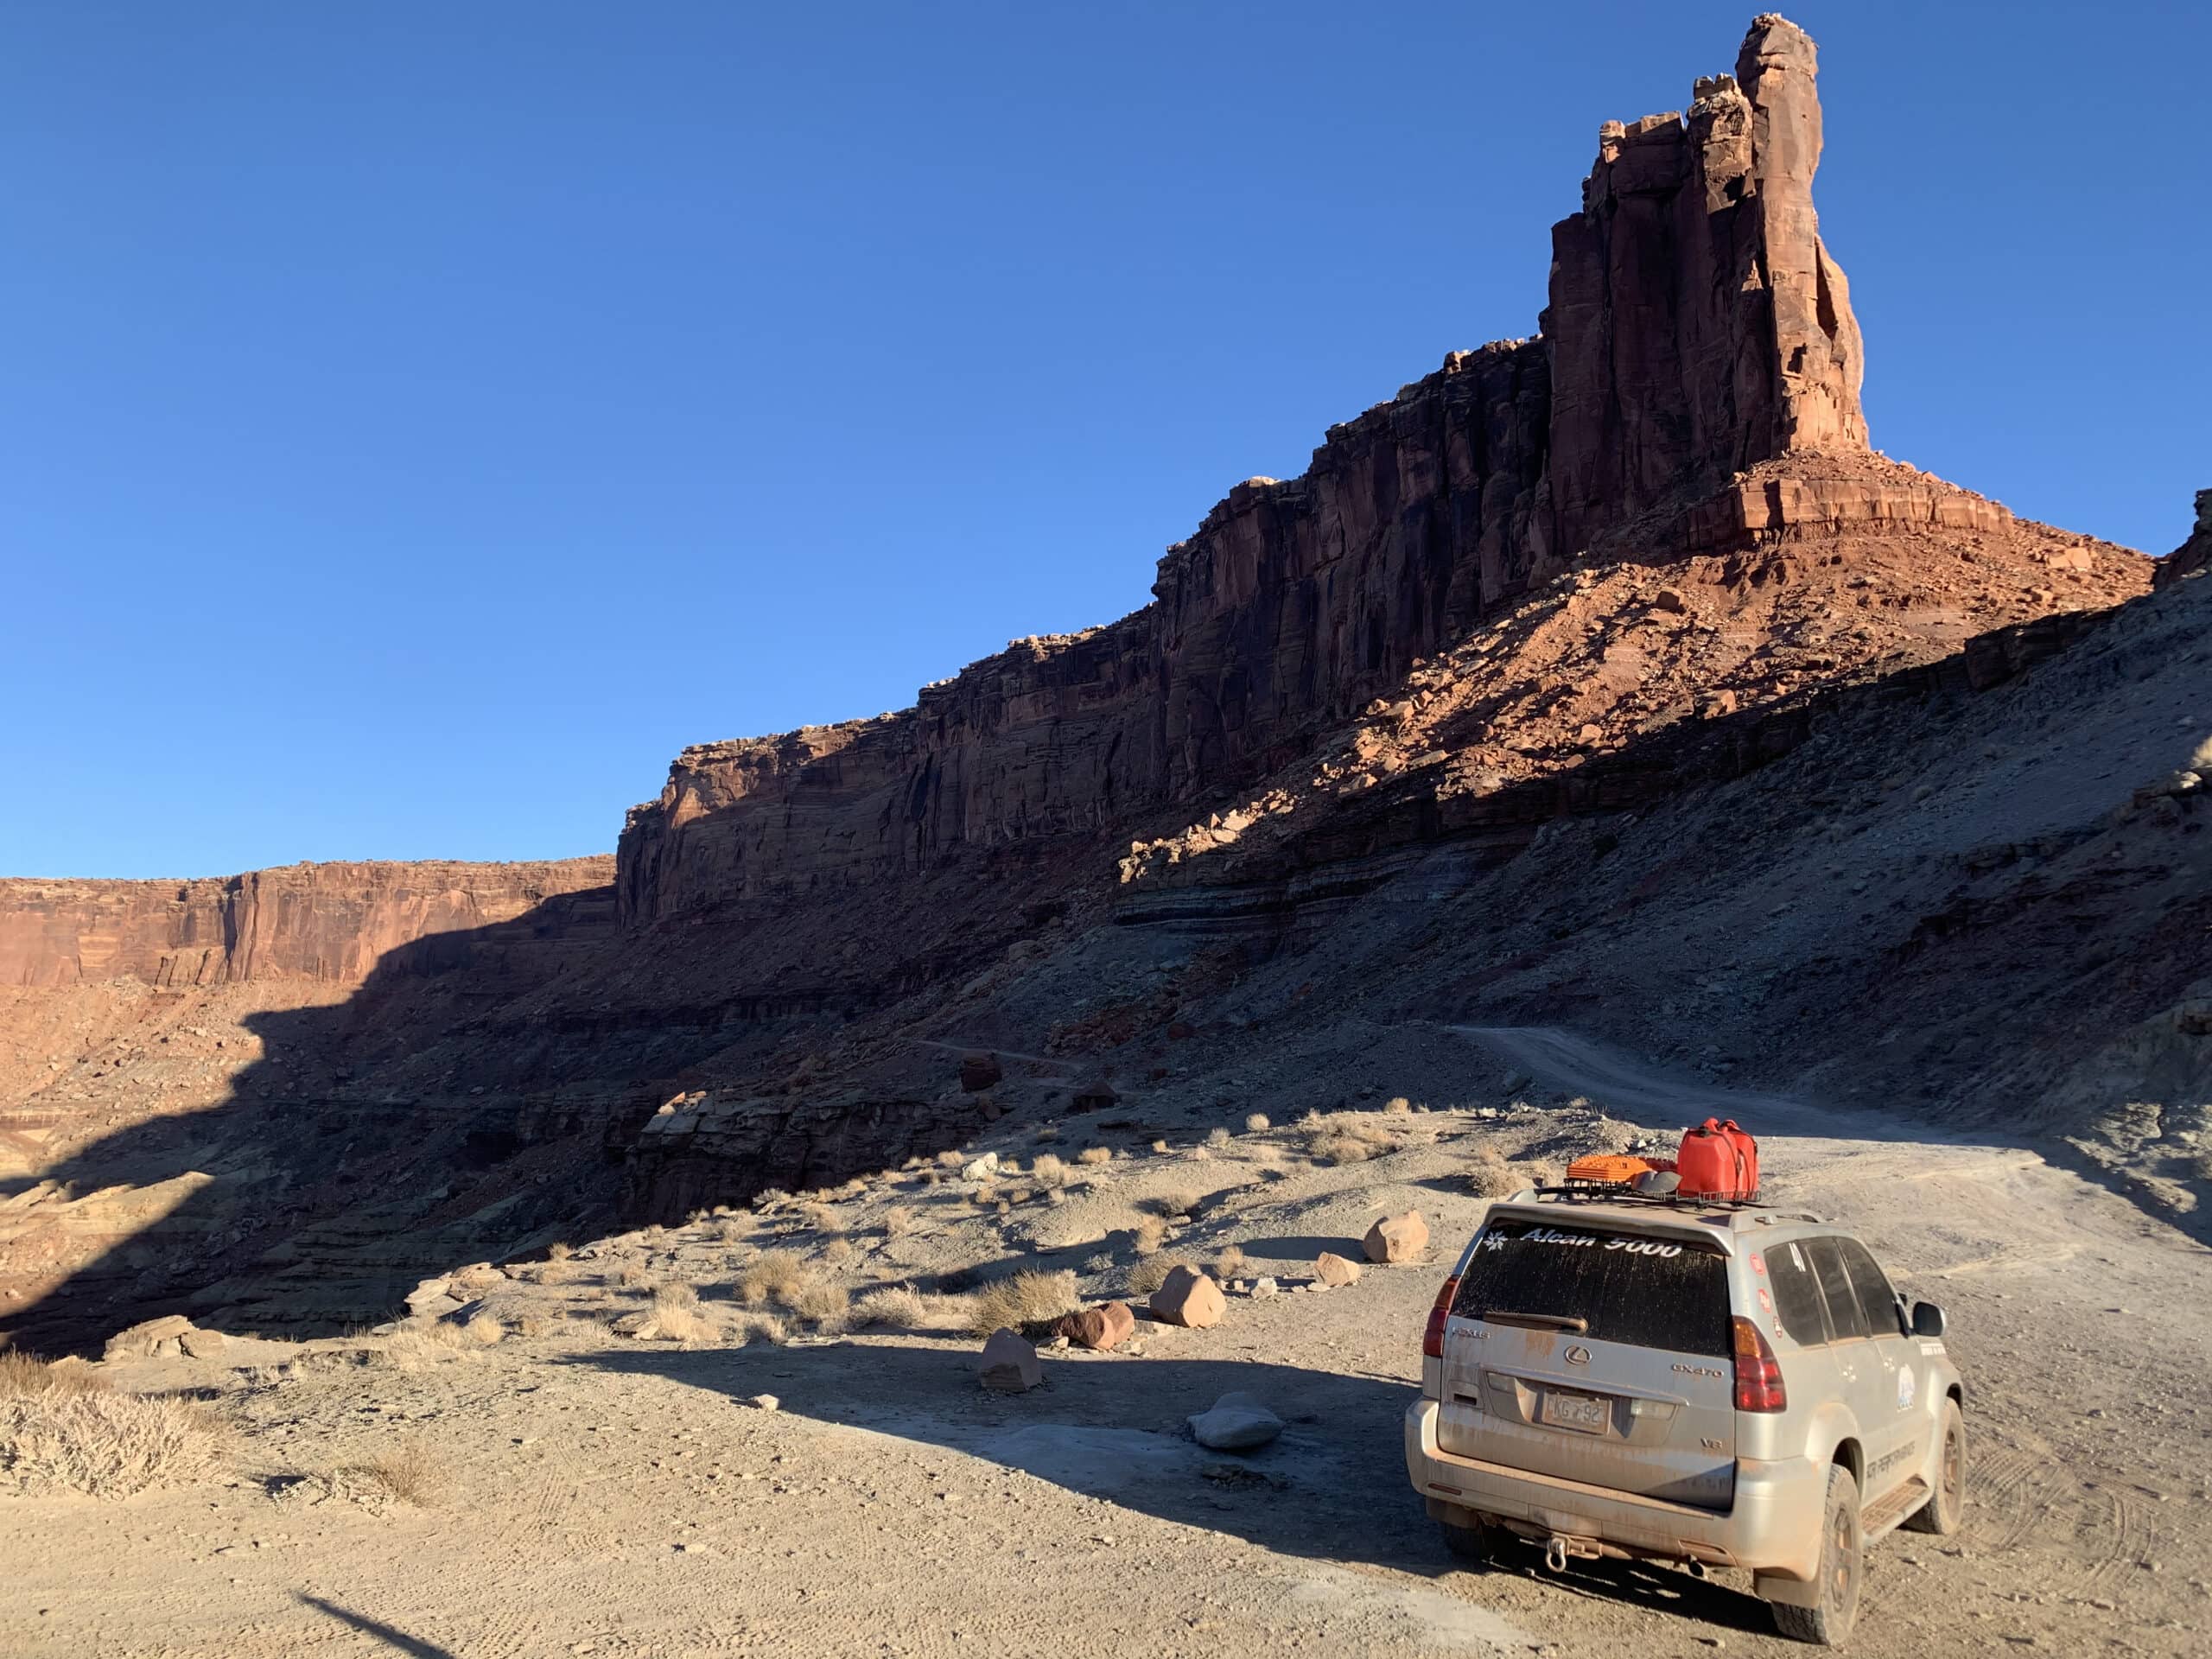
Just shy of 20 miles into the drive, you’ll reach Airport Campground, which has four sites and sits on the open plain below the eponymous butte of Airport Tower. If you’re staying here, you’ll enjoy vast vistas and a great backdrop, but not as much privacy as some of the other sites. The road is well within view for quite a ways in both directions.
Miles 18–30: Airport Campground to Gooseberry Campground
From Airport Tower, the road winds back in around the head of Buck Canyon, below Washer Woman Arch. It’s a distinctive formation that, with a little imagination, resembles the figure of a woman. At this point, you may be getting a feel for how the road flows, with long stretches of dusty and bumpy washboard interspersed with more technical rocky sections, especially when curving around the canyons.
Once you’ve navigated around the edge of Gooseberry Canyon, you’ll reach the two large campsites on a flat section of the mesa in the Gooseberry Campground. The sites are bare dirt patches where you can easily pitch a tent, though the surrounding area has some scrubby vegetation. If you’re looking for big views and big skies not far off the main drag, either of the campsites is a good option.
Miles 30–39: Gooseberry Campground to White Crack Campground
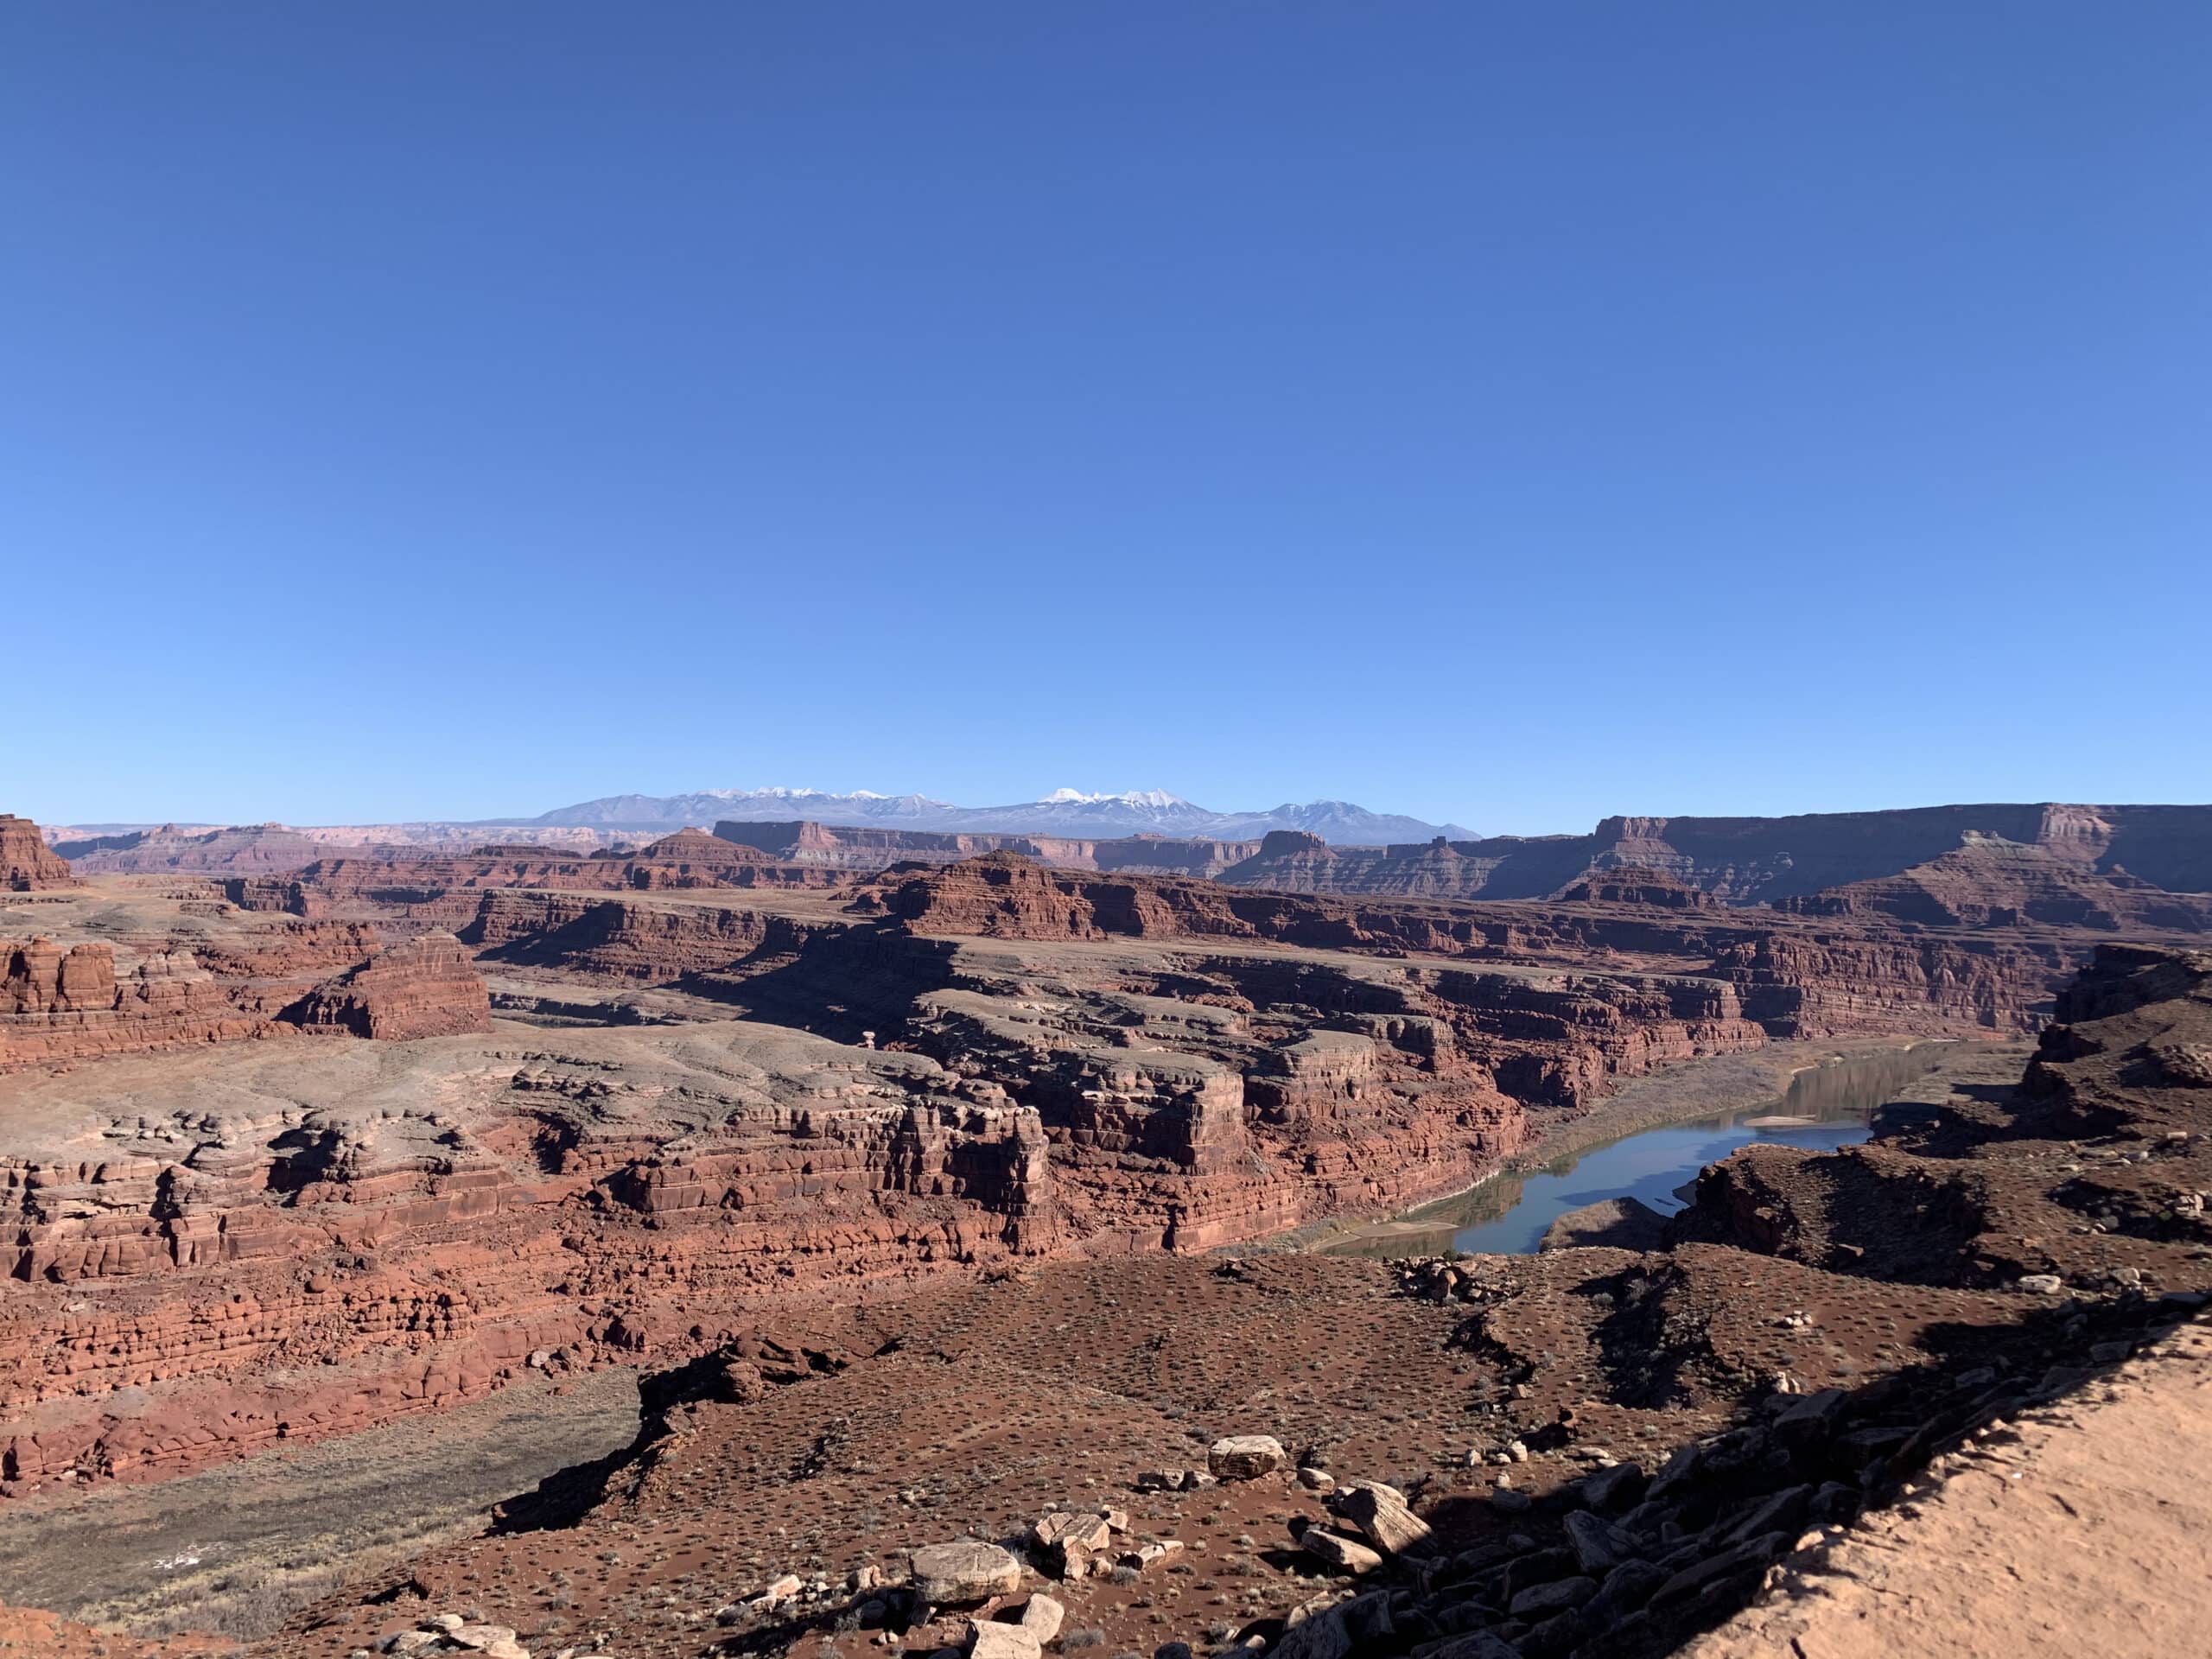
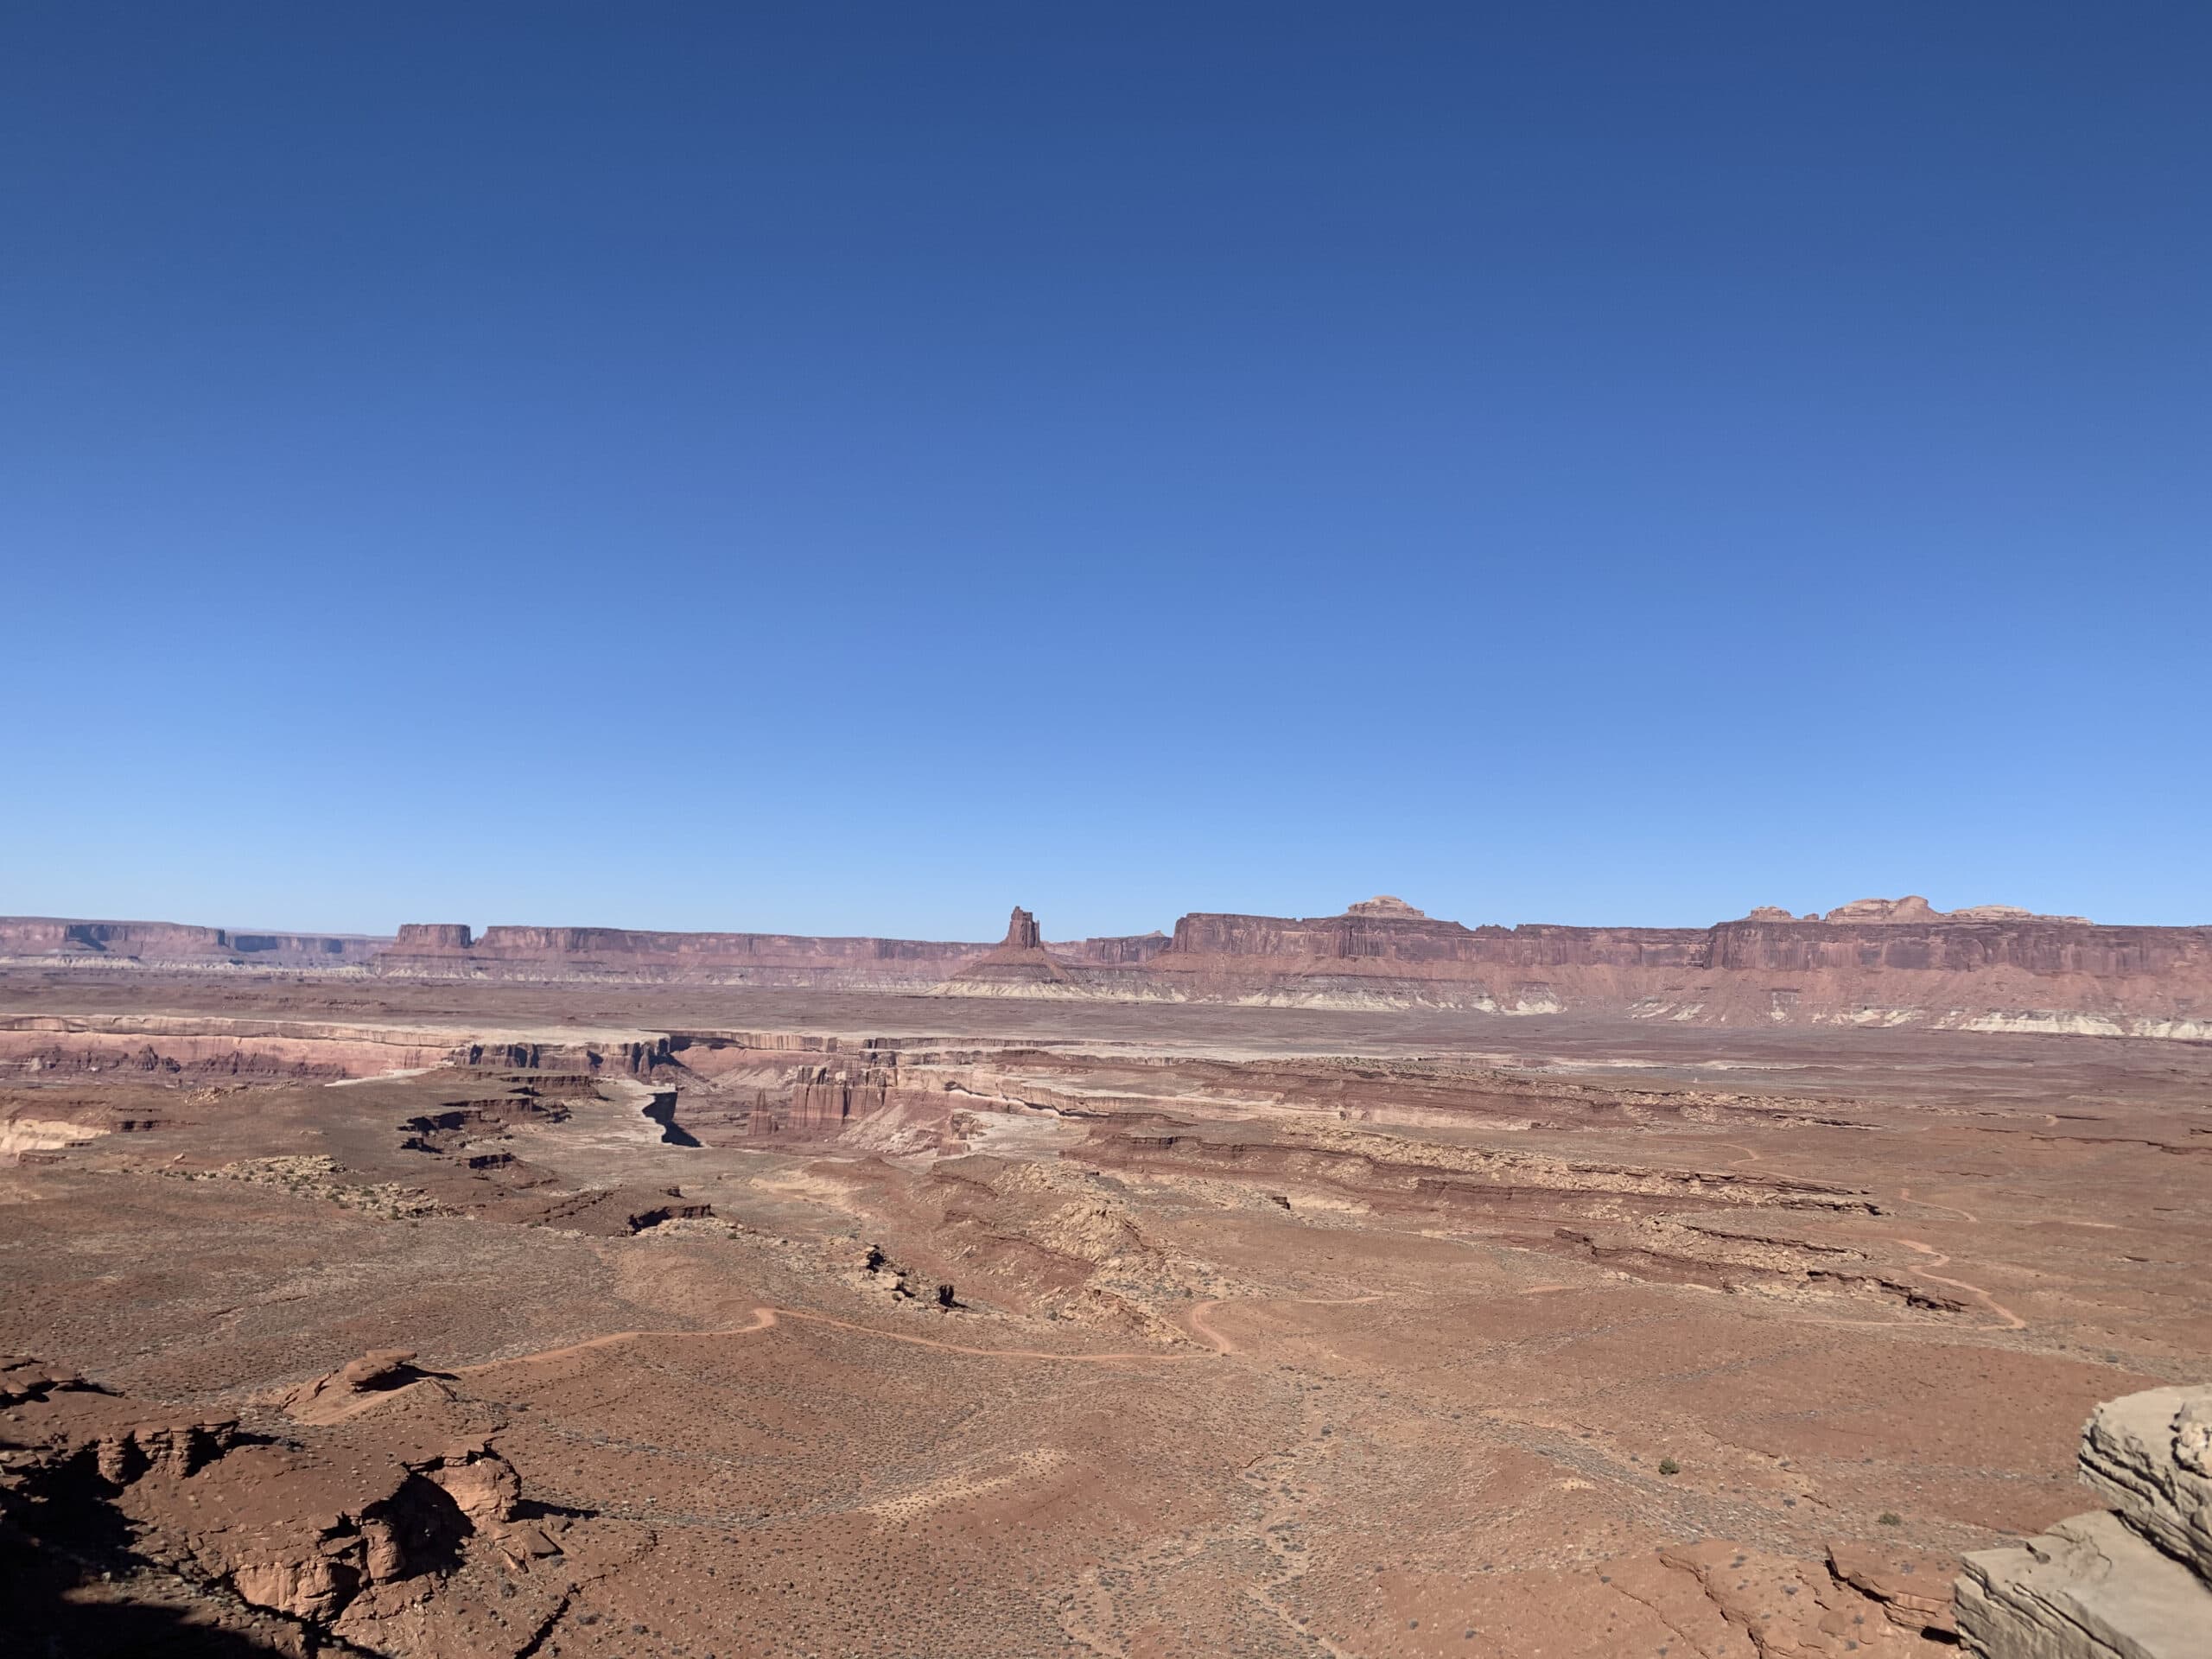
After Gooseberry, you will be on to the final meander down to the southern tip of White Rim Road. As you wind around Monument Basin, you’ll be slowly trading the eastern views for the southwesterly one, with the confluence of the Colorado and Green rivers due south.
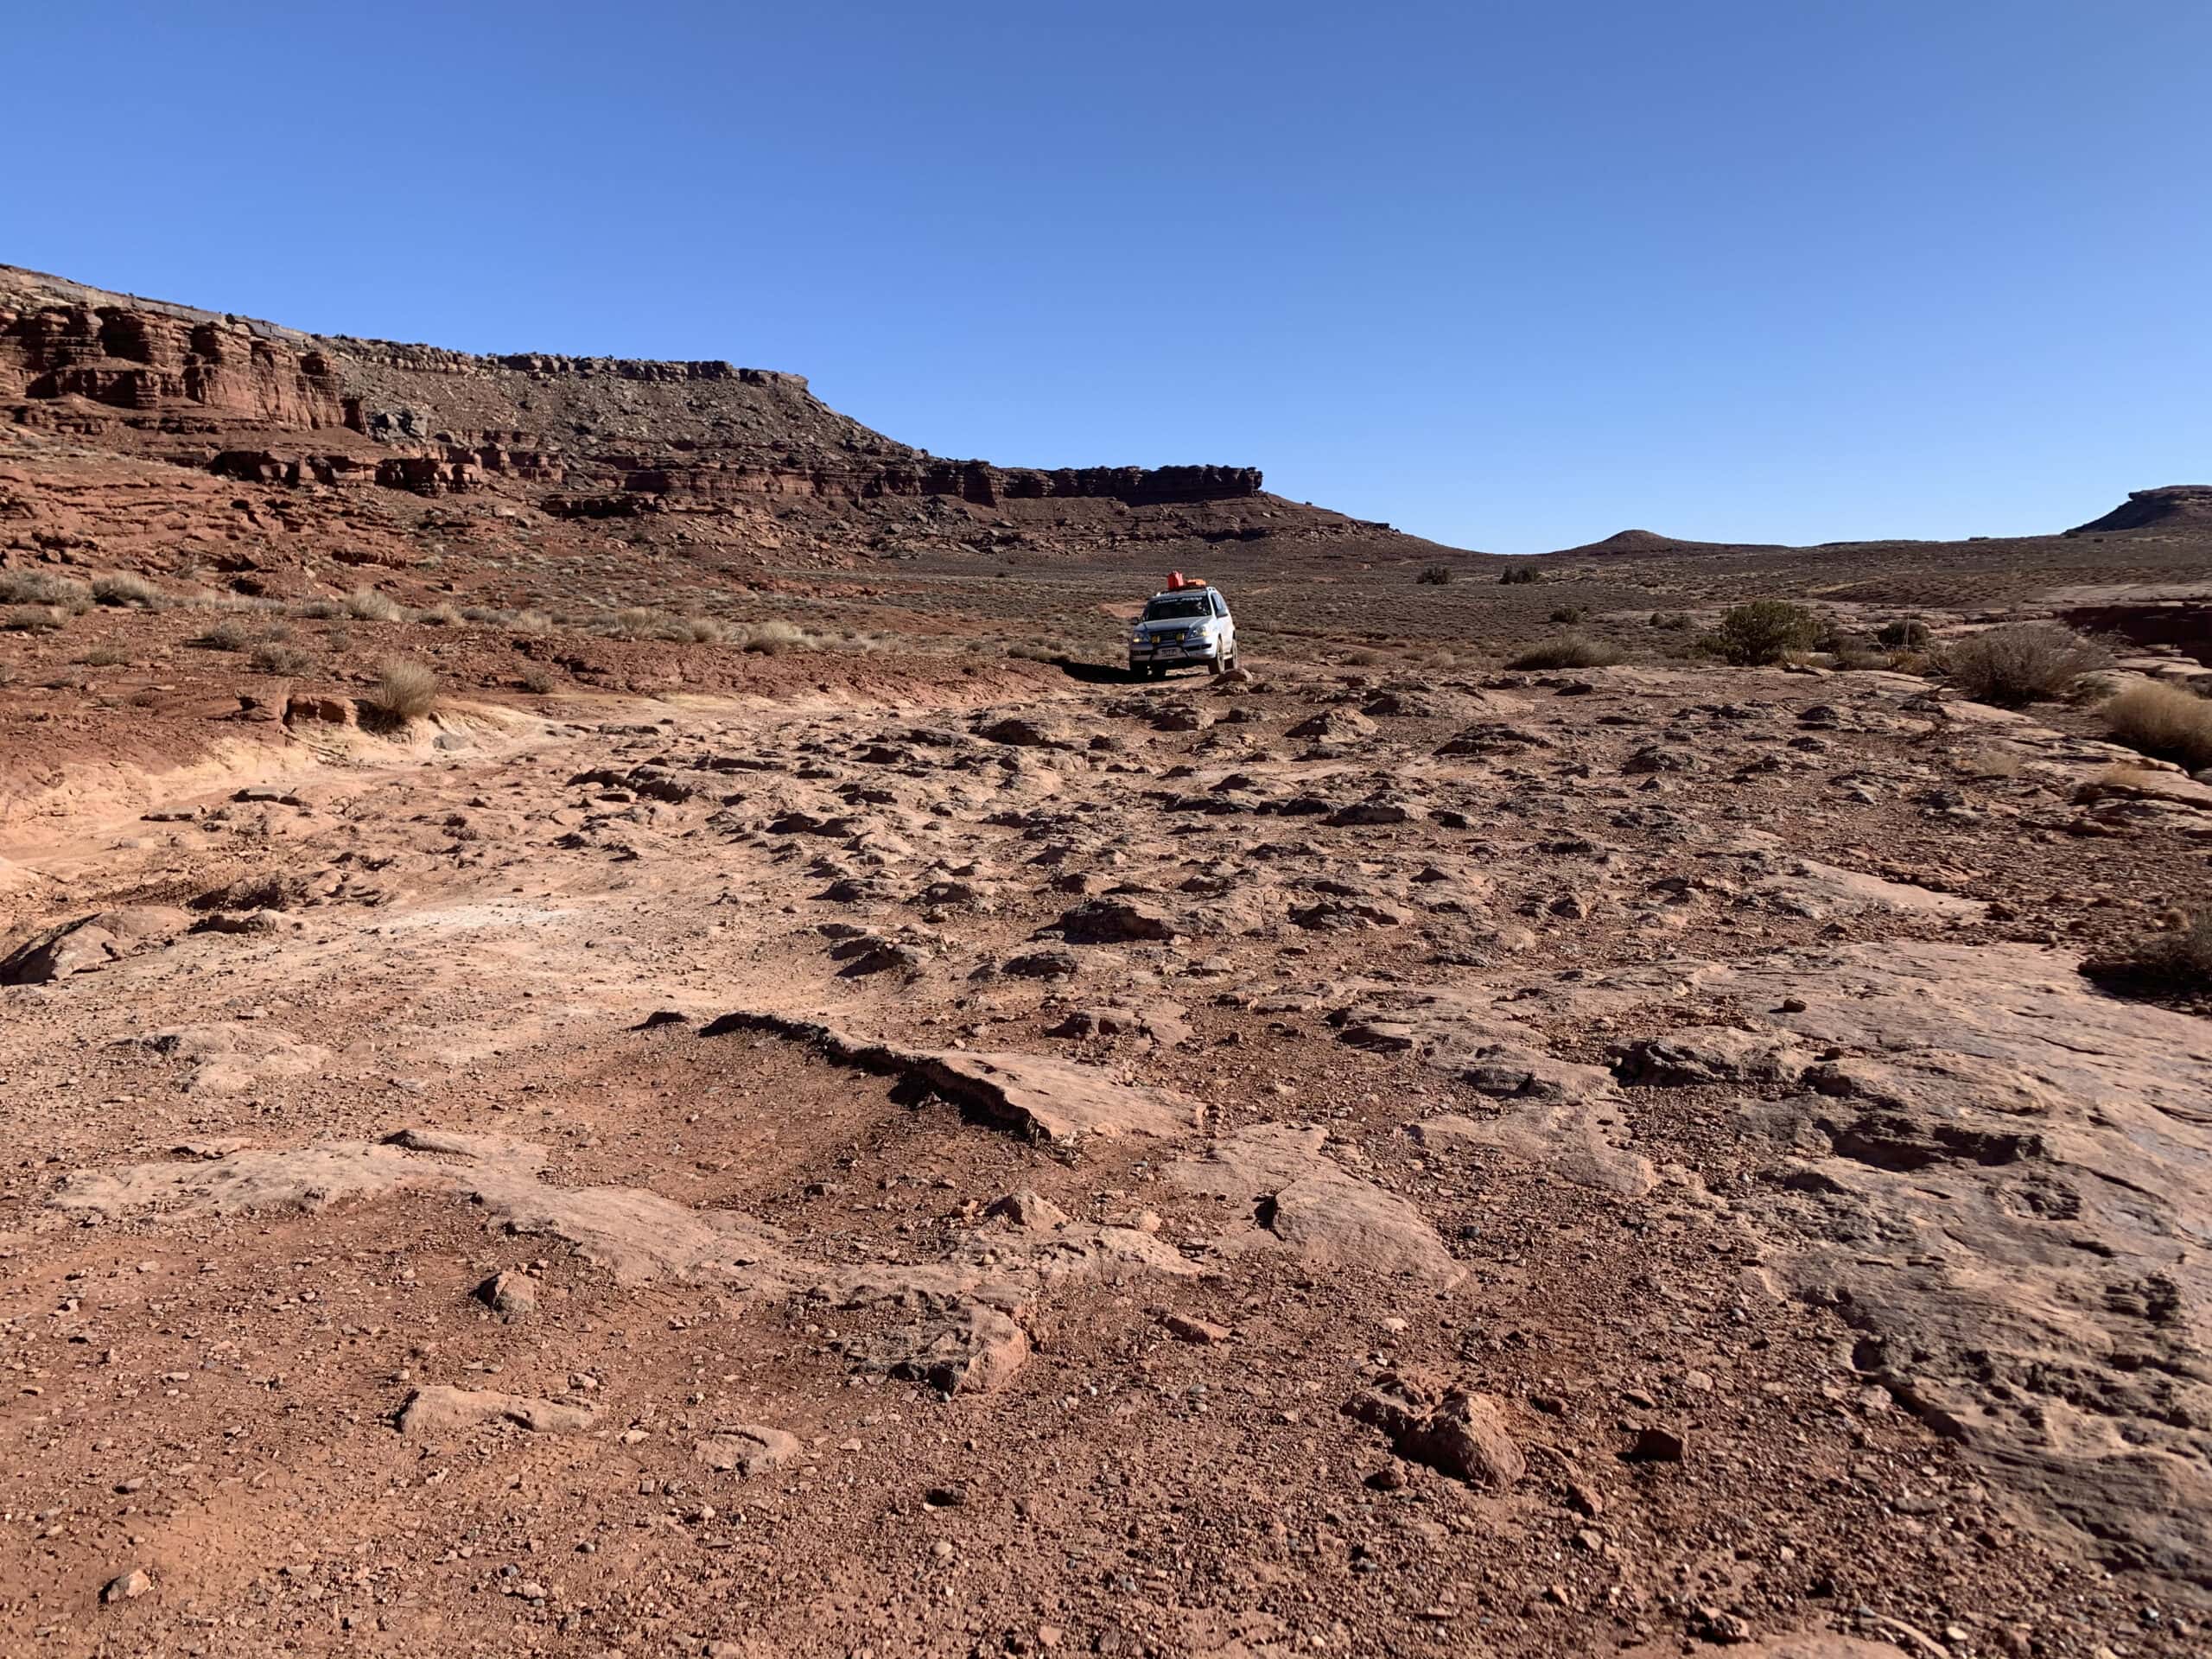
On a clear day (or if you’ve brought your binoculars), you can spot the rock spires of The Needles in the distance. This road here is less rocky, with long stretches of sandy, rutted road interspersed with random rocks and potholes.
At the very southern tip of the loop, you have the option to add on a short out-and-back extension to White Crack. This sandy 1.4-mile stretch of road has a bit more elevation gain than the previous sections, though no technical obstacles. It drops you off at the single campsite at White Crack Campground.
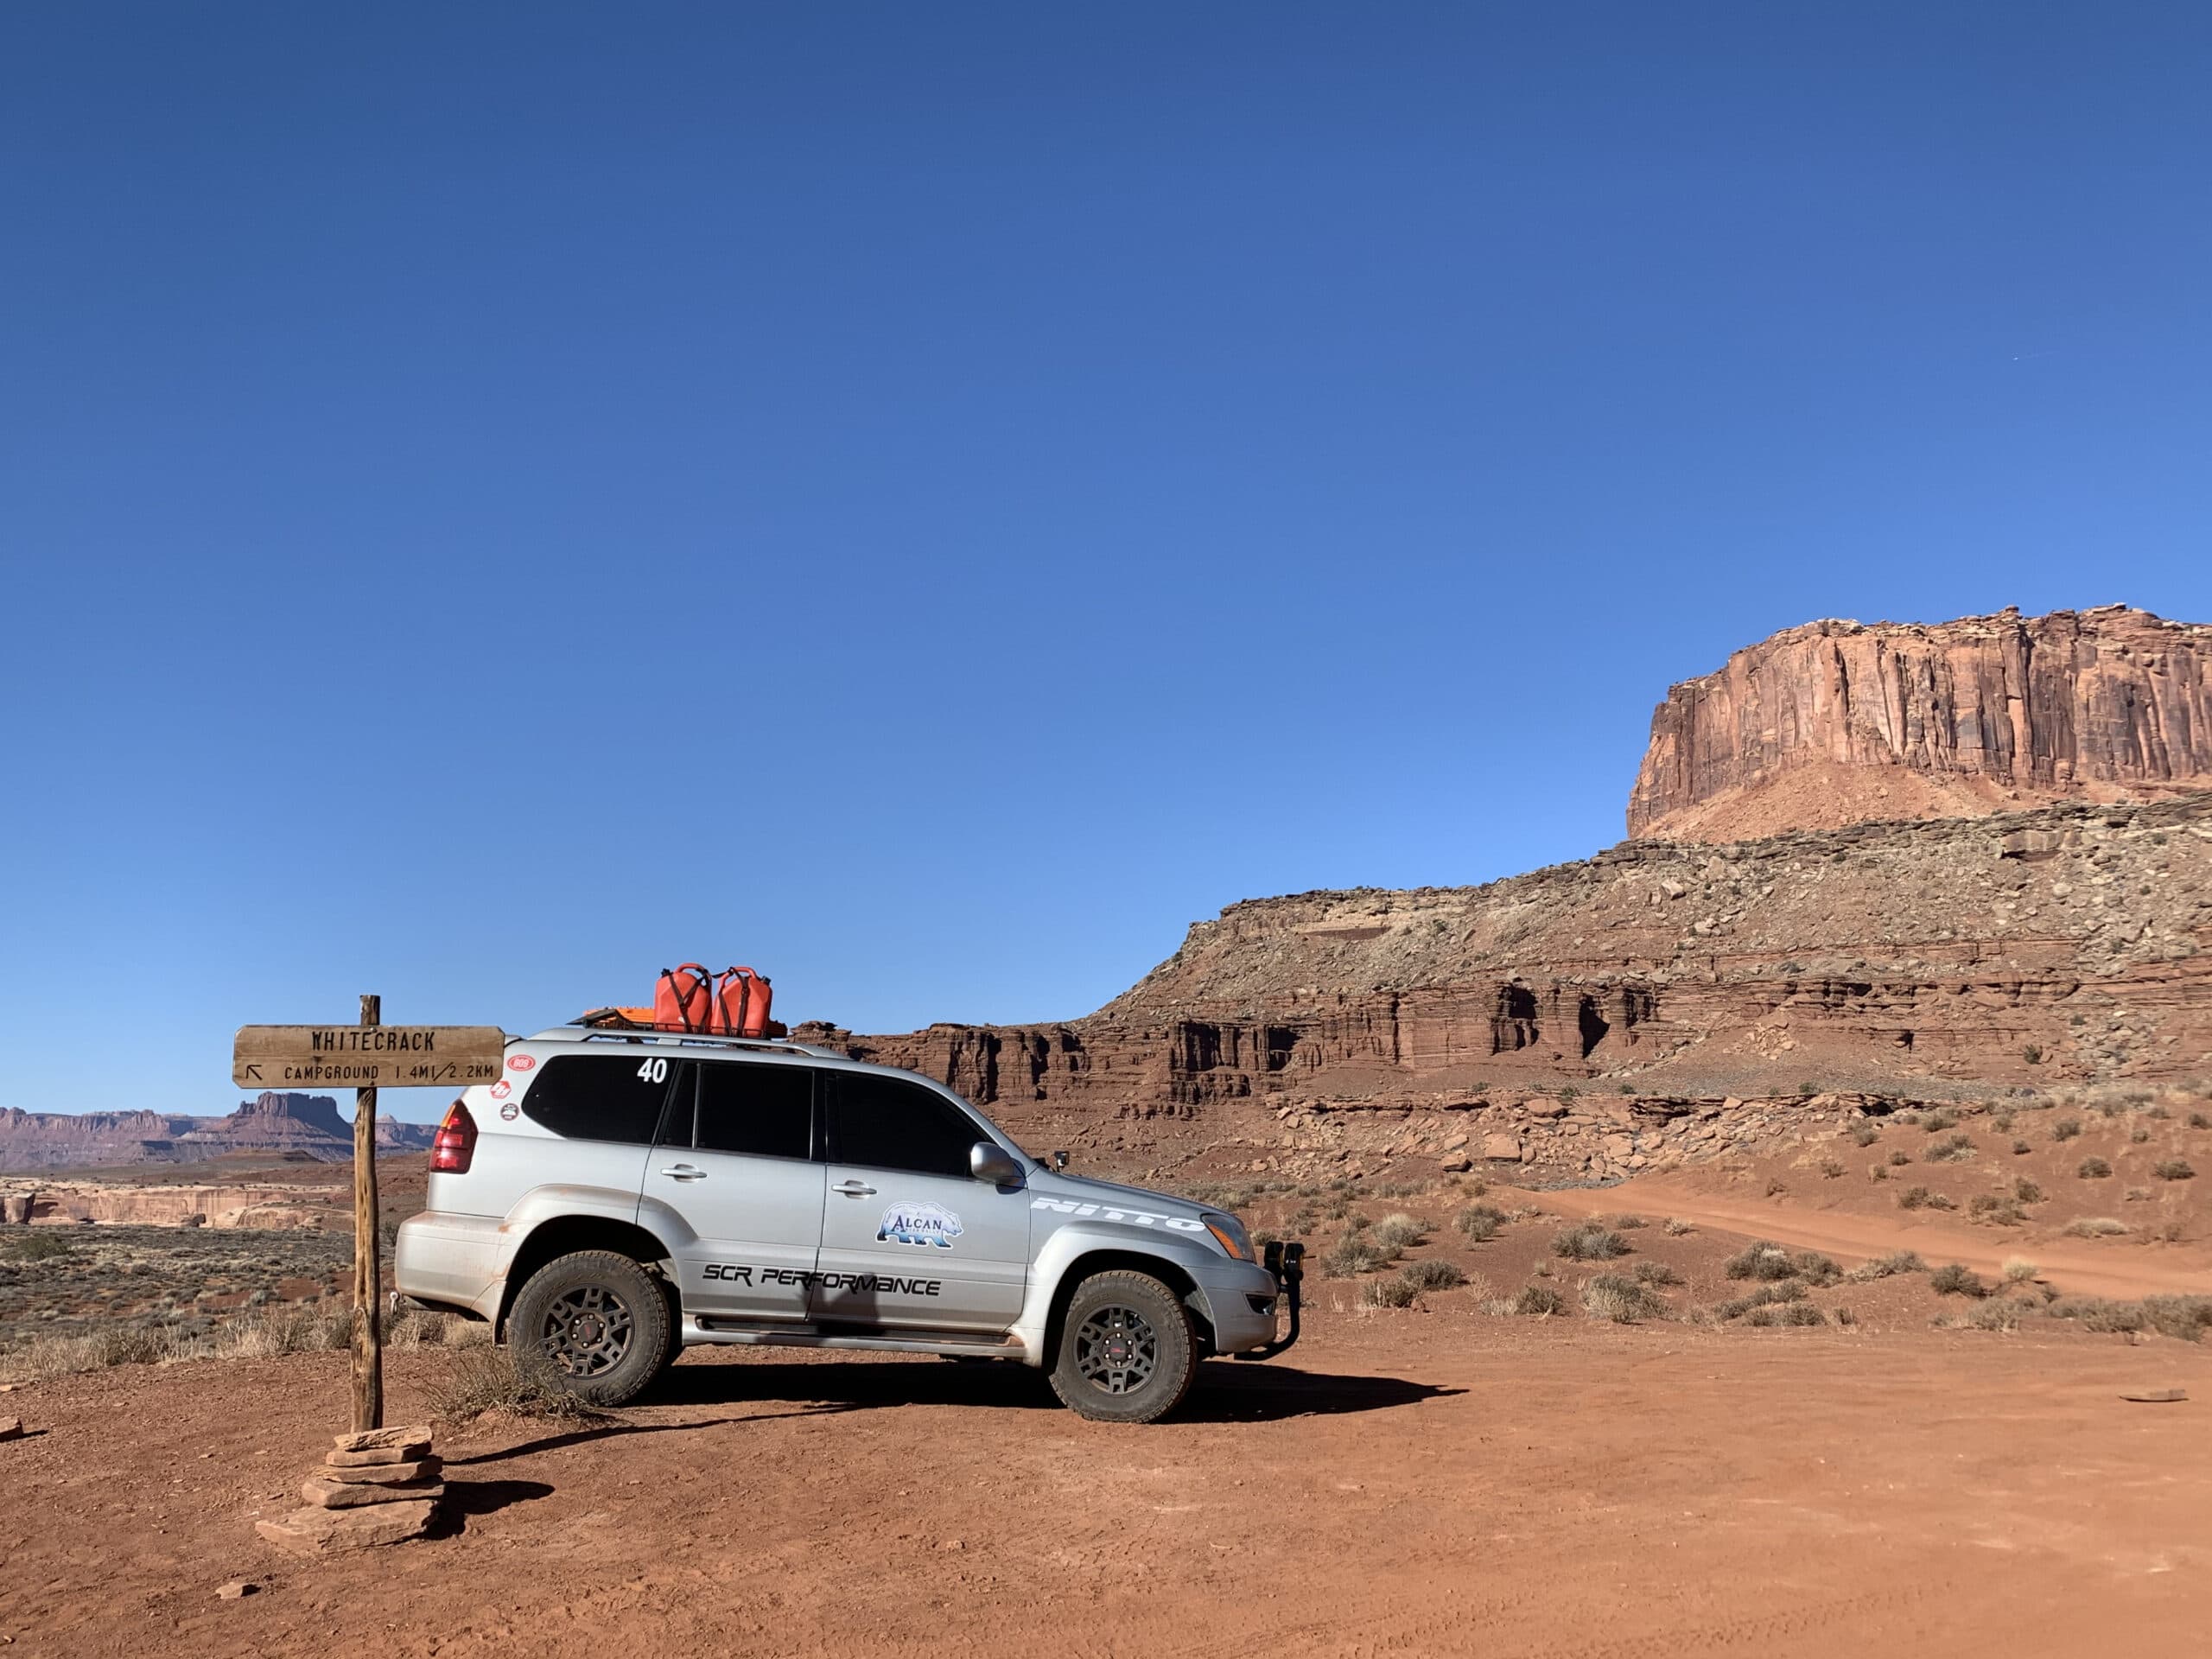
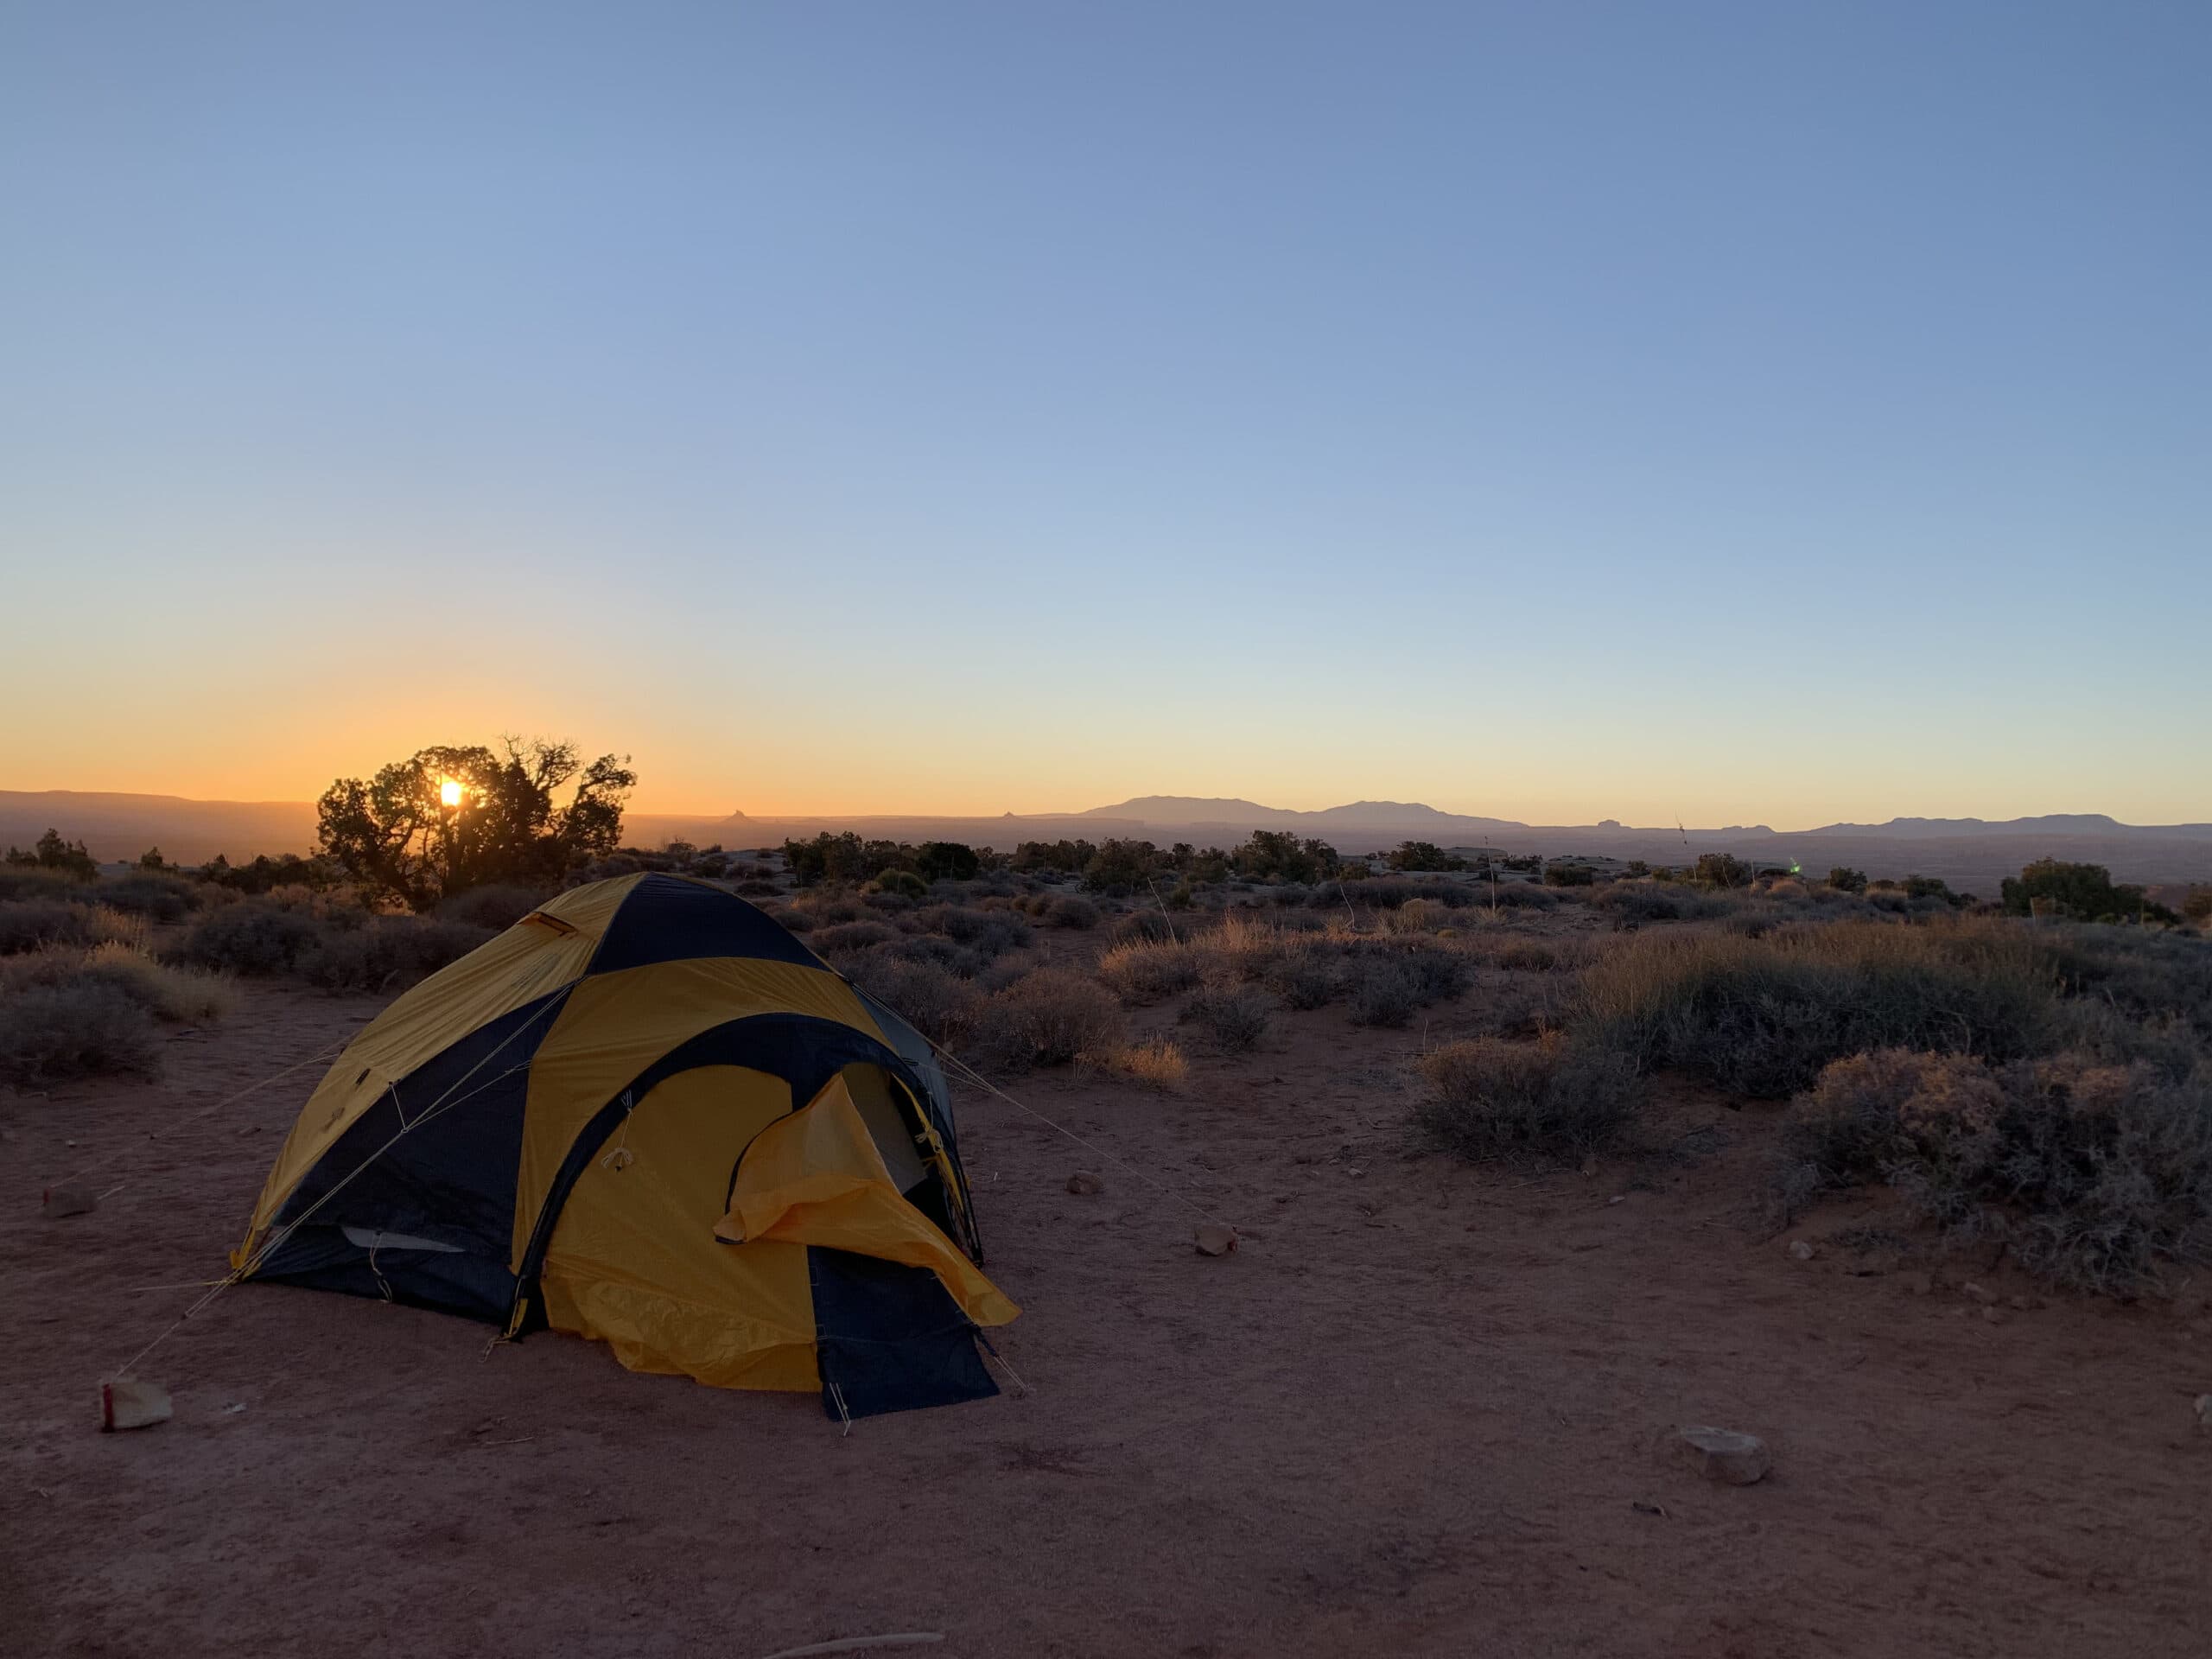
This lonely campsite is about as far away from anything as you can get on the Island in the Sky mesa. The designated site is on a bit of a hillside and the ground is solid rock in many places, so keep this in mind if you plan on pitching a tent. You can find flatter, softer ground around the edges of the marked site, but don’t plan on having a lot of room to maneuver with your tent stakes. However, the sunset and stargazing will be worth the trouble.
Miles 39–45: White Crack Campground to Murphy Hogback Campground
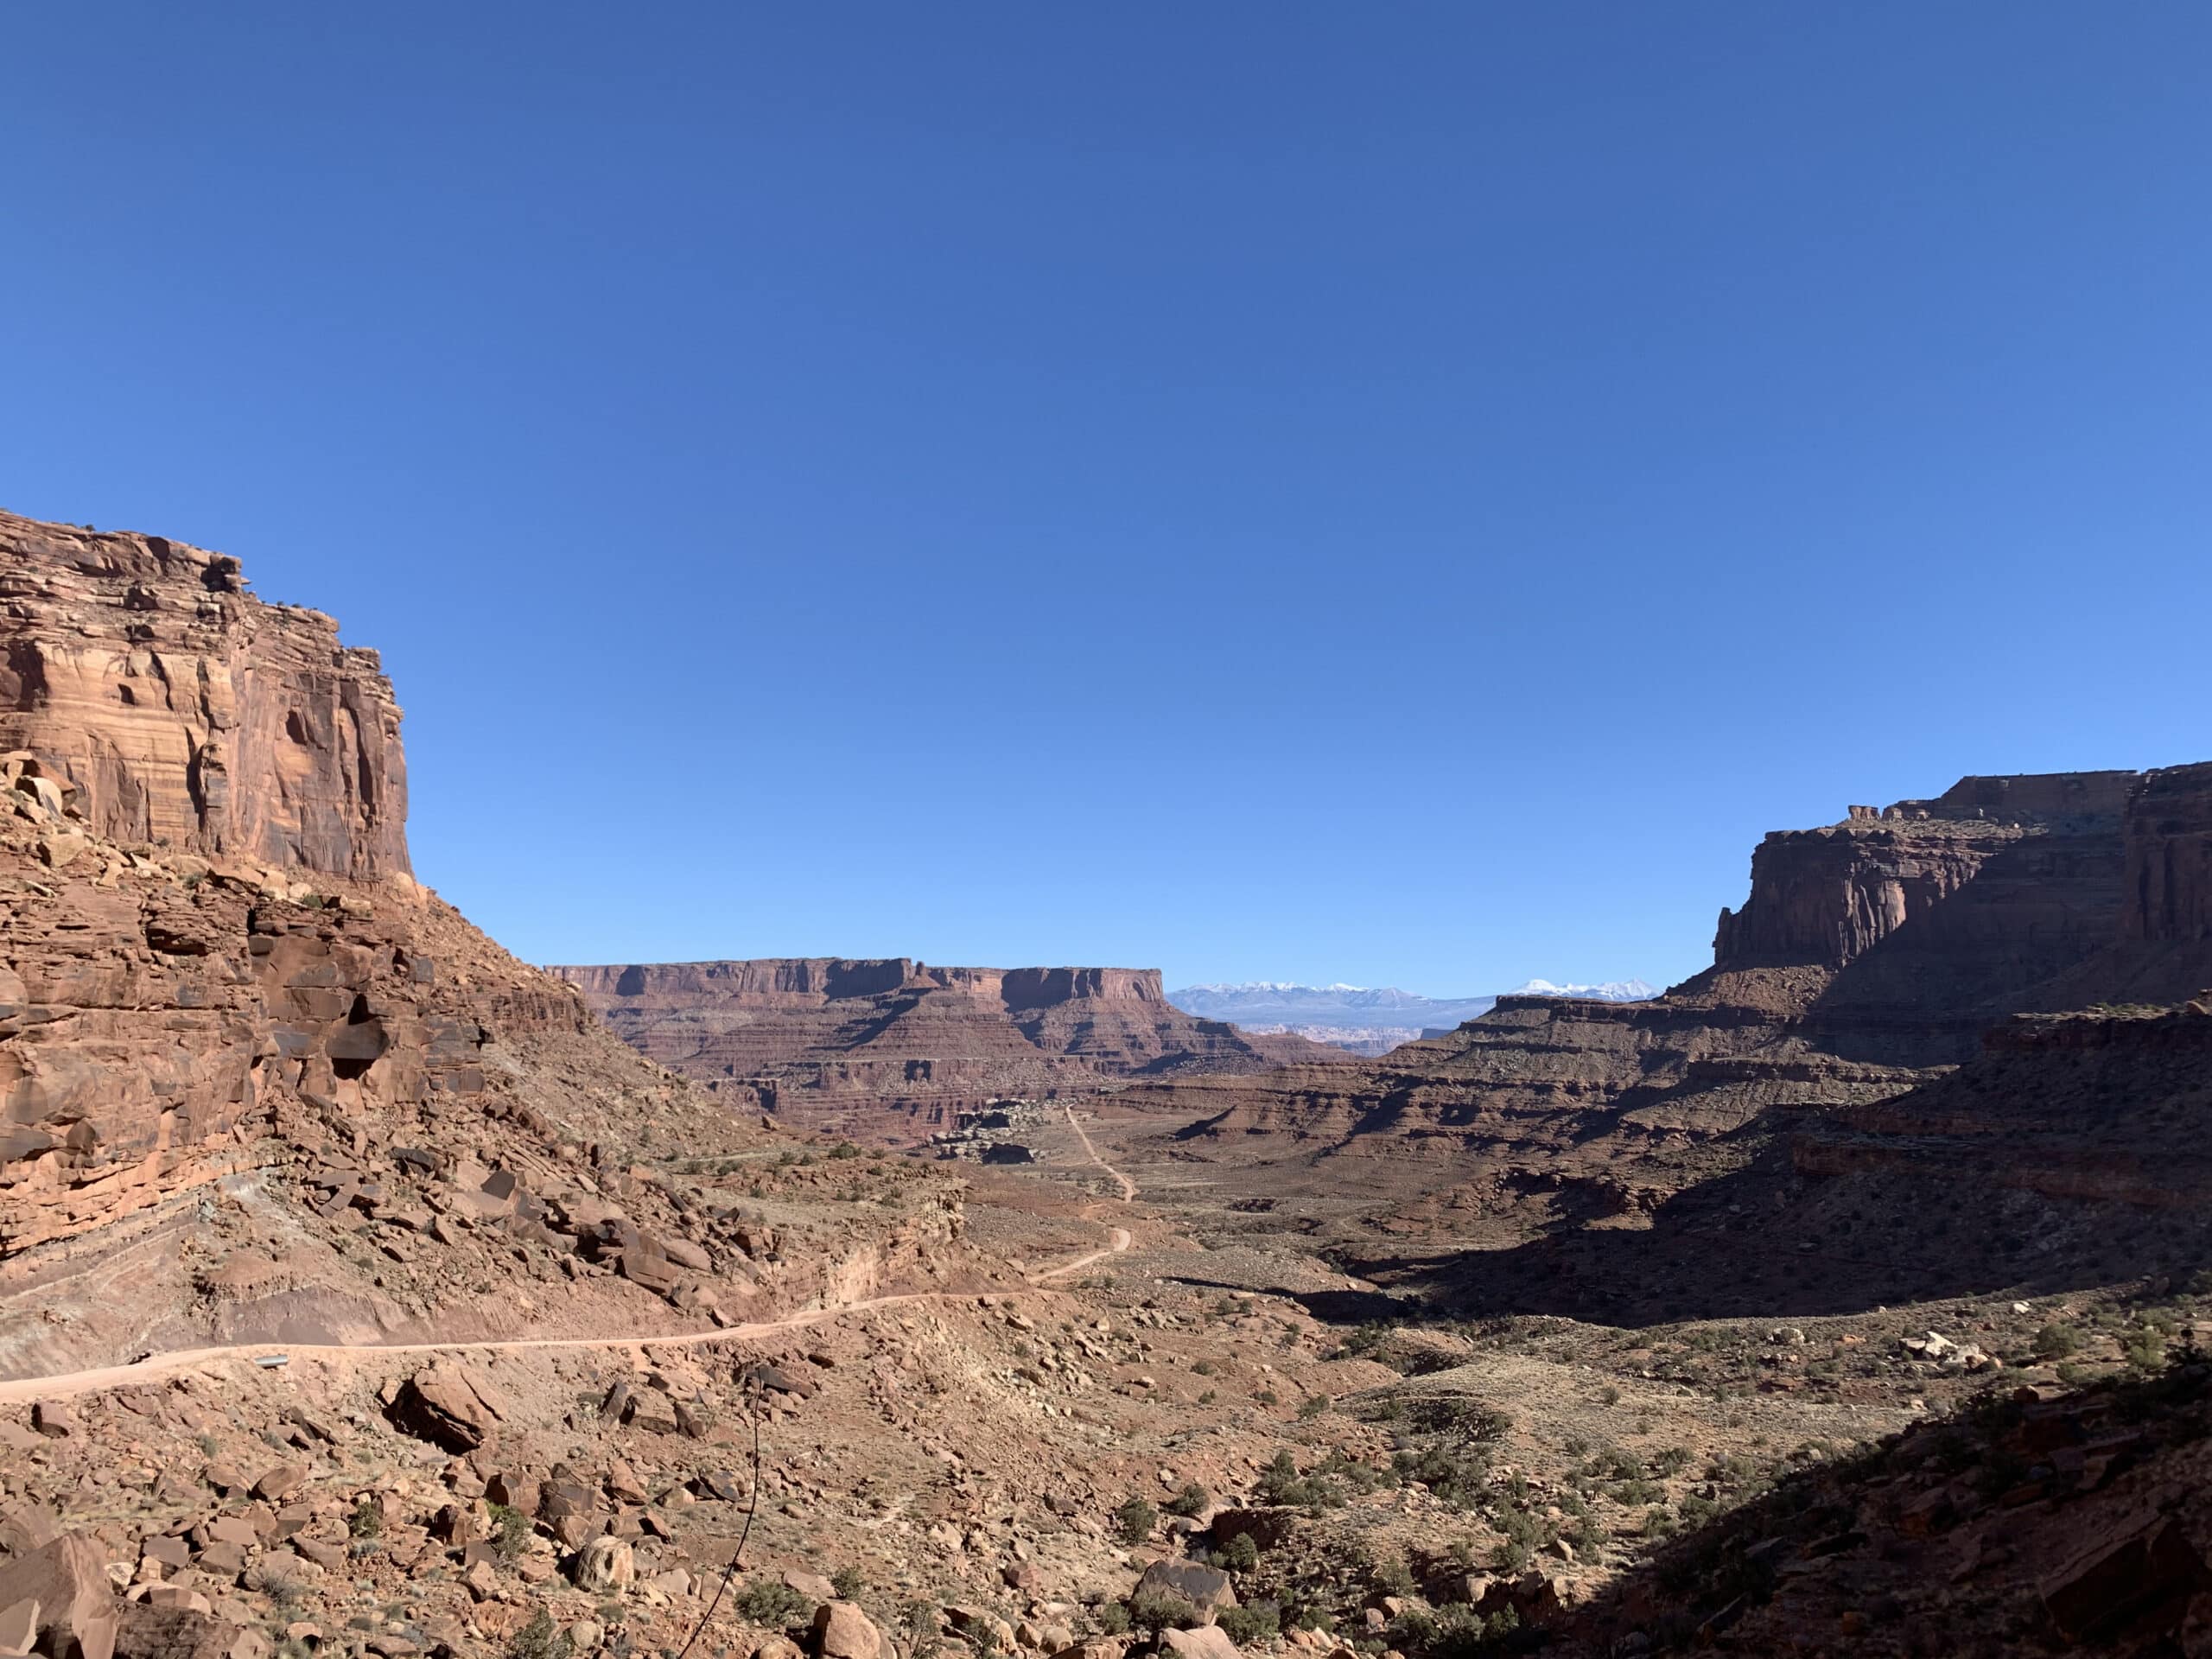
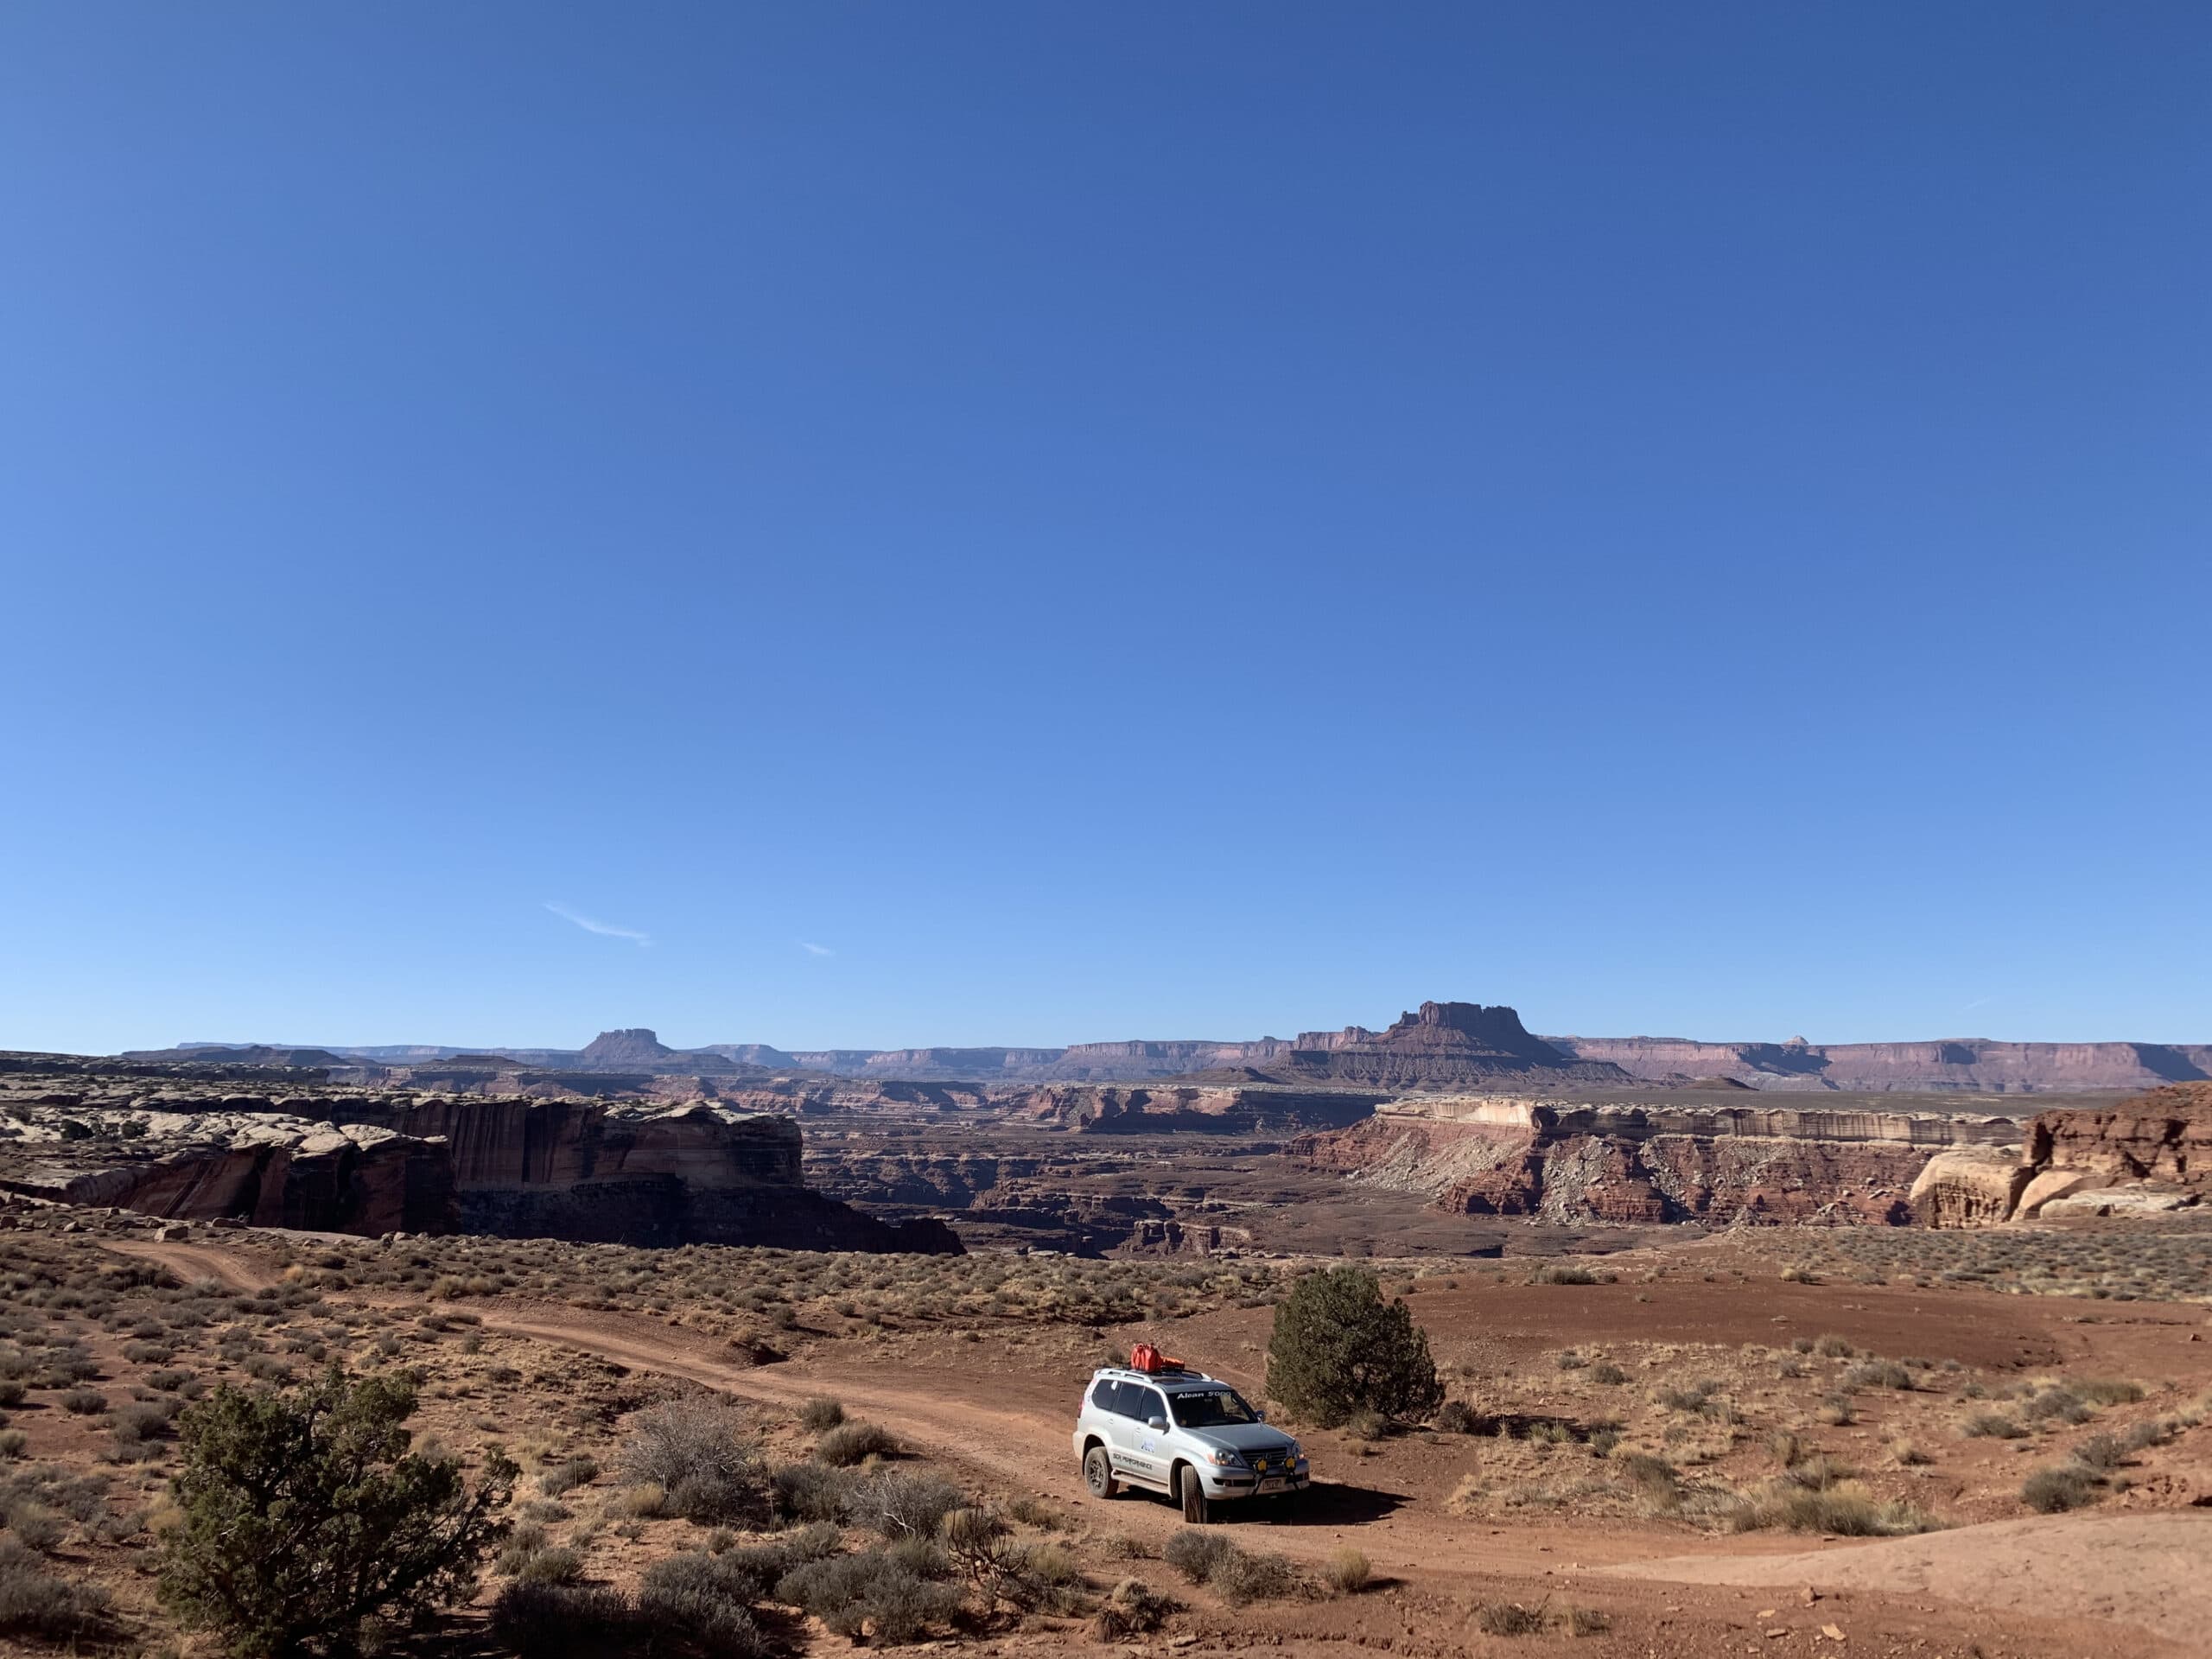
Once back on the main loop, the road turns west then north, trading in the more dramatic landscape above the Colorado River for the slightly more mellow (yet equally expansive) scenery above the Green River. The western side of the loop has some technical driving sections, so you can look forward to testing your off-road chops.
The first of these sections is the drive up Murphy Hogback, the first place along the loop since the Shafer switchbacks with much of an elevation gain. The climb up and over the hogback is a fairly straight shot with no switchbacks; however, the road is narrow with a steep drop-off. This section can be rutted or have some sizeable potholes and rocks where you’ll need to be strategic about your tire placement. Take your time and send your passenger out to spot you if necessary.
There’s a nice vantage point with three campsites at the top of Murphy Hogback. Thanks to large rocks and a few shrubs and trees, these sites are more private than some of the others you’ve passed.
Miles 45–66: Murphy Hogback Campground to Potato Bottom Campground
After soaking in the views of White Rim Road, head down Murphy Hogback. Be careful if you have a tall rig as a section here has a large rock outcropping on the driver’s side.
From here, it’s on to Soda Springs Basin. The road on this section will have some more small ups and downs, alternating between sandy washboard and rocky potholes. There are a few tight turns, but nothing with hair-raising drop-offs or other technical considerations.
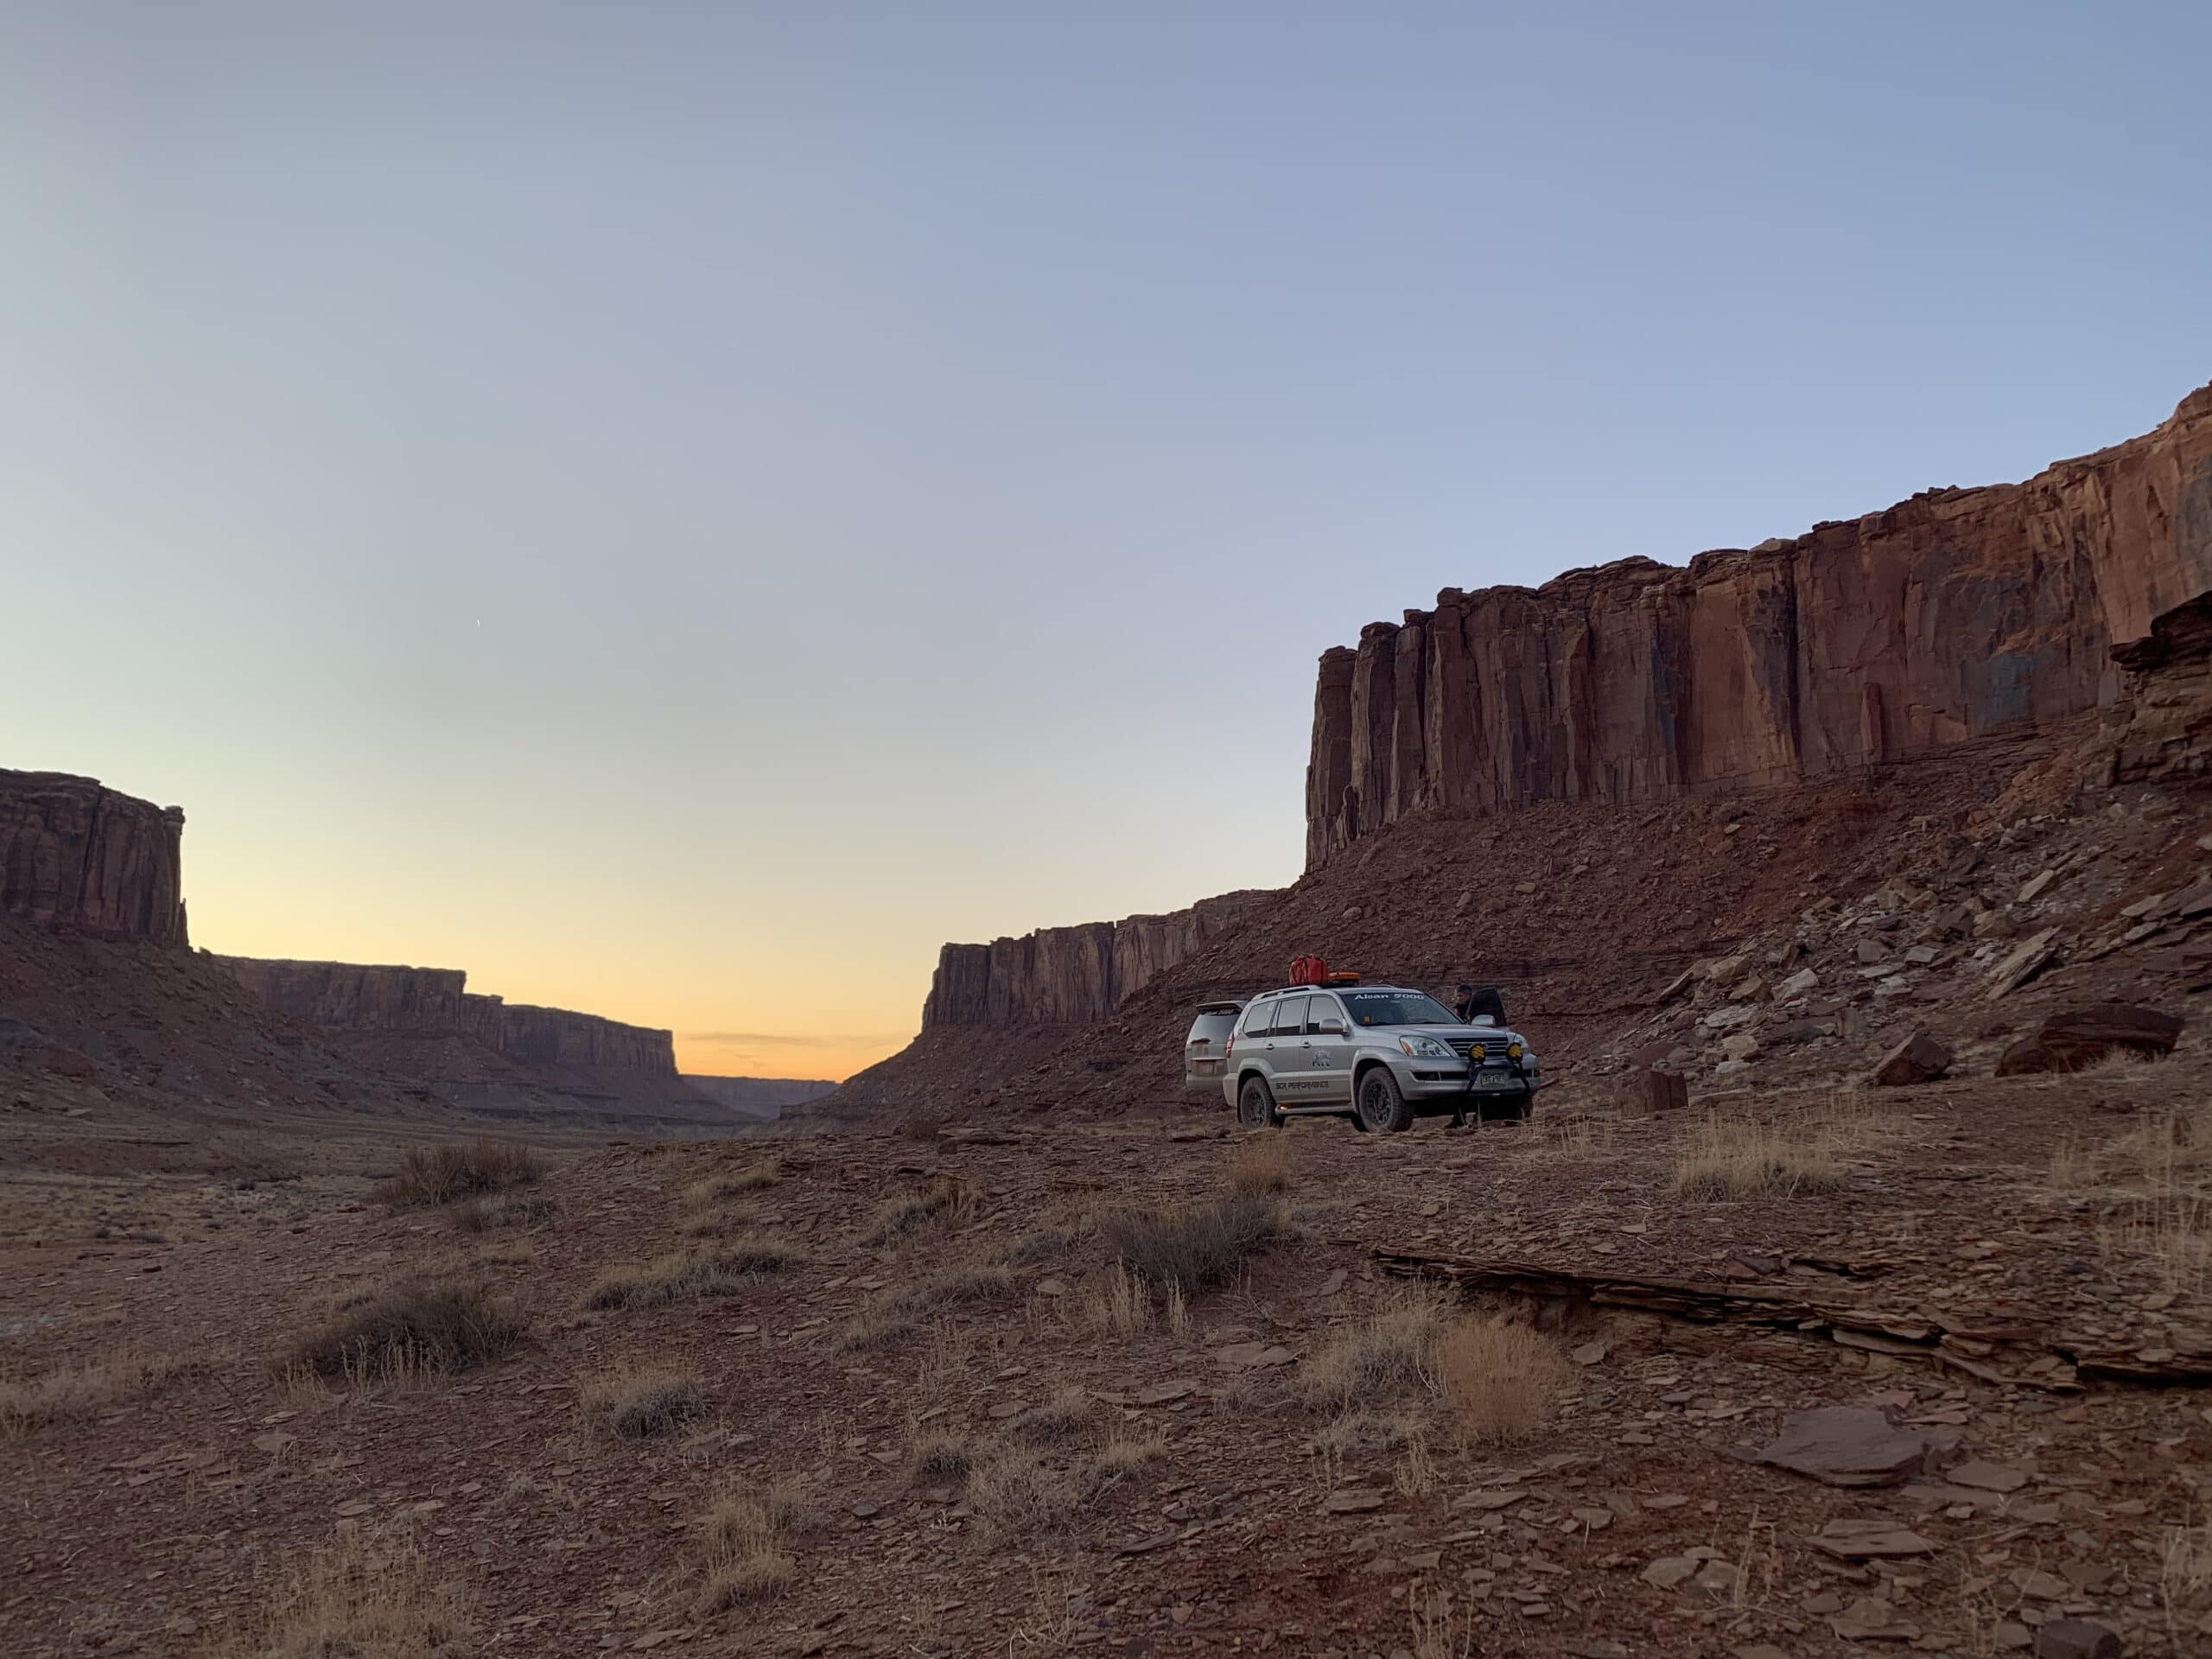
The plateau here is more open and you’ll see impressive rock formations like Turks Head and Candlestick Tower punctuating the landscape. Candlestick Campground, below its namesake tower, has a single campsite overlooking the rim to the Green River. From there on, you’ll steadily lose elevation.
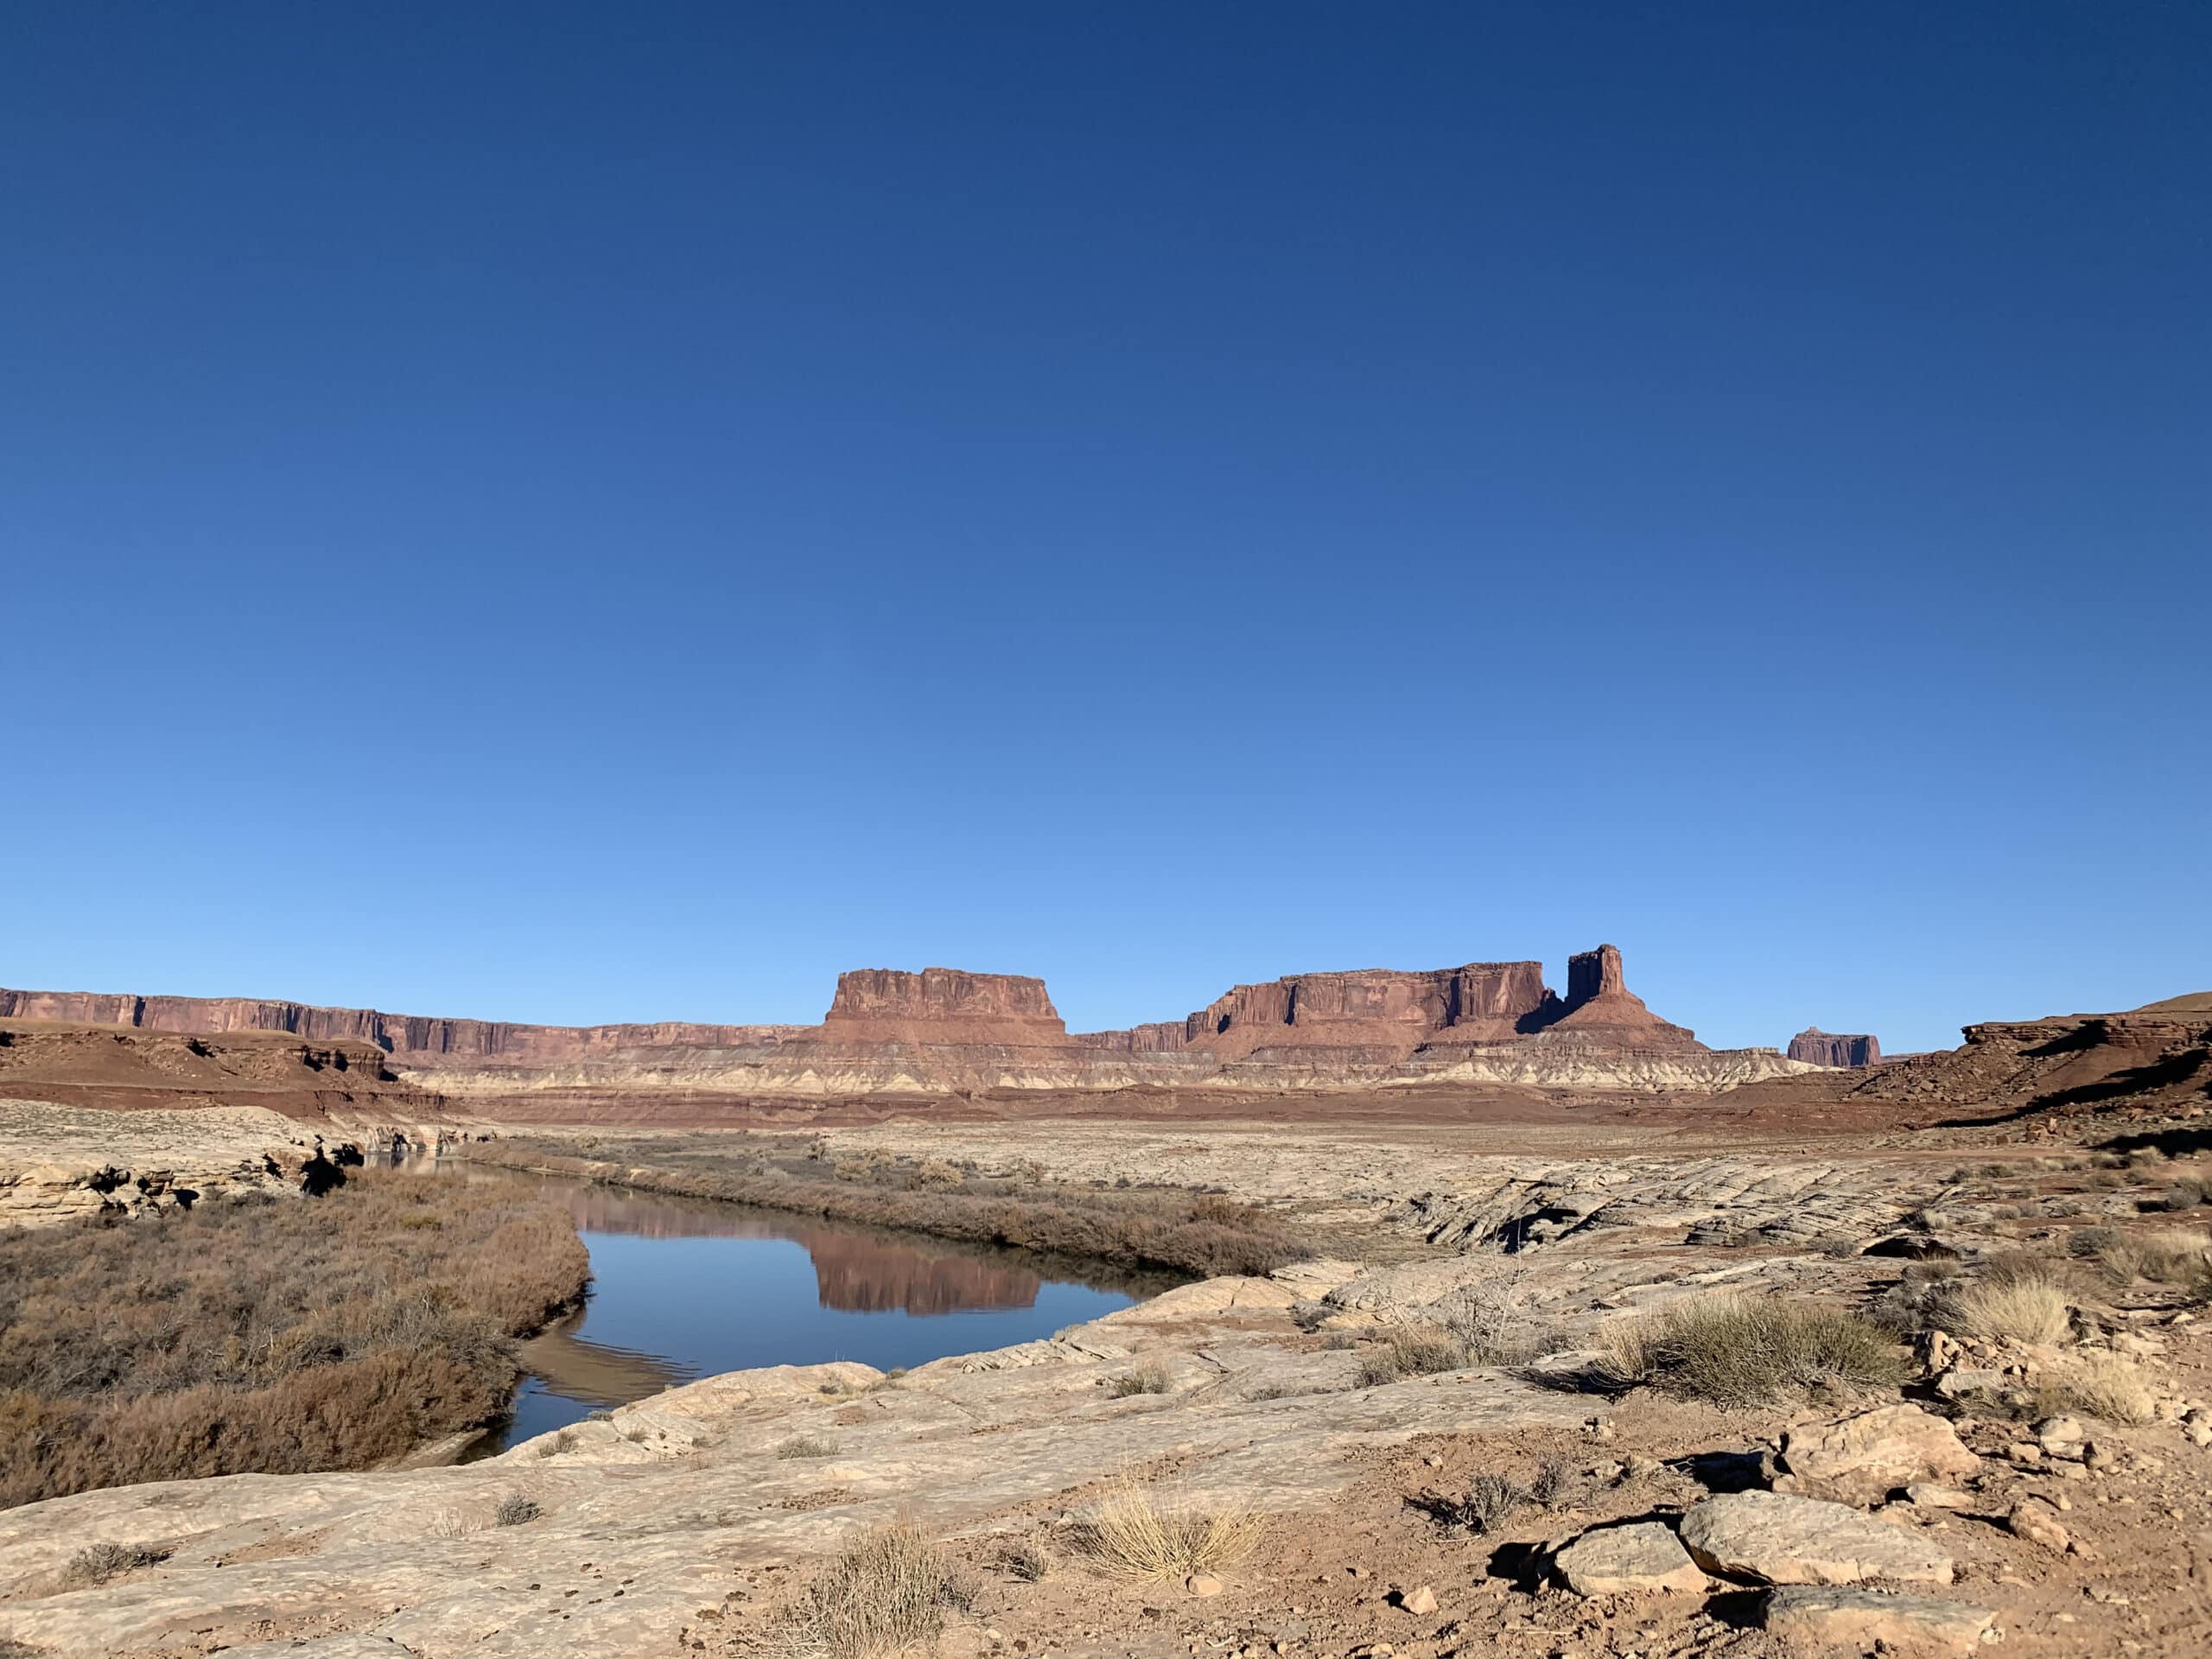
After one more jaunt around Holeman Spring Basin, the road descends to Potato Bottom, paralleling the Green River. It’s the most lush section, with actual trees, riverside greenery, and occasional wildlife. Road conditions along this section can be variable if the river is running high.
Miles 66–72: Potato Bottom Campground to Labyrinth Campground
The three campsites at Potato Bottom Campground and the two campsites at Hardscrabble Bottom offer nice spots if you want to stay close to the river and get a little bit more privacy. They’re also near Upheaval Dome, so either would make a good basecamp if you plan to do some hiking.
The next bit section of White Rim Road is technical — Hardscrabble Hill. It’s is a narrow climb with some steep, loose sections that you may find very challenging after any rain or snow.
When White Rim Road is dry, your main concern will be the tight switchbacks and loose shoulders. When wet, you may find yourself wrestling out your traction devices to get through the mud.
From the top of Hardscrabble Hill, you have a steep descent back to the river corridor with some tight switchbacks and large roadside boulders (watch your side mirrors). Once alongside the Green River again, you’ll be at the Labyrinth Campground. The two riverside sites are peaceful, with actual trees and possible shade.
By the way, if you aren’t sick of driving yet, head out on the five-mile extension to camp at the Taylor Campground instead of Labyrinth. It’s more private as there’s just a single site under the imposing rock towers known as Moses and Zeus.
Miles 72–100: Labyrinth Campground to Mineral Road
Head north on White Rim Road (if you went to Taylor Campground, turn right when you reach the road again.) From there, you’ll exit Canyonlands National Park and follow along the Green River for one more stretch before your final climb back up to the top of the mesa.
At the next junction, take the split east for Mineral Road to make the climb to the rim. Much like the Shafer switchbacks, this road has some tight turns and narrow sections, but you shouldn’t encounter anything too technical apart from the occasional pothole or rock.
Once on the top of the rim, take Mineral Road (which at this point will feel like a four-lane highway) back out to Utah 313 to finish out the loop.
Discover More in Utah
Sign up for Weekend Wanderer to join thousands of readers getting epic and gear travel ideas every week.
Seen in: Canyonlands, National Parks, Road Trips, Southwest, Utah